
How to Create Free Figma Mockups (Laptop & iPhone) with Mockuuups Studio
If you’re Googling “Figma mockup”, “laptop mockup” or “iPhone mockup”, you probably just want one thing:
A clean, professional mockup you can use for free, without spending half a day hunting PSD files and fighting Photoshop.
In this guide, you’ll learn how to do exactly that using Figma + Mockuuups Studio:
- turn your Figma frames into laptop mockups and iPhone mockups
- customize the device, background, hands and lighting
- start with the free Mockuuups Studio option, then decide later if you need the full subscription
Everything here is based on the official video “Create Figma mockups with Mockuuups Studio 3.0”, plus their current pricing page.
What you’ll be able to do after this guide
By the end, you’ll know how to:
- install the Mockuuups Studio Figma plugin
- connect it to a free Mockuuups account
- build a custom device scene (iPhone, laptop, etc.)
- send your Figma frames into that scene
- export Figma mockups as:
- laptop mockups
- iPhone / phone mockups
- other device mockups
You can follow this with just Figma and a browser.
Step 1 – Set up Mockuuups Studio (free) + Figma plugin
Before touching any mockups, get the basics in place.
1. Create your free Mockuuups Studio account
Head to mockuuups.studio and hit the big 👉 “Try it FREE” button.
From their pricing page:
“Create mockups for free, or unlock our complete collection for commercial use with a flexible subscription — cancel anytime.”
That means:
- you can start creating mockups for free
- the 4800+ mockups, unlimited 4K exports, commercial license, and other power features live on the Professional / Team plans
For this tutorial, the free access is enough to see how the workflow works and generate some basic device mockups.
2. Install the Figma Mockuuups plugin
In Figma:
- Open the Community tab.
- Search for “Mockuuups Studio” or “Figma Mockup Plugin”.
- Click Install on the official plugin.
After installation, you’ll be able to launch it from:
- Top menu →
Plugins → Mockuuups Studio - Or right-click →
Plugins → Mockuuups Studio
Once the account and plugin are ready, you’ve connected the “mockup generator” side (Mockuuups) with your designs (Figma).
Step 2 – Prepare your Figma frames (desktop = laptop mockup, mobile = iPhone mockup)
Mockuuups just takes whatever frame you give it and drops it into a device. So the main job inside Figma is choosing the right frame sizes.
Desktop frames → laptop / computer mockups
For laptop mockups or computer mockups:
- Create a desktop frame in Figma, e.g.:
- 1440×900
- 1920×1080
- Design your:
- SaaS landing page
- dashboard
- web app
- Keep important UI elements away from the extreme edges (some mockups crop a little).
This frame will become your laptop mockup or desktop mockup inside Mockuuups.
Mobile frames → iPhone / phone mockups
For iPhone mockups or phone mockups:
- Create a mobile frame in Figma, e.g.:
- iPhone 14 / 15 preset
- 390×844 or similar
- Design your:
- mobile app screen
- responsive mobile layout
- mobile landing page
This frame will later sit inside an iPhone or generic phone device in Mockuuups.
Once you’re happy with both frames, you’re ready to build a custom mockup scene.
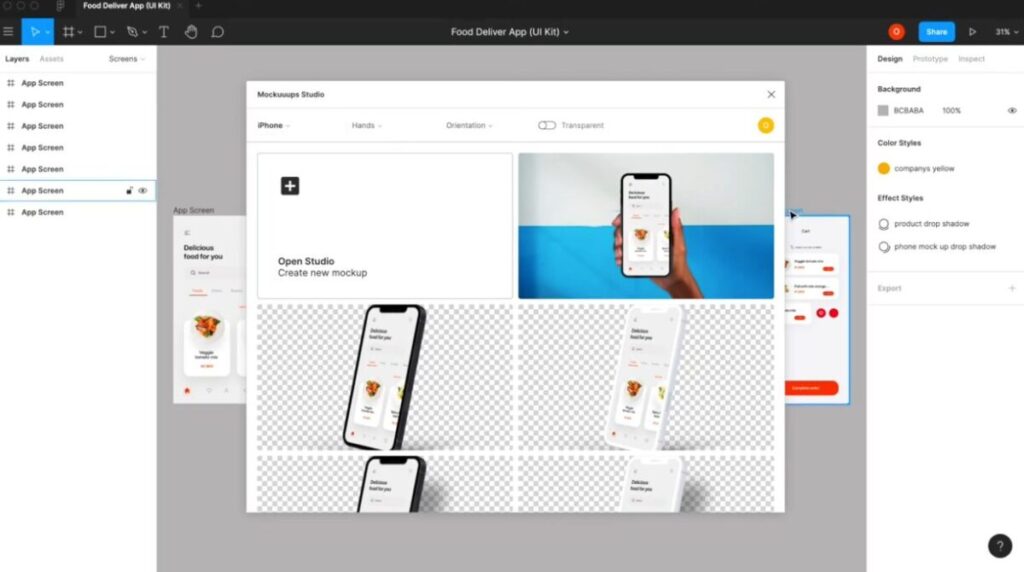
Step 3 – Open the Studio and start a new mockup scene
Now we switch over to Mockuuups Studio.
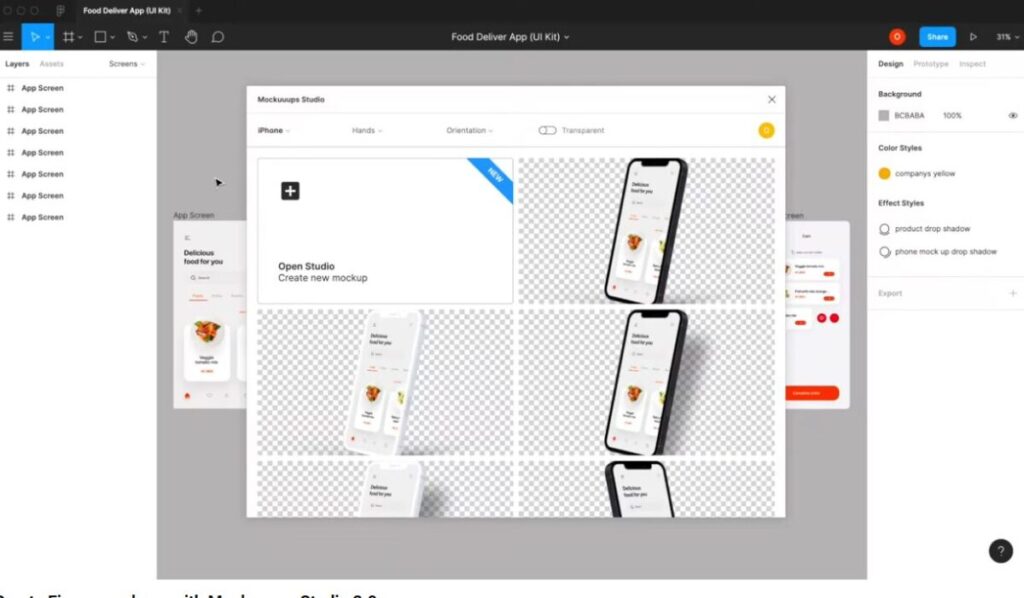
When you open the app or web interface, you’ll see a grid of ready-made mockups. In the video, they highlight a new button in the top left of that grid – this is the entrance to the Studio editor, where you can build your own scene instead of picking a preset.
- Click the Studio / new mockup button in the top-left corner of the grid.
This opens the Studio editor with a blank scene and a device selector.
From here, you’ll choose the device, tweak colors and backgrounds, add hands or lighting, and then reuse that scene for your Figma mockups.
Step 4 – Choose your device (iPhone, Android, laptop, etc.)
First, pick what device you’re designing around.
In the Device section of the Studio editor:
- You’ll see a range of devices:
- recent flagship phones
- older models
- other device types (tablets and watches are being expanded over time)
For the example in the video they choose an iPhone, which is perfect if you’re targeting:
- iPhone mockups
- phone mockups
- app store visuals
For website designs you could pick a laptop or desktop device instead.
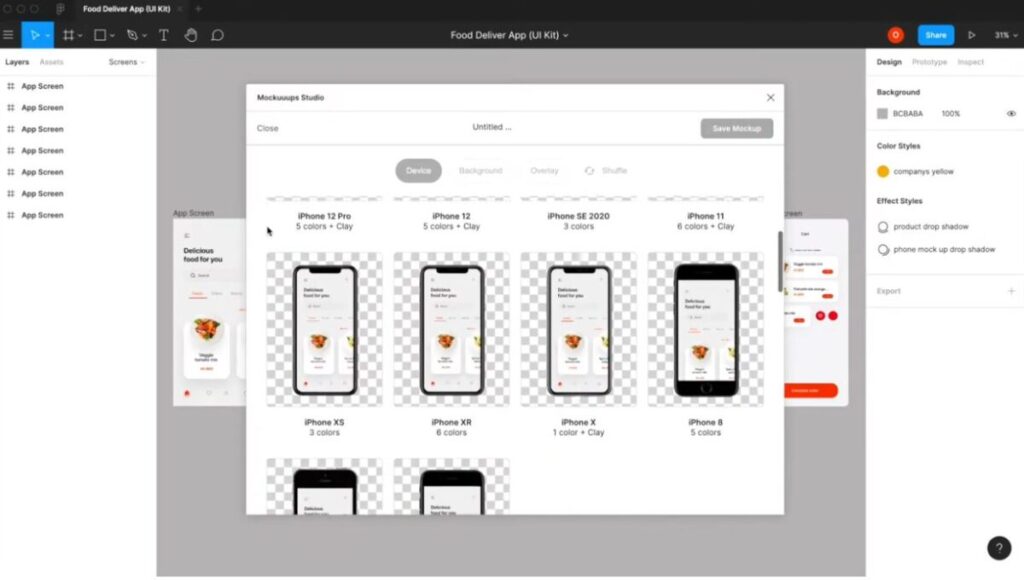
Above the preview you’ll see tabs for everything you can customize:
- Color
- Shadows
- Hands
- Backgrounds
- Overlays
We’ll walk through each.
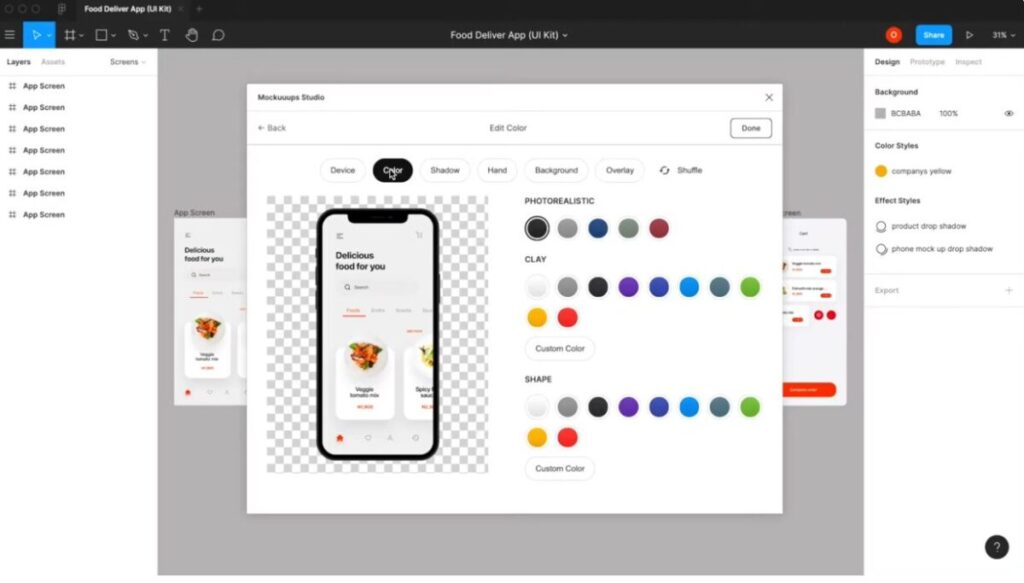
Step 5 – Set your device style (photo, clay, shape)
Click into the Color tab for the device.
You’ll see three main styles for whatever device you picked:
- Photo-realistic
- Shows the default device body, edges, and real-world colors.
- Great when you want a realistic iPhone mockup or laptop mockup.
- Clay
- Fills the device with a clean, solid color but keeps key details visible (speakers, camera, etc.).
- Good for minimal case studies and portfolios.
- Shape
- Turns the device into a simple solid shape, almost like a colored block with your screen inside.
- Very abstract, very “designy”.
You can also define custom colors for Clay and Shape to match your brand.
In the video they stay on the photo-realistic style, which is a safe default for showing product UIs.
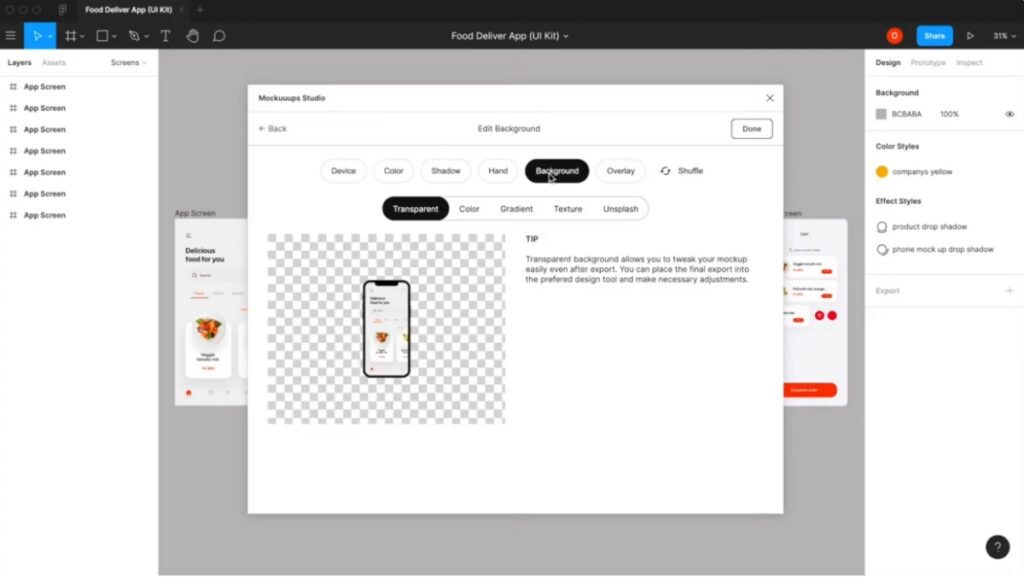
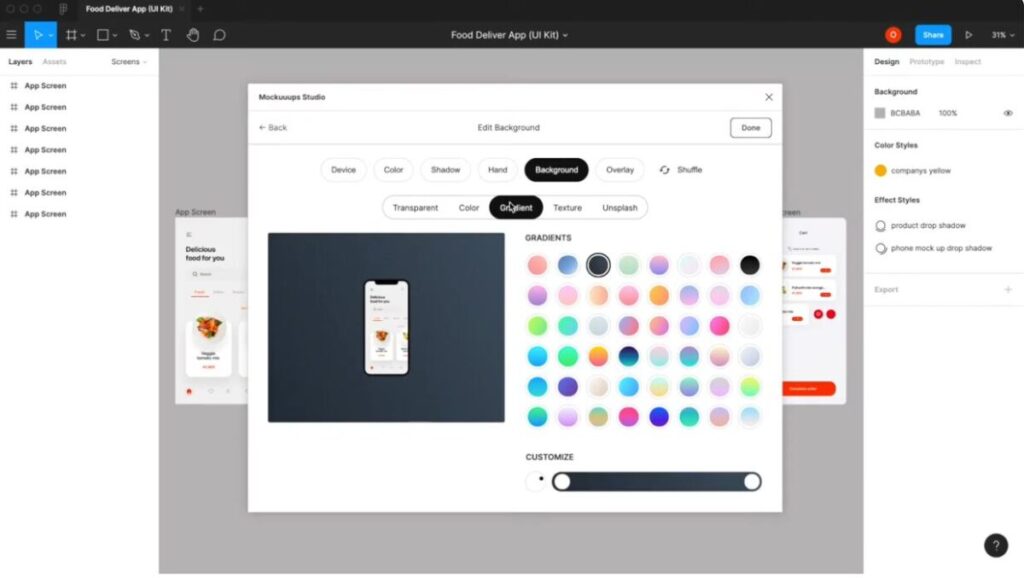
Step 6 – Choose background colors or gradients
Next, set up the background behind your device.
In the Background area you have a couple of options:
Transparent
The first background option is transparent.
- Use this if you want to place your laptop mockup or iPhone mockup later on:
- a website section
- a colored block in Figma
- a slide in Keynote / PowerPoint
Designers love this because you keep control in your main design tool.
Solid colors
Switch to the Color tab inside Background:
- You’ll see a palette of preset colors.
- You can also add your own brand colors.
This is handy if you want your mockup to sit on a simple, solid backdrop that fits your brand identity.
Gradients
There’s also a Gradient tab:
- Choose one from the gradient list.
- Use the slider to tweak intensity and direction until it feels right.
Gradients are great for “hero” Figma mockups where the mockup itself is the main visual on a product or pricing page.
Step 7 – Add a shadow for extra realism
Flat devices can look a bit “cut-out”. To fix that, go to the Shadows tab.
Here you can:
- turn on different shadow styles
- quickly give your device some depth so it feels more like a product shot
A subtle shadow can make a big difference, especially for computer mockups and laptop mockups used on landing pages.
When you later add a hand, Mockuuups automatically disables these shadows to avoid weird doubling.
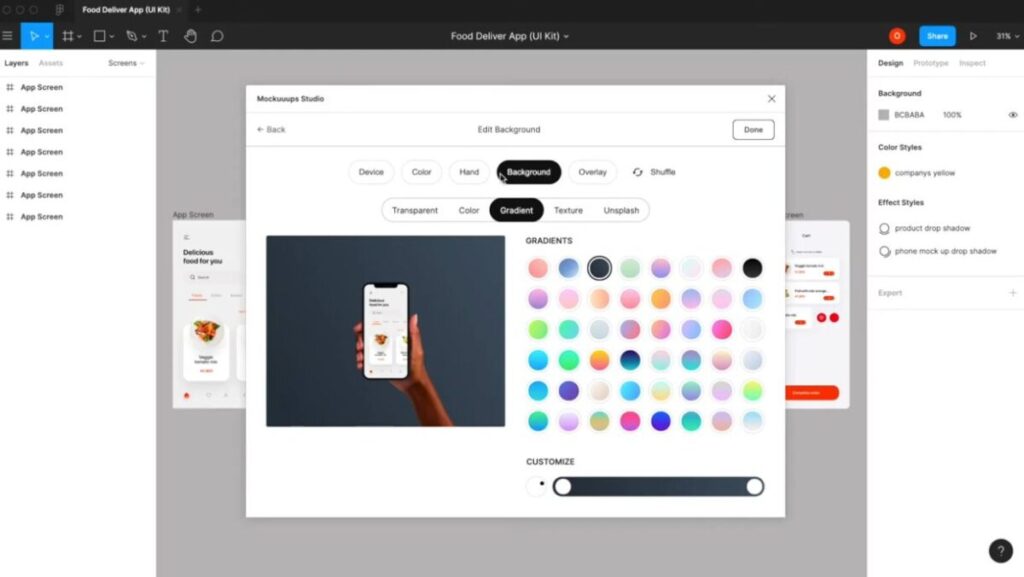
Step 8 – Add a diverse hand (optional)
If you want to show your product being used, not just floating:
- Open the Hands tab.
You’ll see a diverse range of hands, including:
- male / female
- different ages
- various skin tones / ethnicities
Mockuuups is deliberately offering a mix so you can pick something that fits your audience and brand.
- Choose a hand style you like.
- The device drops into that hand automatically.
Mockuuups will switch off the separate shadow when a hand is selected so the lighting remains natural.
If you change your mind later, you can always go back to “no hands” for a clean, device-only mockup.
Step 9 – Use background textures and Unsplash photos
If solid colors and gradients feel too plain, you can add richer scenes.
Textures
In the Background area, open the Textures tab:
- Browse through built-in categories (e.g. desk, wall, surface, etc.) using the dropdown.
- Or search with keywords for something that matches your brand.
This is perfect if you want your laptop mockup on a desk, or your phone mockup over some subtle texture.
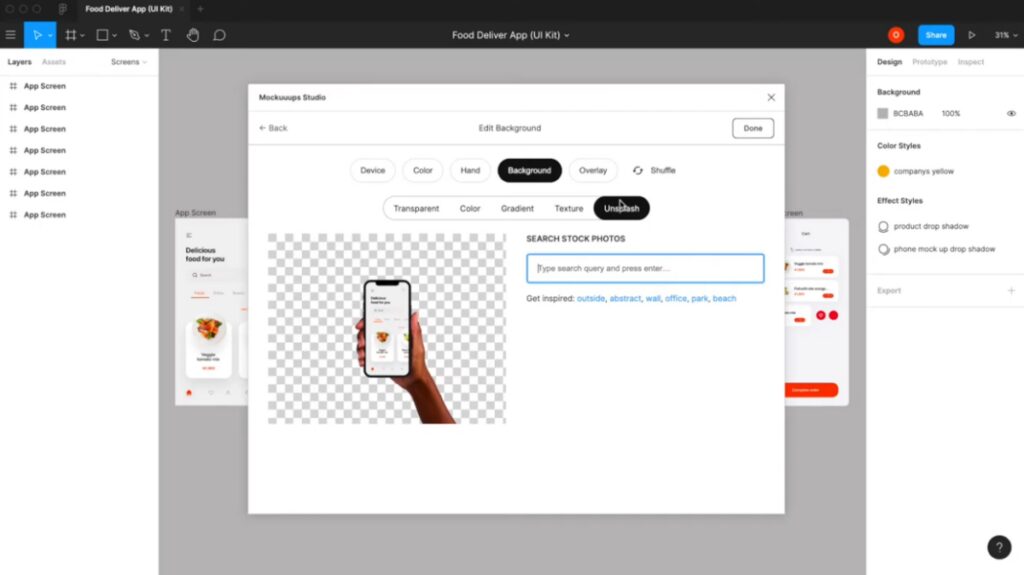
Unsplash
There’s also an Unsplash tab, which is where it gets fun:
- You get direct access to millions of free Unsplash photos inside Mockuuups Studio.
- Type a keyword (in the video they type “wall”) and browse the results.
- Click any photo to instantly use it as your background.
Now your Figma mockup can live in a real scene: on a wall, in an office, on a table, etc.
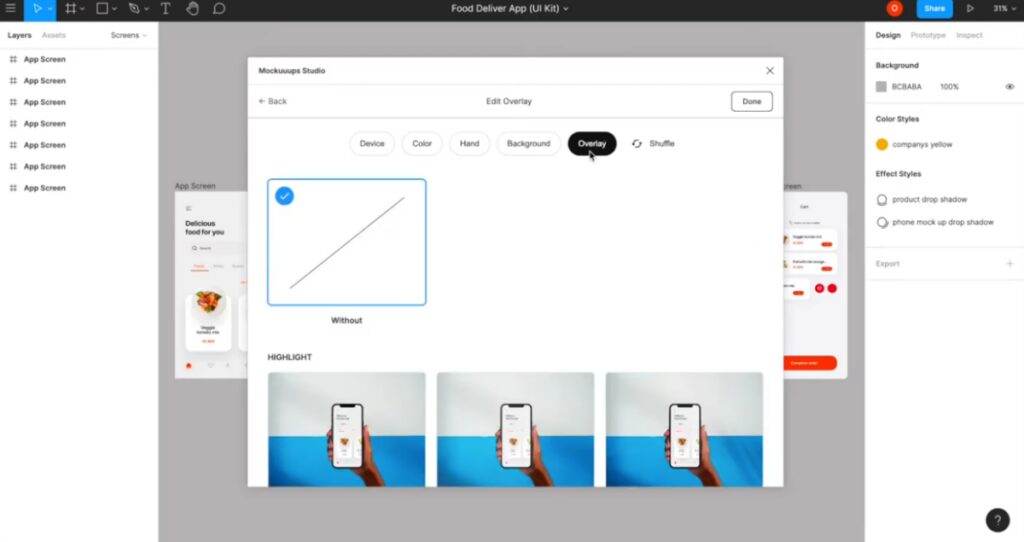
Step 10 – Add overlay effects (lighting)
Real photos rarely have perfectly flat lighting. To add that extra realism:
- Open the Overlay tab.
Here you can:
- apply subtle lighting effects
- mimic shadows like dappled shade or light leaks
- create a more “photographed” feel
Use overlays lightly. A gentle overlay can make an iPhone mockup or laptop mockup look premium; too strong and it might distract from the UI.
Step 11 – Swap device without rebuilding everything
Halfway through you might decide:
“Actually, I want an Android phone instead of an iPhone.”
“Or I want to see this scene as a laptop mockup too.”
You don’t have to start again.
- Go back to the Device tab.
- Choose a different device (e.g. Android, another phone, a different laptop).
Mockuuups keeps:
- your background color/texture/Unsplash photo
- your overlays
- your overall layout
Only the device changes.
This is great when you want the same scene in multiple versions (iPhone + Android; dark laptop + light laptop, etc.).
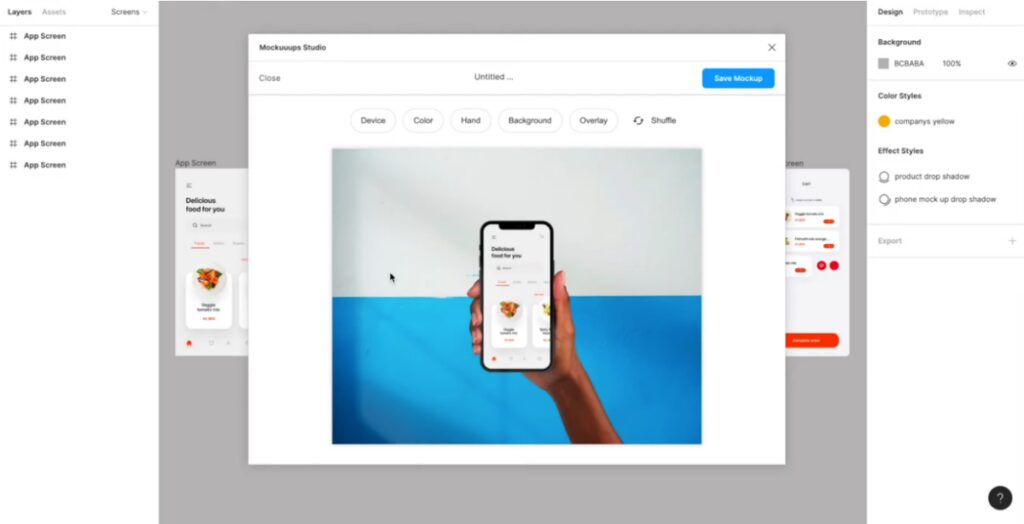
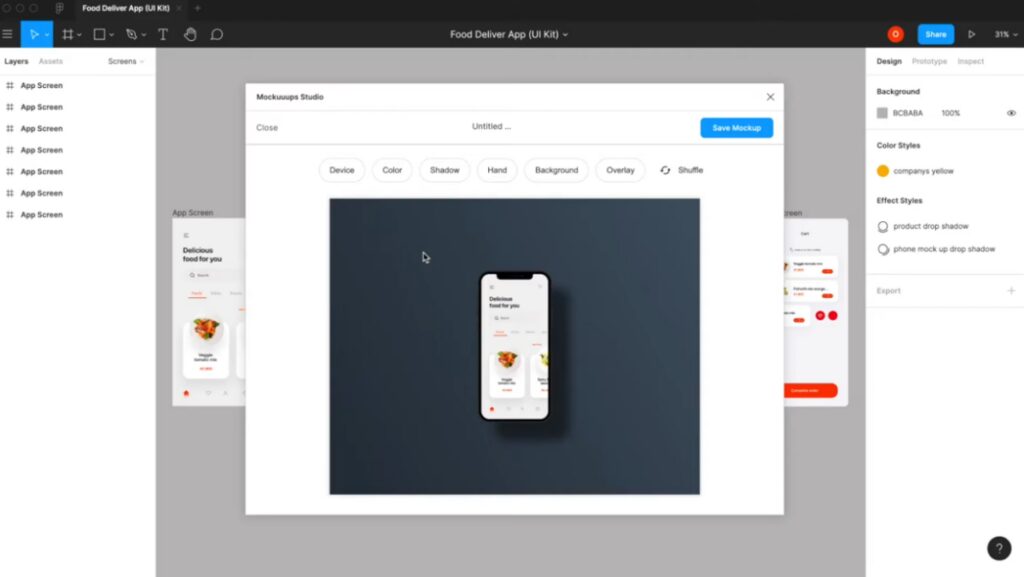
Step 12 – Save, duplicate, and manage your custom mockups
Once you like the scene you’ve built:
- Click Save.
- Give it a clear name:
Landing Page – Laptop MockupiOS App – Handheld iPhone, etc.
Mockuuups will show you a preview screen where you can:
- edit the mockup later
- delete it
- duplicate it to create variations (different background, different device, same core layout)
All your saved scenes appear back on the main grid so you can reuse them whenever you like.
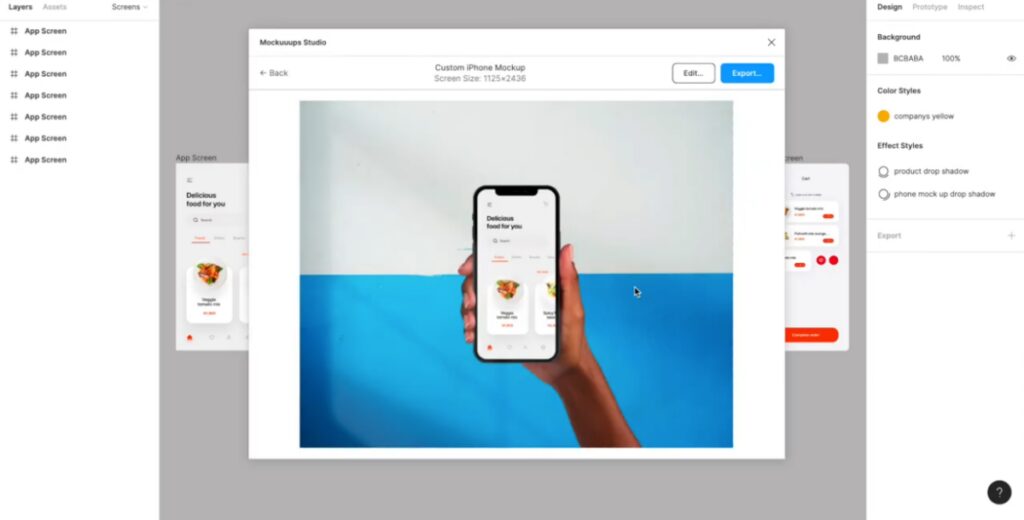
Step 13 – Drop your Figma frames into your new mockups
Now the important part: getting your Figma designs into those scenes.
The video sums it up simply:
“All you need to do is select a Figma frame and it will be placed in the entire collection.”
Here’s what that looks like:
- In Figma, select the frame you want:
- desktop frame → for a laptop mockup or computer mockup
- mobile frame → for an iPhone mockup or phone mockup
- Run the Mockuuups Studio plugin from Figma.
- The plugin sends your current frame into Mockuuups Studio and drops it into:
- your custom Studio scenes
- all compatible device mockups in your library
- Back in Mockuuups, pick the exact scene you just built and preview your design inside it.
- Export the final image:
- use PNG if you want a high-quality iPhone mockup PNG or laptop shot with transparency
- use JPG if you want a lighter file for blog posts or case studies
You can reuse the same scene for multiple Figma frames: just select a different frame in Figma, run the plugin again, and your new UI drops into the same device mockup setup.
Free vs paid: what you can realistically do on the free side
Based on the pricing page you shared:
- Mockuuups Studio lets you “create mockups for free”.
- The paid Professional and Team plans add:
- access to 4800+ mockups
- unlimited 4K exports
- a commercial use license
- advanced editor access
- full plugin/add-on support (Figma plugin, Adobe Express add-on, etc.)
- shareable preview links and website screenshots
So for someone just looking for a free Figma mockup, free laptop mockup, or free iPhone mockup:
- You can:
- sign up via “Try it FREE”
- connect the Figma plugin
- build a custom scene
- generate some device mockups using the free options
- You’ll eventually hit:
- library limits (not all scenes unlocked)
- export / resolution limits
- licensing limitations for heavy commercial use
For production-level, unlimited work (especially for client projects), you’d look at the Professional plan. But the free side is absolutely enough to follow this tutorial and get a few solid mockups out.
Always tell your readers to double-check the current pricing page, because plans and limits can change over time.
When to use Mockuuups vs hunting free PSD templates
Most people searching “free laptop mockup” or “free iPhone mockup” end up on PSD sites (Mockupworld, Mockups-Design, etc.). Those still have their place.
PSD template workflow
- Find a free mockup PSD
- Download it
- Open in Photoshop (which itself isn’t free)
- Replace smart object
- Export image
- Repeat for every new design
This is still great for print / packaging / merch mockups (books, mugs, boxes, etc.).
Mockuuups Studio + Figma workflow
For screen-based work (apps, websites, dashboards), Mockuuups is usually faster:
- Design in Figma
- Build or choose a device mockup scene in Mockuuups Studio
- Send a Figma frame via the plugin
- Export in seconds as a laptop mockup, iPhone mockup, or whatever you need
Your article can gently steer readers this way:
If you’re primarily working on digital products and living in Figma all day, using a mockup generator like Mockuuups Studio is usually much quicker than downloading free PSD templates and opening Photoshop every time you need a new mockup.
Quick FAQ – Figma mockups, laptop mockups, iPhone mockups
Yes. You can create an account via “Try it FREE”, install the Figma Mockuuups plugin, and create Figma mockups (laptop, iPhone, and other device mockups) without paying upfront. For full library access, unlimited 4K exports, and commercial licensing, you’ll need a paid plan.
No. Mockuuups Studio is a mockup generator, so you don’t need PSD files or Photoshop. You just design in Figma, run the plugin, and export ready-made device mockup images.
Yes. When you export from Mockuuups, choose PNG for a high-quality iPhone mockup PNG or laptop mockup with transparency suitable for websites, portfolios, and app store graphics.
You can sign up, connect Figma, set up a simple scene in the Studio, and export a laptop mockup using the free options. If you later find yourself doing this regularly or needing more variety (different hands, backgrounds, devices), that’s when it makes sense to look at the Professional plan.