Want to Schedule a Shutdown in Windows 10? Here’s Your Right Guide:
Welcome to our tutorial on scheduling a Windows 10 shutdown! This function is a useful tool for controlling how much power your computer uses and ensuring that it is turned off when not in use. Setting your computer to shut down automatically may be quite helpful if you want to save energy use, improve security, or just manage your time more effectively. We’ll look at many approaches of scheduling a shutdown in this tutorial, each with simple instructions. We’ll cover everything, so there’s something for everyone, from utilizing basic commands to more complex settings. Let’s get started and discover how to optimize the performance of your Windows 10 PC!

How to Schedule Shutdown Using Command Prompt
Using the Command Prompt to schedule your Windows 10 computer to shut down is a straightforward and efficient method. It’s perfect for those who prefer quick, text-based commands over navigating through multiple menus.
Step-by-Step Guide
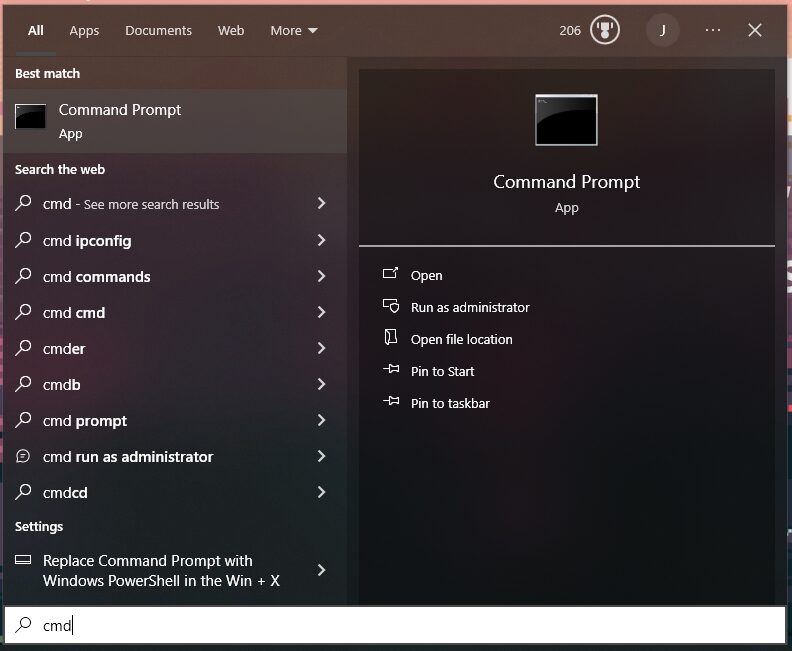
- Open Command Prompt: First, you need to open Command Prompt. You can do this by searching for ‘cmd’ in your Windows search bar.
- Enter the Shutdown Command: Once Command Prompt is open, type the shutdown command followed by the time parameter. For example,
shutdown -s -t 3600will set your computer to shut down in one hour (3600 seconds).
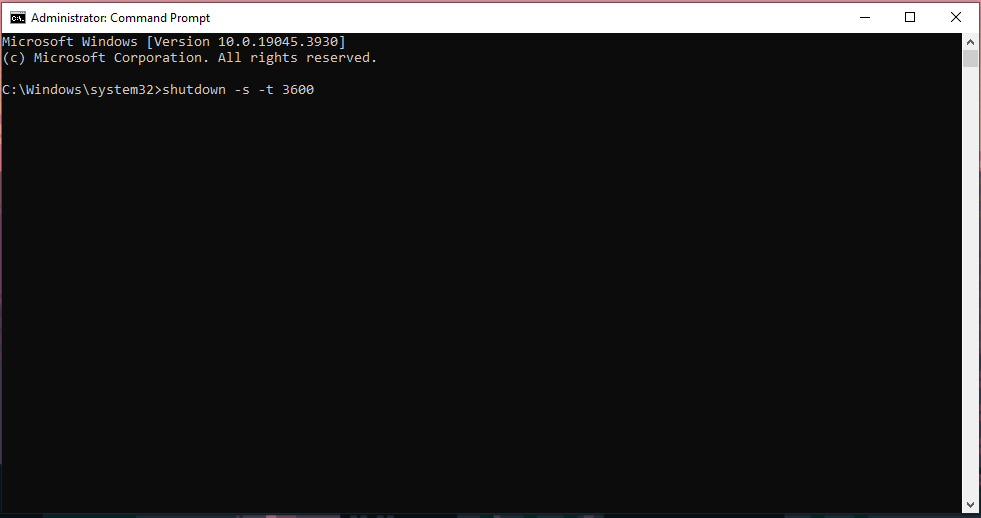
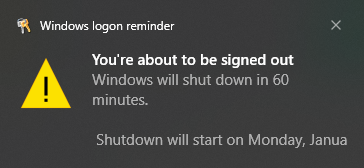
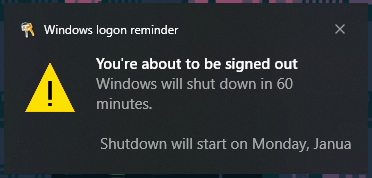
- Confirm the Command: Press Enter to confirm. A message will typically appear, informing you of the scheduled shutdown.
This method is highly effective for those comfortable with basic command lines. It’s quick, direct, and you can easily customize the shutdown timing by changing the number in the command.
Understanding Shutdown Commands
-s: This part of the command tells your computer to shut down.-t: This parameter is followed by the time in seconds. You set when you want the shutdown to happen.
Remember, scheduling a shutdown via Command Prompt is a powerful tool. It helps you manage your computer’s running time without needing to remember to turn it off manually. Whether you’re stepping out or winding down for the night, this method ensures your PC shuts down at the time you specify.
Scheduling Shutdown via Windows Task Scheduler
Scheduling a shutdown using Windows Task Scheduler offers more flexibility and options compared to other methods. This tool, built into Windows, allows you to create a variety of automated tasks, including shutting down your computer at a specified time.
Navigating to Task Scheduler
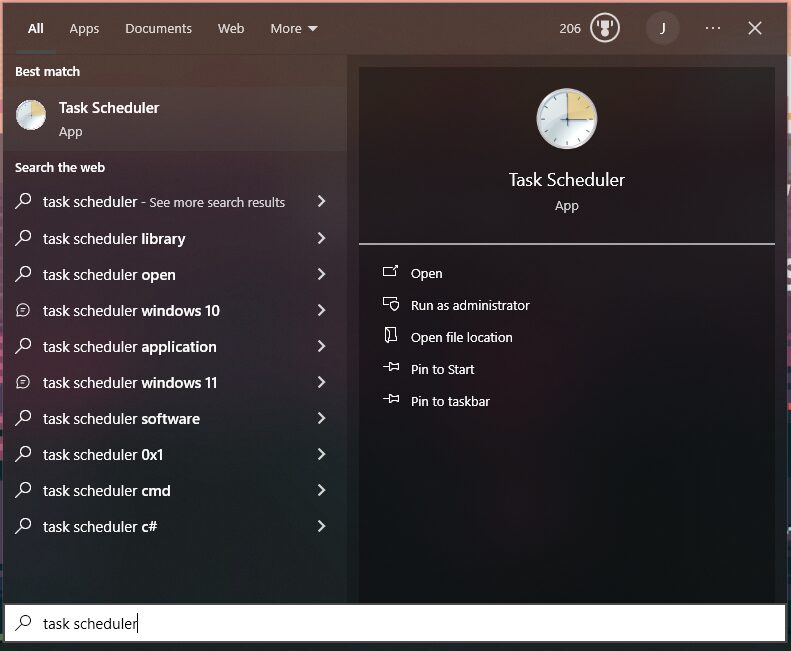
- Accessing Task Scheduler: Find Task Scheduler by searching for it in the start menu.
- Creating a New Task: Once you’re in Task Scheduler, go to ‘Create Basic Task’ to start setting up your shutdown schedule.
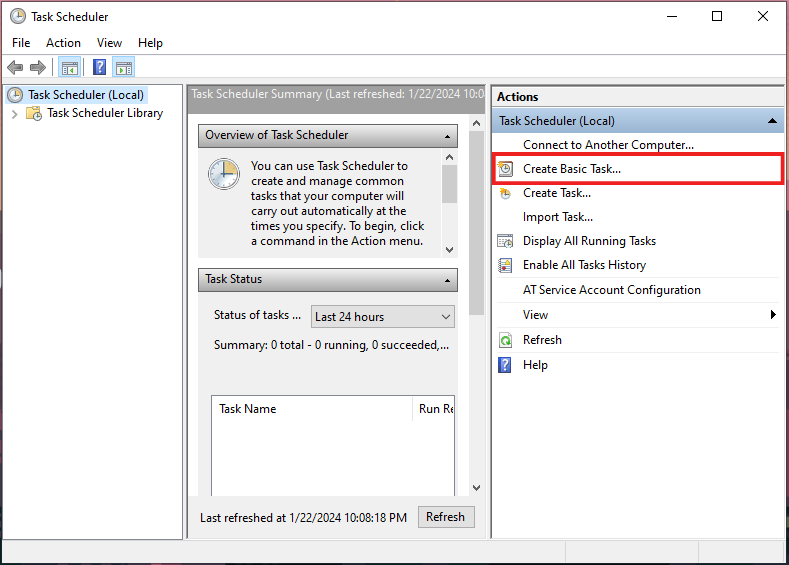
- Follow the Wizard: The Task Scheduler Wizard will guide you through the process. You’ll need to name your task, define the trigger (the time or event that will start the shutdown), and specify the action as ‘Start a program’ with the program/script as shutdown and add arguments (optional) as /s.

This method is great for those who want more control over their scheduled tasks and don’t mind a few extra steps to set it up.
Setting Time and Conditions
- Specify Time: Choose the exact time and frequency for the shutdown – daily, weekly, or a specific date and time.
- Advanced Settings: You can also set conditions like only executing the task when the computer is idle for a certain period.
Task Scheduler not only lets you schedule shutdowns but also offers vast possibilities for automating other tasks on your computer. It’s a powerful tool for anyone looking to streamline their computer usage and save time.
Quick Shutdown Scheduling Using Run Dialog Box
The Run dialog box in Windows 10 provides a quick and easy way to schedule a shutdown without the need for navigating through various menus or using complex commands. This method is ideal for those who prefer a more straightforward approach.
Accessing Run Dialog Box
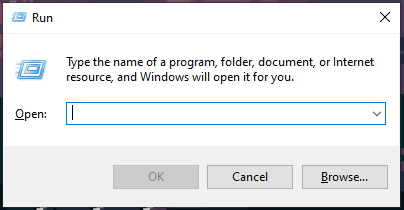
- Opening Run Dialog Box: Press Windows Key + R to open the Run dialog box. This is a small window where you can type commands directly.
- Typing the Shutdown Command: In the Run dialog box, type shutdown -s -t [time in seconds]. For example, shutdown -s -t 1800 will schedule your computer to shut down in 30 minutes.
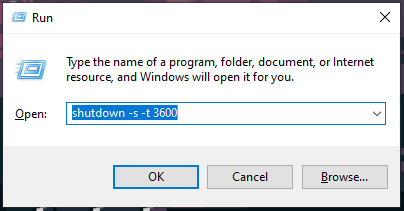
- Executing the Command: Press Enter or click ‘OK’ to set the shutdown timer.
Using the Run dialog box for scheduling a shutdown is a fast and efficient method, especially when you’re in a hurry. It requires minimal steps and is easy to remember, making it a convenient option for daily use.
Advanced Tips for Shutdown Scheduling
For those who want to take their shutdown scheduling to the next level, there are several advanced tips and tricks that can enhance the process. These tips allow for more customized and efficient ways to manage your computer’s shutdown schedule.
Troubleshooting Common Issues
- Checking Command Accuracy: Ensure your commands in Command Prompt or Run dialog box are accurate. A small typo can lead to the command not working.
- Task Scheduler Advanced Options: In Task Scheduler, explore advanced options like setting conditions for running the task only when the computer is idle, on AC power, or under specific circumstances.
These advanced tips are useful for those who schedule shutdowns regularly and want more control over how and when their computer turns off. They help in creating a more personalized and efficient system management routine.
Security Implications and Best Practices
When scheduling a shutdown in Windows 10, it’s important to consider the security implications and best practices to ensure your data’s safety and efficient computer management.
Avoiding Data Loss
- Save Work Regularly: Always save your work before a scheduled shutdown to prevent any loss of data.
- Warning Notifications: Use commands or settings that provide a warning before shutdown. This gives you a chance to save any ongoing work.
Scheduling Best Practices
- Consistent Schedule: Try to keep a consistent shutdown schedule, so you are always aware of when your computer will turn off.
- Emergency Overrides: Learn how to cancel a scheduled shutdown in case you need your computer to stay on longer.
Following these best practices ensures that your scheduled shutdowns are both safe and effective, aligning with good security practices and data management.
Conclusion
In this guide, we’ve explored various methods to schedule a shutdown in Windows 10. From using the Command Prompt and Run dialog box to the more detailed approach via Windows Task Scheduler, each method offers its own advantages. We’ve also discussed advanced tips and best practices to enhance your experience and ensure data safety. Scheduling shutdowns is not only about saving energy but also about efficient computer management. By following these steps, you can make sure your PC shuts down at a time that suits you best, keeping your data safe and your usage efficient. Remember, the key to successful scheduling lies in understanding the method that works best for your needs.