How to Optimize Wi-Fi Signal Strength in Every Room
In today’s hyper-connected world, a reliable Wi-Fi connection is not just a luxury; it’s a necessity. Whether you’re working from home, streaming your favorite shows, or simply browsing the web, a strong Wi-Fi signal is crucial for a smooth online experience. However, many of us have experienced the frustration of weak Wi-Fi signals in certain parts of our homes. It’s time to put an end to those dead zones and slow connections.
The Importance of a Strong Wi-Fi Signal
Before we delve into the nitty-gritty of optimizing your Wi-Fi signal, let’s understand why it’s so crucial. A strong Wi-Fi signal offers several key benefits:
- Faster Speeds: A robust signal allows for faster data transmission, resulting in quicker downloads, seamless video streaming, and lag-free online gaming.
- Better Coverage: With a strong signal, you can enjoy reliable internet access in every corner of your home, eliminating frustrating dead zones.
- Stable Connections: A stable Wi-Fi signal ensures that your devices remain connected without interruptions, reducing the need to constantly reconnect.
- Improved Productivity: For remote workers and students, a strong Wi-Fi signal is essential for efficient online collaboration and learning.
- Enhanced Smart Home Performance: If you have smart home devices like security cameras, thermostats, or voice assistants, a strong Wi-Fi signal is vital for their optimal performance.
Common Wi-Fi Issues
Now that we’ve highlighted the advantages of a strong Wi-Fi signal, let’s acknowledge some common issues that can plague your wireless network:
- Dead Zones: These are areas in your home where the Wi-Fi signal is weak or non-existent. They can be frustrating, especially if they occur in frequently used spaces.
- Slow Connection Speeds: If your internet feels sluggish, it’s often due to a weak Wi-Fi signal. Slow speeds can disrupt your online activities and lead to buffering during streaming.
- Interference: Wi-Fi signals can be affected by interference from neighboring networks, household appliances, or physical barriers like walls and floors.
- Inconsistent Performance: Some devices may experience inconsistent connectivity, dropping the connection intermittently.
- Limited Range: Older routers may have limited coverage, preventing you from accessing Wi-Fi in distant rooms.
In this comprehensive guide, we’ll provide you with step-by-step instructions and expert tips to help you optimize your Wi-Fi signal strength throughout your home. We’ll cover everything from ideal router placement to the use of Wi-Fi extenders and channel optimization. By the end of this journey, you’ll have the tools and knowledge to ensure that you have a robust Wi-Fi connection in every room. Say goodbye to frustrating Wi-Fi woes and hello to a seamless online experience.
Understanding Wi-Fi Signals
To optimize your Wi-Fi signal effectively, it’s essential to grasp the fundamentals of Wi-Fi signals. This knowledge will empower you to make informed decisions about improving your home network.
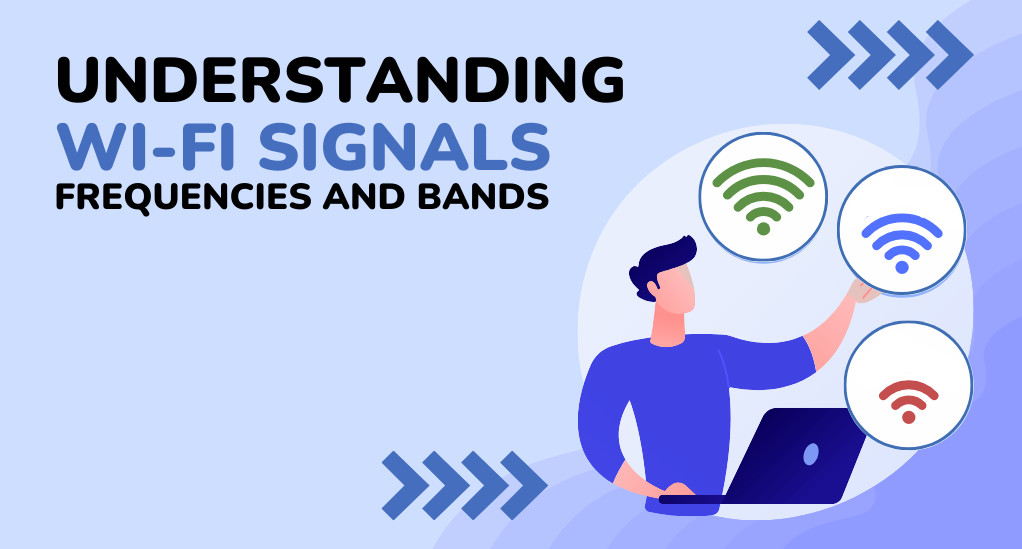
Basics of Wi-Fi Frequencies and Bands
Wi-Fi operates on different frequencies within the radio spectrum. The two primary frequency bands used for Wi-Fi are:
- 2.4 GHz Band: This band is commonly used by older Wi-Fi devices and offers wider coverage but lower data transfer speeds. It’s susceptible to interference from other devices like microwaves and cordless phones.
- 5 GHz Band: The 5 GHz band provides faster speeds but over shorter distances. It’s less crowded and experiences less interference, making it ideal for high-bandwidth activities like streaming and online gaming.
Signal Strength Measurement: dBm
Wi-Fi signal strength is measured in decibels per milliwatt (dBm). Understanding dBm values can help you assess your Wi-Fi network’s performance:
- -30 dBm to -50 dBm: Excellent signal strength.
- -51 dBm to -60 dBm: Good signal strength.
- -61 dBm to -70 dBm: Fair signal strength.
- -71 dBm or below: Weak signal strength, may result in connectivity issues.
You can check your device’s Wi-Fi signal strength in the device settings or by using a Wi-Fi analyzer app.
Assessing Your Current Wi-Fi Setup
Before making any changes to your Wi-Fi network, it’s essential to assess your current setup. This step will help you identify areas that require improvement. Here’s how to do it:
- Check Signal Strength: Use your device’s built-in Wi-Fi signal indicator or a Wi-Fi analyzer app to check signal strength in different parts of your home.
- Identify Dead Zones: Walk around your home and take note of areas with weak or no signal. These are your dead zones.
- Identify Interference Sources: Look for potential sources of interference, such as microwave ovens, cordless phones, and neighboring Wi-Fi networks.
- Note Device Performance: Pay attention to how your devices perform. Do they frequently disconnect or experience slow speeds in specific areas?
By assessing your current Wi-Fi setup, you’ll have a clear picture of the challenges you need to address in the optimization process. In the next section, we’ll explore the importance of router placement in enhancing your Wi-Fi signal strength.
Ideal Router Placement
Now that you have a better understanding of your Wi-Fi setup, it’s time to explore one of the most critical factors affecting signal strength: router placement. The location of your router within your home can significantly impact the coverage and performance of your Wi-Fi network.
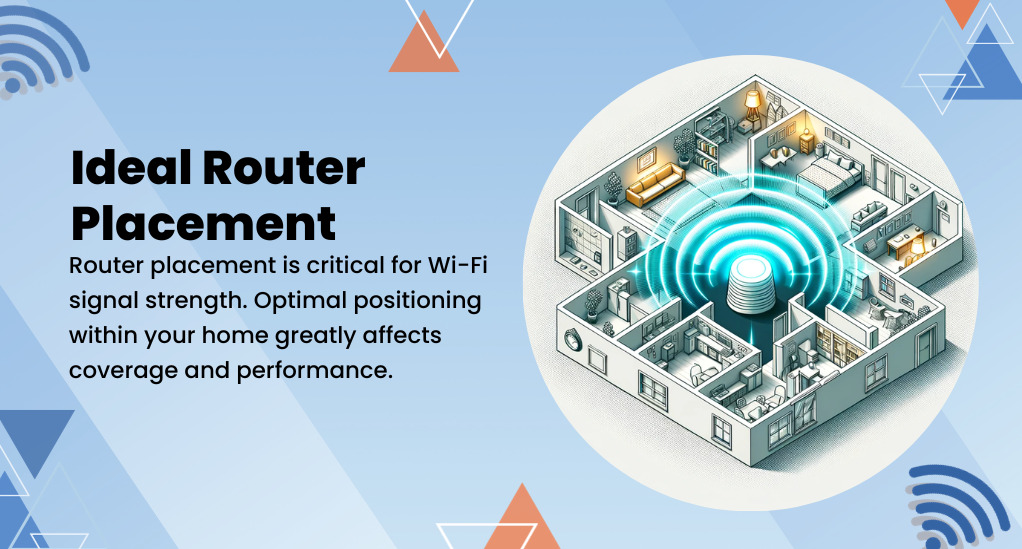
The Significance of Router Placement
Router placement matters because it determines how well the Wi-Fi signal can propagate throughout your home. Here are some key considerations:
- Centralized Location: Ideally, place your router in a central area of your home. This helps distribute the signal more evenly in all directions.
- Elevation: Elevate the router. Placing it on a higher shelf or mounting it on a wall can improve signal coverage, as Wi-Fi signals tend to spread better downward.
- Avoid Obstacles: Keep the router away from physical obstructions like walls, floors, and large furniture. These barriers can block or weaken the signal.
- Avoid Interference: Position the router away from devices that may cause interference, such as cordless phones, baby monitors, and microwave ovens.
- Router Antenna Orientation: If your router has external antennas, adjust their orientation for optimal signal distribution. Typically, positioning them vertically works well.
Dealing with Specific Scenarios
- Multi-Story Homes: In multi-story homes, consider placing the router on the upper floor in a central location. This can help provide better coverage to both levels.
- Large Homes: For larger homes, you may need multiple routers or a mesh Wi-Fi system to ensure complete coverage. These systems can extend your Wi-Fi signal to every corner of your home.
- Outdoor Coverage: If you want Wi-Fi coverage in your backyard or outdoor spaces, place the router near a window facing the desired area or use outdoor Wi-Fi access points.
- Basements: If your router is in the basement, it might struggle to provide strong signals on upper floors. In such cases, consider relocating it to a more central location.
Testing Signal Strength
After you’ve adjusted your router’s placement, don’t forget to check signal strength in different areas of your home to ensure improvements. Use your device’s Wi-Fi signal indicator or a Wi-Fi analyzer app to gauge signal strength.
Optimizing router placement is a fundamental step in enhancing your Wi-Fi signal strength. However, in some cases, even with ideal placement, you may still encounter dead zones or weak signals in distant rooms. In the next section, we’ll explore the option of upgrading your router to a more powerful and modern model to address these challenges.
Upgrading Your Router
While optimizing router placement is essential, sometimes the best solution for improving Wi-Fi signal strength is to upgrade your router. Advances in Wi-Fi technology have resulted in more powerful and feature-rich routers that can significantly enhance your home network’s performance.
Benefits of Upgrading to a Modern Router
Investing in a modern router can bring several advantages to your home network:
- Faster Speeds: Newer routers support the latest Wi-Fi standards, such as 802.11ac (Wi-Fi 5) and 802.11ax (Wi-Fi 6). These standards offer faster data transfer rates, reducing lag and improving streaming and online gaming experiences.
- Improved Range: Modern routers often have better range capabilities, ensuring that Wi-Fi signals can reach distant rooms and even outdoor areas.
- Enhanced Device Handling: New routers are designed to handle a larger number of connected devices simultaneously. This is particularly important in homes with numerous smart devices and family members using Wi-Fi at the same time.
- Advanced Features: Many modern routers come with advanced features like Quality of Service (QoS) settings for prioritizing certain types of traffic, parental controls, and guest networks.
Choosing the Right Router
When selecting a new router, consider the following factors:
- Wi-Fi Standard: Look for routers that support the latest Wi-Fi standards, such as Wi-Fi 6 (802.11ax), for optimal performance.
- Speed and Coverage: Choose a router with the appropriate speed and coverage capabilities for your home size and internet plan.
- Dual-Band or Tri-Band: Dual-band routers (2.4 GHz and 5 GHz) are common, but tri-band routers (two 5 GHz bands) provide even better performance in busy networks.
- Beamforming: Routers with beamforming technology can focus the Wi-Fi signal directly at connected devices, improving signal strength and reliability.
- MU-MIMO: Multi-User, Multiple Input, Multiple Output (MU-MIMO) technology allows routers to communicate with multiple devices simultaneously, reducing congestion.
- Security Features: Ensure that the router offers robust security features, including WPA3 encryption and regular firmware updates.
Setting Up Your New Router
Once you’ve chosen a new router, follow these steps to set it up:
- Disconnect the old router and connect the new one.
- Follow the manufacturer’s instructions for initial setup, which typically involves connecting to a web interface.
- Configure your Wi-Fi network name (SSID) and password.
- Enable any advanced features or security settings as needed.
- Connect your devices to the new Wi-Fi network using the updated credentials.
By upgrading to a modern router that suits your needs, you can significantly boost your Wi-Fi signal strength and overall network performance. However, if you still encounter Wi-Fi dead zones or have a large home, you may want to consider Wi-Fi extenders, which we’ll discuss in the next section.
Using Wi-Fi Extenders
If you’ve optimized router placement and upgraded to a modern router but still experience weak Wi-Fi signals in certain areas of your home, Wi-Fi extenders can come to the rescue. These devices, also known as range extenders or repeaters, help expand your Wi-Fi coverage to eliminate dead zones and ensure reliable connectivity throughout your home.
Understanding Wi-Fi Extenders
Wi-Fi extenders work by receiving the existing Wi-Fi signal from your router and then rebroadcasting it to reach areas that previously had weak or no coverage. Here’s how they function:
- Signal Reception: The extender captures the Wi-Fi signal from your router.
- Amplification: It amplifies and retransmits the signal to extend the coverage area.
- Seamless Connectivity: Your devices can seamlessly switch between the router and the extender as you move around your home, ensuring a continuous and strong connection.
Choosing the Right Wi-Fi Extender

Selecting the right Wi-Fi extender is crucial for optimal performance. Consider the following when making your choice:
- Compatibility: Ensure that the extender is compatible with your router’s Wi-Fi standards (e.g., 802.11ac, 802.11ax).
- Dual-Band Support: Look for dual-band extenders that operate on both the 2.4 GHz and 5 GHz bands for better performance.
- Signal Strength: Choose an extender with sufficient signal amplification to cover the areas you need.
- Ethernet Ports: Some extenders come with Ethernet ports, which can be useful for wired connections to devices like gaming consoles or smart TVs.
- Mesh Systems: Consider investing in a mesh Wi-Fi system if you have a large home. These systems consist of multiple nodes that work together to provide seamless Wi-Fi coverage.
Installing and Configuring Wi-Fi Extenders
Here’s a general guide for setting up a Wi-Fi extender:
- Plug In: Plug the extender into an electrical outlet within the range of your existing Wi-Fi signal.
- Connect to Extender: Using a computer or mobile device, connect to the extender’s Wi-Fi network (usually labeled as “Extender” or something similar).
- Access Configuration Page: Open a web browser and enter the extender’s IP address (refer to the extender’s manual for details).
- Follow Setup Wizard: Most extenders provide a setup wizard that guides you through the configuration process. You’ll typically need to select your existing Wi-Fi network and enter its password.
- Placement: Place the extender in an area where it can receive a strong Wi-Fi signal from your router while still covering the dead zone you want to eliminate.
- Test Signal: Confirm that the extender is providing improved signal strength in the previously weak area using a device with Wi-Fi signal strength indicators or a Wi-Fi analyzer app.
Wi-Fi extenders are effective tools for extending your network’s reach and eliminating dead zones. However, keep in mind that they may introduce a slight latency compared to a direct router connection. In the next section, we’ll delve into optimizing Wi-Fi channels to further enhance your network’s performance.
Optimizing Wi-Fi Channels
Optimizing Wi-Fi channels is a vital step in fine-tuning your network for maximum performance. Wi-Fi channels determine how your router communicates with your devices, and selecting the right channel can reduce interference and improve signal strength.
Understanding Wi-Fi Channels
Wi-Fi routers operate on specific channels within the 2.4 GHz and 5 GHz frequency bands. Each channel represents a different frequency on which data is transmitted. Here’s what you need to know:
- 2.4 GHz Band: This band has several channels, but they overlap with each other. There are only three non-overlapping channels: 1, 6, and 11. These are ideal for minimizing interference.
- 5 GHz Band: The 5 GHz band offers more non-overlapping channels, which means less interference. However, it has a shorter range compared to the 2.4 GHz band.
Selecting the Right Wi-Fi Channel
To optimize your Wi-Fi channel selection, follow these steps:
- Access Router Settings: Log in to your router’s web interface using a computer or mobile device. Consult your router’s manual for instructions on accessing these settings.
- Check Channel Usage: In the router settings, find the section related to Wi-Fi channels. Some routers have an automatic channel selection option, but it’s often better to choose a channel manually.
- Use Wi-Fi Analyzer Tools: You can use Wi-Fi analyzer apps on your smartphone or computer to scan your area for nearby networks and determine which channels are less crowded.
- Select Optimal Channels: Based on your analysis, manually set your router to use less congested channels. For the 2.4 GHz band, choose channels 1, 6, or 11. For the 5 GHz band, select a channel with minimal interference.
- Monitor Regularly: Periodically check for channel congestion and make adjustments if necessary, especially if new networks appear in your vicinity.
Channel Width and Bandwidth
Some routers allow you to adjust the channel width, which affects the bandwidth available for your Wi-Fi network. A wider channel provides more bandwidth but may be more susceptible to interference. Consider the following:
- 2.4 GHz Band: Typically, it’s best to use a channel width of 20 MHz to minimize interference. Avoid 40 MHz channel widths in crowded areas.
- 5 GHz Band: The 5 GHz band offers wider channel options, such as 40 MHz and 80 MHz. Use wider channels if you have a network with fewer devices and minimal interference.
Optimizing Wi-Fi channels is a proactive step that can lead to a more stable and interference-free network. In the next section, we’ll explore the importance of security and maintenance in ensuring the longevity and security of your Wi-Fi setup.
Security and Maintenance
Securing and maintaining your Wi-Fi network is essential not only for protecting your data but also for ensuring the long-term performance of your network. In this section, we’ll cover the key aspects of Wi-Fi security and ongoing maintenance.
Wi-Fi Security Best Practices
- Change Default Passwords: Start by changing the default username and password for your router. Strong and unique login credentials are your first line of defense against unauthorized access.
- Enable Encryption: Ensure that your Wi-Fi network is encrypted with WPA3 or WPA2. This prevents eavesdropping and unauthorized access to your network.
- Use a Strong Wi-Fi Password: Create a strong, complex Wi-Fi password that combines letters, numbers, and symbols. Avoid using easily guessable information, such as your name or address.
- Regularly Update Firmware: Check for firmware updates for your router and apply them as needed. Manufacturers release updates to fix security vulnerabilities and improve performance.
- Guest Network: If your router supports it, set up a separate guest network with a different password. This keeps your main network more secure while allowing guests to connect.
- MAC Address Filtering: Consider enabling MAC address filtering, which allows only specific devices with registered MAC addresses to connect to your network.
Ongoing Maintenance
- Check for Interference: Periodically check for new sources of interference in your home, such as new electronic devices, and adjust your router placement or channel settings accordingly.
- Update Devices: Keep your devices’ Wi-Fi drivers and software up to date. Outdated drivers can lead to connectivity issues.
- Review Connected Devices: Regularly review the list of connected devices in your router’s settings to ensure no unauthorized devices are connected.
- Reboot Your Router: If you notice a drop in performance, reboot your router. This can help resolve minor connectivity issues.
- Monitor Data Usage: Keep an eye on your data usage to ensure that no unauthorized devices are consuming excessive bandwidth.
- Backup Router Settings: Backup your router’s settings regularly. In case of a factory reset or a configuration error, having a backup can save you time and effort.
- Security Audits: Perform periodic security audits by checking for weak passwords or unusual activity on your network.
By following these security and maintenance best practices, you can ensure the security, reliability, and longevity of your Wi-Fi network. This will help you enjoy a strong and stable Wi-Fi signal in every room of your home for years to come.
Troubleshooting Wi-Fi Issues
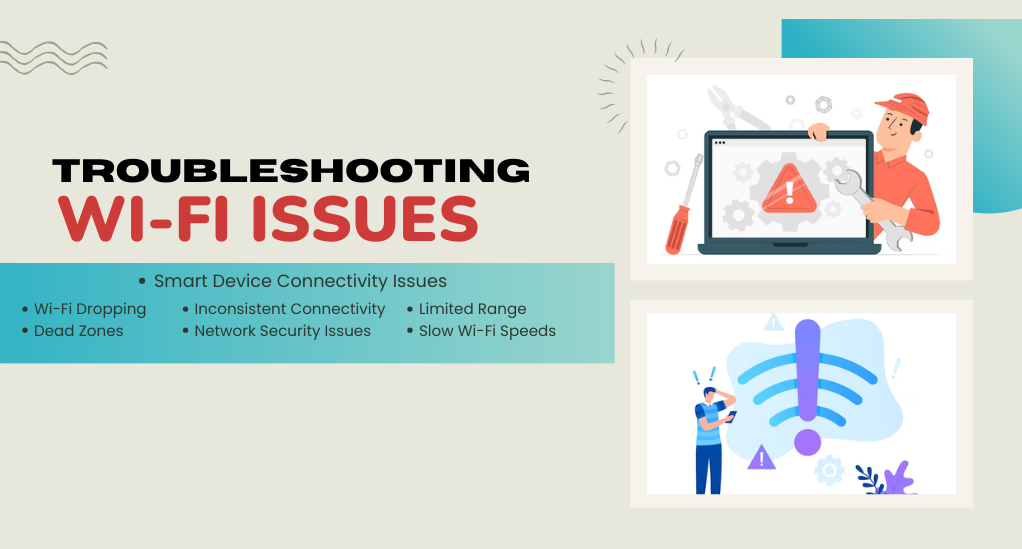
Even with the best efforts to optimize your Wi-Fi network, occasional issues may still arise. In this section, we’ll provide you with some common Wi-Fi troubleshooting tips to help you quickly identify and resolve connectivity problems.
1. Slow Wi-Fi Speeds
- Check for Interference: Identify any new electronic devices or appliances that may be causing interference with your Wi-Fi signal and move them away from the router.
- Limit Background Downloads: Ensure that no devices are heavily downloading or streaming content in the background, which can slow down your network.
- Reset Router: Sometimes, a simple router reset can improve speed. Power cycle your router by unplugging it for about 30 seconds and then plugging it back in.
2. Wi-Fi Dropping or Disconnecting
- Check for Signal Strength: Verify that the device experiencing drops has a strong Wi-Fi signal. If not, consider repositioning your router or adding a Wi-Fi extender.
- Update Device Drivers: Ensure that the drivers for the affected device are up to date. Outdated drivers can lead to connectivity issues.
- Router Firmware: Check if your router has the latest firmware installed. An outdated router firmware can cause connectivity problems.
3. Dead Zones
- Wi-Fi Extender: If you have dead zones despite optimizing your router placement, consider adding a Wi-Fi extender to cover those areas.
- Mesh Wi-Fi: Upgrade to a mesh Wi-Fi system if dead zones persist. Mesh systems provide seamless coverage throughout your home.
4. Inconsistent Connectivity
- Reposition Router: Try repositioning your router to a more central location within your home. This can help maintain a consistent connection.
- Check for Nearby Devices: Make sure no nearby devices are causing interference, especially in crowded areas with many networks.
5. Network Security Issues
- Change Wi-Fi Password: If you suspect unauthorized access or suspect that your Wi-Fi password has been compromised, change it immediately.
- Review Connected Devices: Regularly review the list of connected devices in your router settings to ensure no unknown devices are accessing your network.
6. Limited Range
- Router Upgrade: If your home is particularly large, consider upgrading to a high-range router or a mesh Wi-Fi system to cover every corner.
7. Smart Device Connectivity Issues
- Separate Networks: Create separate networks for your smart devices and personal devices. This can prevent smart devices from causing congestion on your main network.
- Reboot Smart Devices: If a smart device is not connecting or responding, try rebooting it and reconnecting it to the Wi-Fi network.
Remember that troubleshooting Wi-Fi issues may require a bit of patience and experimentation. Start with the simplest solutions, such as rebooting your router, and gradually move on to more advanced troubleshooting steps if needed. If problems persist, don’t hesitate to contact your internet service provider or router manufacturer for additional support.
Conclusion
In conclusion, optimizing Wi-Fi signal strength in every room of your home is not just a matter of convenience; it’s a necessity in our digitally connected world. By understanding the fundamentals of Wi-Fi signals, assessing your current setup, and making informed choices about router placement, upgrades, and extenders, you can transform your home network into a powerhouse of connectivity.
Remember that ongoing maintenance, security measures, and troubleshooting are essential for ensuring a reliable and robust Wi-Fi experience. With the insights and tips provided in this guide, you now have the knowledge and tools to tackle Wi-Fi challenges head-on, providing you and your family with a seamless online experience in every corner of your home. Say goodbye to dead zones and slow connections – your optimized Wi-Fi network is ready to keep you connected and productive. Happy browsing!