How to Navigate the macOS Interface Like a Pro
Welcome to the world of macOS, Apple’s renowned operating system that powers millions of devices worldwide. Whether you’re a seasoned user looking to refine your skills or a newcomer eager to dive into the macOS experience, this guide is tailored for you. Navigating the macOS interface can be both an art and a science, and mastering it can significantly enhance your productivity and overall user experience.
Why is Navigating macOS Important?
Apple’s macOS is known for its sleek design, intuitive user interface, and robust performance. However, beneath its polished surface lies a plethora of features and functionalities waiting to be explored. By understanding the intricacies of the macOS interface:
- Efficiency: You can perform tasks more quickly, from launching applications to managing files.
- Productivity: With a deep understanding of macOS, multitasking becomes a breeze, allowing you to get more done in less time.
- Customization: macOS offers a range of customization options. Knowing how to navigate the interface lets you tailor your Mac to your preferences, creating a personalized user experience.
What to Expect in This Guide?
This guide will take you on a journey through the macOS interface, starting with the basics and gradually delving into more advanced topics. We’ll cover:
| Sections | Description |
|---|---|
| Understanding the macOS Desktop | Explore the main workspace of your Mac and learn how to manage files, applications, and much more. |
| Working with Applications | Dive into the world of macOS applications, from launching to efficient management. |
| Mastering macOS Windows | Understand the anatomy of macOS windows and how to effectively use them in your daily tasks. |
| … and much more! | Dive deeper into advanced topics, shortcuts, and pro-tips to truly master the macOS interface. |
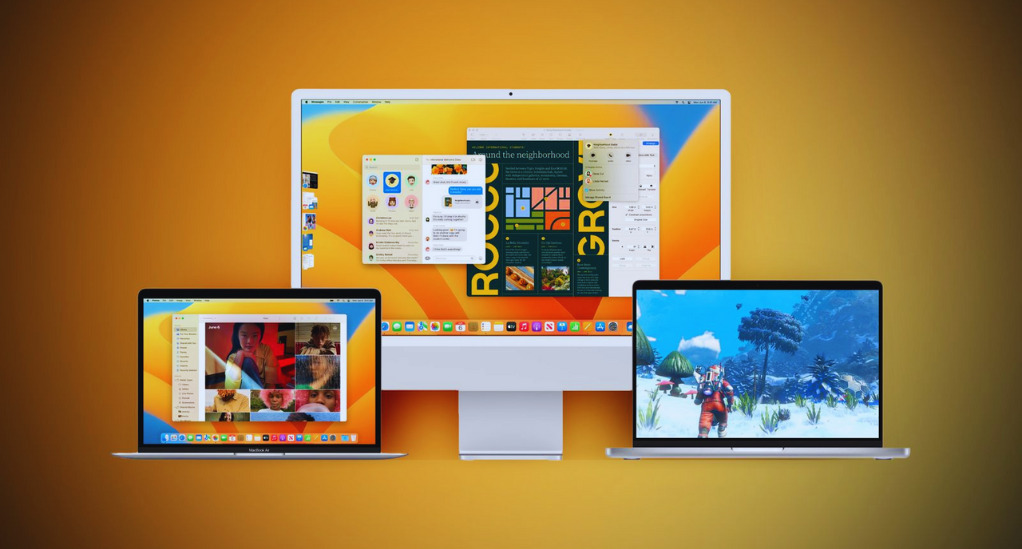
Understanding the macOS Desktop
The heart and soul of your Mac experience begins with the desktop. Think of it as your digital workspace, where you can access everything you need, from files to applications and even system settings. Let’s dive into the intricacies of the macOS desktop.
The Role of the Desktop
When you boot up your Mac, the first thing you’re greeted with is the desktop. It’s more than just a backdrop for your favorite wallpaper; it’s a functional space designed for:
- File Management: Store, access, and organize your files and folders.
- Application Access: Launch and manage applications.
- System Navigation: Access system settings, notifications, and more.
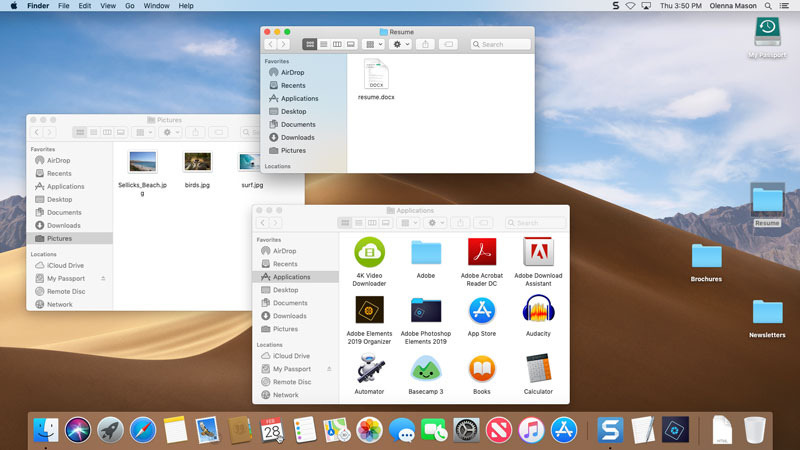
Desktop Components
The macOS desktop comprises several key components:
- Desktop Icons: These are shortcuts to files, folders, or applications. You can customize their arrangement and appearance based on your preferences.
- The Dock: Located at the bottom of the screen (though its position can be changed), the Dock houses shortcuts to your most-used applications, folders, and files. It also shows which applications are currently running.
- Menu Bar: Situated at the top, the menu bar contains the Apple logo, application-specific menus, system controls (like Wi-Fi and battery status), and the Spotlight search.
- Spotlight Search: A powerful tool for searching anything on your Mac, from files to applications and even web results. Simply click on the magnifying glass in the menu bar or press
Cmd + Spaceto activate it. - Trash: Located on the Dock’s far right, it’s where your deleted files go. Remember to empty the trash regularly to free up storage space.
Customizing Your Desktop
macOS offers a plethora of customization options to make your desktop truly yours:
- Wallpapers: Choose from a range of stunning default wallpapers or set your own photo. Right-click on the desktop and select ‘Change Desktop Background’.
- Dock Preferences: Adjust the size of the Dock, its position on the screen, and the apps it displays. Navigate to System Preferences > Dock to tweak these settings.
- Desktop Icons: Control the size and arrangement of icons. Right-click on the desktop, hover over ‘Show View Options’, and adjust as needed.
- Hot Corners: These are interactive corners of your screen that can trigger specific actions when your cursor is moved to them. Set them up in System Preferences > Mission Control > Hot Corners.
Working with Applications
Applications, often referred to as apps, are the software programs that allow you to perform specific tasks on your Mac. From word processing and web browsing to graphic design and video editing, applications are the tools that make your Mac a powerful workstation. Let’s explore how to effectively work with and manage these applications.
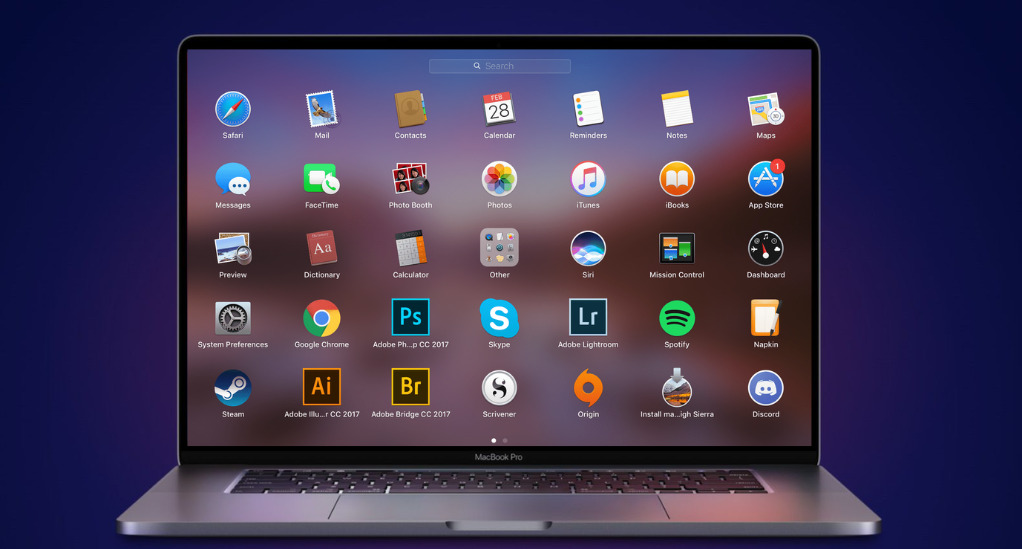
Discovering Pre-installed Applications
Every Mac comes with a suite of pre-installed applications designed to cover most of your basic needs:
- Safari: Apple’s proprietary web browser.
- Mail: An email client to manage and send emails.
- Calendar: Organize your schedule and set reminders.
- Photos: View, edit, and organize your photo library.
- Messages: Send texts, photos, and videos to other Apple devices.
- Notes: Jot down quick thoughts or detailed notes.
… and many more. You can find these applications in the Applications folder or on the Dock.
Launching and Closing Applications
Launching:
- From the Dock: Simply click on the application’s icon.
- Using Spotlight: Press
Cmd + Space, type the application’s name, and hit Enter. - From the Applications Folder: Navigate to the Applications folder and double-click the desired app.
Closing:
- Red Button: Click the red button in the top-left corner of the application window.
- Right-click on Dock: Right-click the application’s icon on the Dock and select ‘Quit’.
- Keyboard Shortcut: Press
Cmd + Qwhen the application is active.
Managing Multiple Applications
macOS excels in multitasking. Here’s how you can manage multiple applications simultaneously:
- Mission Control: Provides an overview of all open windows, desktop spaces, and full-screen apps. Activate it by swiping up with three or four fingers on the trackpad or pressing
Control + Up Arrow. - Split View: Work with two apps side by side without any distractions. Click and hold the green button on an app window, then drag it to the left or right side of the screen.
- App Switcher: Quickly switch between active apps by pressing
Cmd + Tab.
Installing and Uninstalling Applications
Installing:
- Mac App Store: Search for the desired app, click on the download or purchase button, and the app will automatically install.
- Third-party Sources: Download the application file (usually .dmg or .pkg), open it, and drag the application to the Applications folder.
Uninstalling:
- From the Applications Folder: Drag the app to the Trash and empty the Trash.
- Using a Third-party Uninstaller: Some apps come with their uninstallers, or you can use third-party software to ensure all associated files are removed.
Keeping Applications Updated
Regular updates ensure that your apps have the latest features and security patches. To update:
- Mac App Store: Go to the App Store > Updates to see available updates for your apps.
- Third-party Apps: Often have a ‘Check for Updates’ option within the app’s menu.
Mastering macOS Windows
macOS windows are the digital canvases where you interact with your applications and content. Mastering their functions and behaviors is essential for efficient multitasking and overall navigation. In this section, we’ll explore the anatomy of macOS windows and how to make the most of them.
Parts of a Window
While each application’s window may have unique elements, there are common components you’ll find in nearly every macOS window:
- Title Bar: Located at the top of the window, it displays the name of the application and the file or document you’re working on.
- Close, Minimize, and Maximize Buttons: These small buttons on the top left corner allow you to close, minimize, or maximize the window.
- Close (Red Button): Closes the window but doesn’t quit the application.
- Minimize (Yellow Button): Shrinks the window and sends it to the Dock, allowing you to quickly restore it.
- Maximize (Green Button): Expands or resizes the window to fill the available screen space.
- Menu Bar: The menu bar at the top of the screen changes depending on the active application. It contains various menus and options specific to the application.
- Content Area: This is where the application’s content or document is displayed and where you perform your work.
- Toolbars: Some applications have toolbars below the title bar or within the content area. These toolbars contain various functions and tools related to the application.
Moving and Resizing Windows
macOS allows you to have multiple windows open simultaneously, so knowing how to move and resize them is essential:
- Moving a Window: Click and drag the title bar of the window to move it to your desired location on the screen. Release the mouse to drop it.
- Resizing a Window: Hover the mouse cursor over the bottom-right corner of the window until it becomes a diagonal double-sided arrow. Click and drag to resize the window as needed.
Minimizing and Maximizing Windows
- Minimizing a Window: Click the yellow button in the top-left corner of the window to minimize it to the Dock. To restore it, click its icon on the Dock.
- Maximizing a Window: Click the green button in the top-left corner to maximize the window, making it take up the entire screen. Click it again to return the window to its previous size.
Closing Windows vs. Quitting Applications
Unlike some other operating systems, closing a window in macOS does not necessarily quit the associated application. The application can continue running in the background, ready for you to open a new window. To quit an application:
- Click on the application’s window to make it active.
- In the menu bar, click the application name (e.g., “Finder”) and select “Quit [Application Name].”
- Alternatively, press
Cmd + Qon your keyboard to quit the active application.
Understanding window management is crucial for efficient multitasking and organizing your work on macOS. In the next section, we’ll explore the importance of quitting applications and properly shutting down your computer.
Quitting Applications the Right Way
One of the nuances of working with macOS is understanding the difference between closing a window and quitting an application. Unlike some other operating systems, macOS allows applications to remain open even when their windows are closed. In this section, we’ll explore why quitting applications is important and how to do it properly.
Why Quit an Application?
You might wonder why it’s necessary to quit an application when you’re done using it. Here are some key reasons:
- Resource Management: Every open application consumes system resources like memory (RAM) and processing power. Quitting unnecessary applications frees up these resources, which can lead to better overall system performance.
- Battery Life: On laptops, quitting unused applications can extend your battery life, as the CPU isn’t working as hard to keep applications running.
- Organization: Quitting applications helps keep your desktop and Dock clutter-free, making it easier to find and access the applications you need.
Identifying Running Applications
Before you can quit an application, you need to know which ones are currently running. macOS provides several indicators:
- Active Applications in Dock: Open applications have a small black dot below their icons in the Dock.
- Menu Bar: The menu bar at the top of the screen displays the name of the active application. This is the application whose menu options are currently available in the menu bar.
- App Switcher: Press
Cmd + Tabto open the App Switcher, which displays all running applications. You can cycle through them and select the one you want to switch to.
Quitting an Application
To properly quit an application, follow these steps:
- Click on the application’s window to make it active.
- In the menu bar at the top of the screen, click the application name (e.g., “Finder”).
- Select “Quit [Application Name]” from the dropdown menu that appears.
- Alternatively, you can use the keyboard shortcut
Cmd + Qwhile the application is active to quit it. - Note: macOS requires the Finder application to run continuously, so you won’t be able to quit it.
- Alternatively, you can use the keyboard shortcut
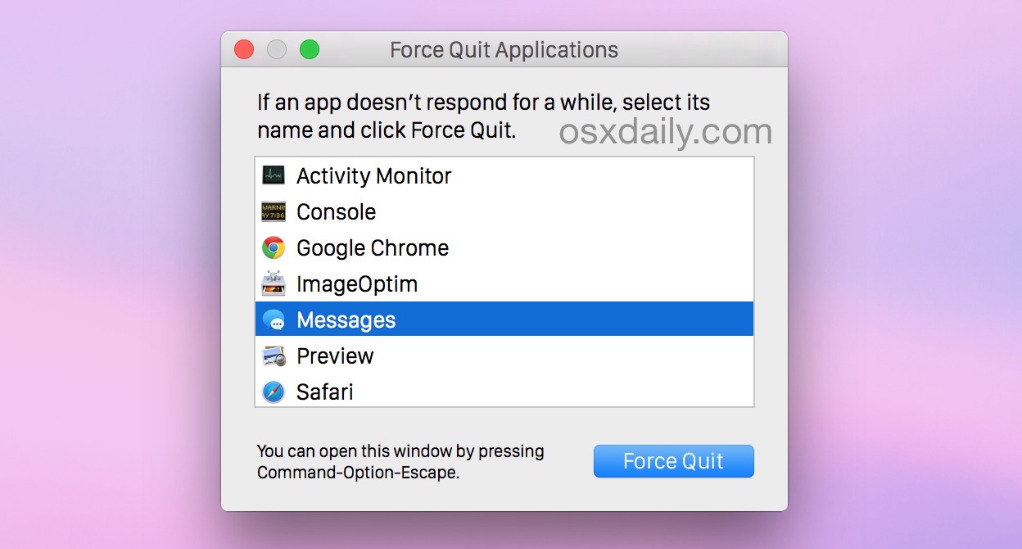
Force Quitting Applications
In rare cases, an application may become unresponsive and not quit using the standard method. In such situations, you can force quit an application:
- Press
Cmd + Option + Escsimultaneously. This opens the “Force Quit Applications” window. - Select the unresponsive application from the list.
- Click the “Force Quit” button.
- Be cautious with force quitting, as it may result in unsaved work being lost. Use it as a last resort.
By quitting applications when you’re finished with them, you can keep your macOS system running smoothly and efficiently. In the next section, we’ll explore the proper ways to shut down your Mac and put it in Sleep mode.
Efficiently Shutting Down Your macOS
When you’re done using your Mac or need to step away from it temporarily, it’s essential to shut it down or put it in Sleep mode properly. In this section, we’ll guide you through the steps for both options and explain when to use each.
Shutting Down macOS
Shutting down your Mac ensures that it turns off completely. It’s the right choice when you’re finished using it for an extended period or when you need to transport it.
Here’s how to shut down your Mac:
- Click the Apple icon in the top-left corner of the screen. This opens the Apple menu.
- Select “Shut Down…” from the dropdown menu. A confirmation dialog will appear.
- Click “Shut Down” in the dialog to initiate the shutdown process.
Your Mac will go through the shutdown sequence and turn off completely. When you’re ready to use it again, press the power button to start it up.
Restarting and Sleep Mode
Next to the “Shut Down” option in the Apple menu, you’ll find a few more choices:
- Restart: This option is useful if your Mac is running slowly or experiencing issues. Restarting will turn it off and then back on, essentially giving it a fresh start.
- Sleep: Sleep mode is a power-saving state that allows your Mac to conserve energy while keeping your current session intact. It’s ideal for short breaks or when you want to resume work quickly.
- If you have a laptop, you can also put it into Sleep mode by simply closing the lid.
Waking Your Computer from Sleep Mode
If your Mac is in Sleep mode, you can quickly wake it to resume where you left off:
- For Desktops: Click the mouse or press any key on the keyboard. Your Mac will wake up, and your screen will display your session as you left it.
- For Laptops: Open the laptop lid, and your Mac will wake up.
Sleep mode is an excellent way to conserve energy and extend your Mac’s battery life on laptops while maintaining a seamless user experience.
Automatic Sleep Mode
macOS is designed to conserve power, so your computer may automatically enter Sleep mode if you haven’t used it for a set period. You can customize these settings in:
- System Preferences: Go to “Energy Saver” and adjust the settings under the “Battery” and “Power Adapter” tabs.
Properly shutting down and using Sleep mode are essential practices for maintaining the health and longevity of your Mac while ensuring that it’s ready and responsive when you need it.
macOS Keyboard Shortcuts
Keyboard shortcuts are like secret pathways that can significantly boost your productivity and efficiency when navigating macOS. They allow you to perform various tasks quickly without the need for a mouse or trackpad. In this final section, we’ll introduce you to some essential macOS keyboard shortcuts to streamline your user experience.
Basic Keyboard Shortcuts
- Cut, Copy, Paste:
- Cut:
Cmd + X - Copy:
Cmd + C - Paste:
Cmd + V
- Cut:
- Undo and Redo:
- Undo:
Cmd + Z - Redo:
Cmd + Shift + Z(orCmd + Y)
- Undo:
- Save and Save As:
- Save:
Cmd + S - Save As:
Cmd + Shift + S
- Save:
Navigation Shortcuts
- Switching Between Open Applications:
Cmd + Tab- Hold down the
Cmdkey and pressTabto cycle through open applications. ReleaseCmdto switch to the selected app.
- Hold down the
- Switching Between Open Windows of the Same Application:
Cmd + ~(the tilde key, usually located above the Tab key)- This is handy when you have multiple windows open in the same application.
- Quickly Access Spotlight Search:
Cmd + Space- Opens the Spotlight search bar, allowing you to quickly search for files, apps, and information.
Window Management Shortcuts
- Minimize Window:
Cmd + M- Minimizes the active window to the Dock.
- Maximize Window:
Cmd + F- Expands the active window to fill the screen. Pressing it again restores the window to its previous size.
- Close Window:
Cmd + W- Closes the active window. Note that this is different from quitting the application.
System and File Shortcuts
- Open Finder:
Cmd + N- Opens a new Finder window.
- Take a Screenshot:
- Capture the entire screen:
Cmd + Shift + 3 - Capture a selected portion:
Cmd + Shift + 4
- Capture the entire screen:
- Lock Your Mac:
Ctrl + Cmd + Q- Locks your Mac’s screen, requiring your password or fingerprint to unlock.
Conclusion
In this comprehensive guide, we’ve embarked on a journey through the macOS interface, equipping you with the knowledge and skills to navigate it like a pro. You’ve discovered the intricacies of the desktop, learned how to manage applications efficiently, mastered the art of working with windows, and unlocked the power of keyboard shortcuts. By embracing these fundamental aspects of macOS, you’ve set yourself on the path to a more productive and enjoyable computing experience.
As you continue to explore macOS, remember that practice and curiosity are your greatest allies. Delve deeper into specific areas, discover advanced features, and personalize your Mac to suit your unique workflow. Whether you’re a newcomer or a seasoned user, the macOS interface is yours to master, and with these newfound skills, you’re well-equipped to make the most of it. Happy navigating, and may your Mac journey be both rewarding and empowering!