How to Optimize Your Windows Experience
In today’s digital age, optimizing one’s computing experience is paramount for both efficiency and security. This comprehensive guide aims to walk users through the intricate steps of understanding and enhancing their Windows system. From delving into system specifications and understanding software compatibility to personalizing the interface and troubleshooting common issues, this article provides a holistic approach to making the most of the Windows environment. Whether you’re a novice user or a seasoned tech enthusiast, this guide offers valuable insights to ensure a smoother, faster, and more secure Windows experience.
Understanding Your System Specifications
In the journey to optimize your Windows experience, the first step is to have a comprehensive understanding of your system specifications. This knowledge forms the foundation upon which you can build a smoother, faster, and more secure computing environment. Let’s delve into the step-by-step process of understanding and utilizing your system specifications to the fullest.
How to Check Your System Specifications
- Right-Click on “This PC” or “My Computer”
- Navigate to your desktop or file explorer and right-click on the “This PC” or “My Computer” icon.
- Select “Properties”
- From the context menu that appears, select “Properties” to open the System window.
- System Window
- Here, you will find detailed information about your system including the processor, installed RAM, system type (64-bit or 32-bit), and more.
- Device Manager
- For more detailed specifications, click on “Device Manager” on the left sidebar to view all the hardware components installed on your system.
Understanding Minimum Requirements for Optimal Performance
Understanding the minimum requirements for various applications and Windows versions is crucial. Below, we provide a comparison table illustrating the minimum requirements for different Windows versions:
| Windows Version | Processor | RAM | Hard Disk Space | Graphics |
|---|---|---|---|---|
| Windows 7 | 1 GHz | 1 GB | 16 GB | DirectX 9 |
| Windows 8 | 1 GHz | 2 GB | 20 GB | DirectX 9 |
| Windows 10 | 1 GHz | 2 GB | 20 GB | DirectX 9/12 |
| Windows 11 | 1 GHz | 4 GB | 64 GB | DirectX 12 |
Leveraging Your System Specifications
To enhance your Windows experience, it is pivotal to align your actions and choices with the specific characteristics and capabilities of your system. Here, we delve deeper into how you can leverage your system specifications to ensure software compatibility, consider hardware upgrades, and optimize settings.
Software Compatibility
Understanding and respecting the boundaries of your system’s specifications is the cornerstone of software compatibility. Here’s how you can ensure a seamless operation:
- Research Before Installation
System Requirements: Before installing any software, always check its system requirements against your computer’s specifications to prevent potential lags and crashes.
Updates and Patches: Keep an eye out for updates and patches that can enhance compatibility with your current system setup.
- Trial and Error
Beta Versions: Sometimes, trying out beta versions of software can help you understand how well it aligns with your system.
Feedback: Provide feedback to developers to help them optimize the software for systems similar to yours.
Hardware Upgrades
To keep pace with the evolving demands of modern software, hardware upgrades become inevitable. Here’s how you can approach this:
- Identifying Potential Upgrades
RAM: Increasing the RAM can significantly enhance the speed and multitasking capabilities of your system.
Storage: Consider switching to a faster SSD to reduce boot and load times, enhancing your overall system responsiveness.
Consulting Experts
Professional Advice: If unsure about what upgrades to undertake, seek advice from professionals or online communities.
Compatibility: Ensure that the new hardware components are compatible with your existing system to prevent conflicts and issues.
Optimized Settings
Tailoring the settings of individual applications to suit your system specs can strike the perfect balance between performance and visual quality. Here’s how:
Individual Application Settings
Graphics: Adjust the graphics settings in applications to match your system’s capabilities, preventing unnecessary strain on your hardware.
Resolution: Setting the correct resolution can ensure a better visual experience without compromising performance.
System-Wide Settings
Power Plans: Windows allows you to choose different power plans that can help optimize performance based on your usage patterns.
Background Applications: Manage applications running in the background to free up system resources for a smoother experience.
System Settings and Personalization
Optimizing your Windows experience goes beyond just enhancing its performance; it also involves tailoring the system to your preferences and needs.
Customizing Your Desktop and Themes
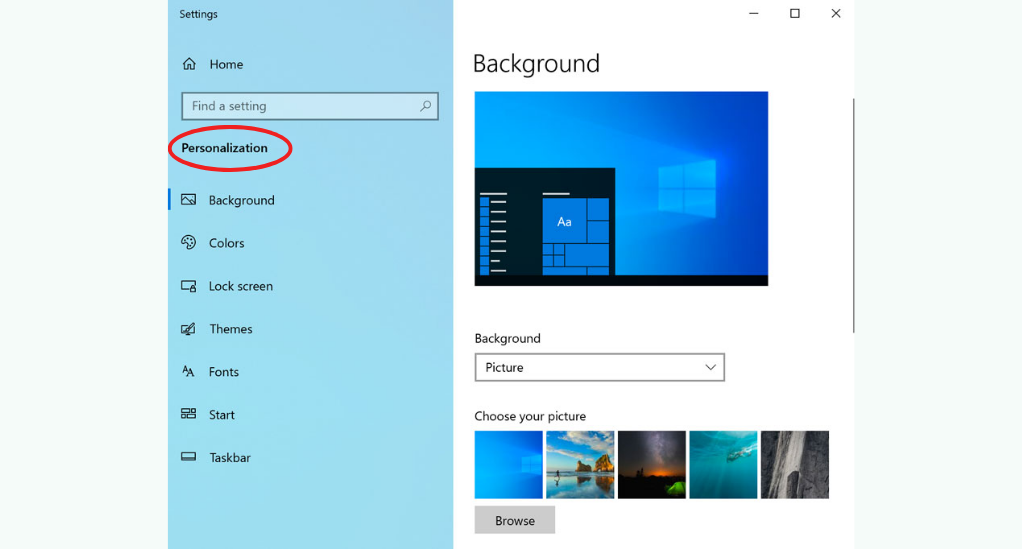
Desktop Background
Right-click on your desktop and select Personalize. Here, you can change your desktop background to a picture, solid color, or slideshow.
Themes
In the same Personalization window, navigate to the Themes tab. Here, you can choose from a variety of themes or create your own by combining different backgrounds, colors, and sounds.
Icons
Customize the icons on your desktop by right-clicking on them and selecting Properties. In the Shortcut tab, you can change the icon by clicking on Change Icon.
Setting Up a User-Friendly Interface
- Taskbar
- Right-click on the taskbar and select Taskbar settings. Here, you can customize the taskbar’s location, size, and the icons it houses.
- Start Menu
- Personalize your start menu by pinning your most-used apps for easy access. You can also group apps into folders to keep it organized.
- File Explorer
- Customize the File Explorer to your liking by choosing which folders appear in the Quick Access menu, and by setting a default view for your files and folders.
Accessibility Features
Windows is equipped with a variety of accessibility features to enhance user-friendliness. You can find the Magnifier tool under Settings > Ease of Access > Magnifier, which allows you to zoom in on your screen for better visibility. Similarly, the Narrator tool, accessible through Settings > Ease of Access > Narrator, reads the text displayed on your screen aloud, aiding individuals with visual impairments. Additionally, for users with visual sensitivities, the high contrast themes can be activated via Settings > Ease of Access > High Contrast, offering a more comfortable viewing experience. These features are designed to make the system more accommodating for all users, ensuring ease of access and usability.
Optimizing System Performance
To truly optimize your Windows experience, it is essential to focus on enhancing the system’s performance. This involves a series of steps that ensure your PC runs smoothly and efficiently.
Disk Cleanup and Defragmentation
- Disk Cleanup
- Accessing the Tool: Navigate to the start menu, type “Disk Cleanup” and select the application.
- Using the Tool: Once opened, select the drive you want to clean. The tool will then scan for files that can be deleted to free up space. Review the files and select those you wish to delete.
- Disk Defragmentation
- Accessing the Tool: Type “Defragment” in the start menu and select “Defragment and Optimize Drives”.
- Using the Tool: In the tool, select the drive you wish to defragment and click “Optimize”. This process can take a while, especially if the drive has not been defragmented in a long time.
Managing Startup Programs to Boost Boot-Time
Accessing Startup Programs
Task Manager: Right-click on the taskbar and select “Task Manager”. Navigate to the “Startup” tab to see a list of programs that start with Windows.
Optimizing Startup Programs
Disabling Unnecessary Programs: Identify programs that are not essential and disable them to reduce boot time. Be cautious not to disable programs vital for system functions.
Performance Options and Visual Effects
To access the Performance Options on your Windows system, right-click on “This PC” or “My Computer” and choose “Properties”. Next, navigate to “Advanced system settings” and under the “Advanced” tab, find and click on “Settings” in the Performance section. This will open the Performance Options window where you can optimize visual effects according to your preference. You have the freedom to prioritize either performance or appearance, or alternatively, allow Windows to automatically select the best option for you, facilitating a customized user experience.
Security and Privacy
In the digital age, securing your personal data and maintaining privacy has never been more critical. In this section, we will walk you through setting up a reliable antivirus solution and protecting your data to optimize your Windows experience fully.
Setting Up a Reliable Antivirus
- Choosing the Right Antivirus
- Research: Before choosing an antivirus, conduct research to understand the features, effectiveness, and user reviews of various options available in the market.
- Compatibility: Ensure the antivirus is compatible with your Windows version and system specifications.
- Installation and Setup
- Download: Once you have chosen an antivirus, download it from the official website to avoid counterfeit software.
- Setup: Follow the on-screen instructions to set up the antivirus. Customize the settings to suit your preferences and security needs.
Protecting Your Data and Maintaining Privacy
Data Encryption
BitLocker: Utilize Windows BitLocker to encrypt your drives, protecting your data from unauthorized access.
File Encryption: Consider encrypting individual files or folders containing sensitive information.
VPN
Choosing a VPN: Select a VPN service that ensures online privacy by masking your IP address.
Setup: Install the VPN software and configure it according to your preferences to maintain privacy while browsing.
Windows Security Features
Windows comes equipped with a variety of security features to safeguard your system. Here are some essential features and how to use them:
- Windows Defender
- Access: Navigate to “Settings” > “Update & Security” > “Windows Security”.
- Usage: Regularly check Windows Security for system health reports and to run security scans.
- Firewall & Network Protection
- Access: Find it in the same Windows Security section.
- Usage: Ensure that the firewall is active to protect your system from unauthorized access.
Software Management
To optimize your Windows experience, it is imperative to manage the software installed on your system effectively. Proper software management not only ensures optimal system performance but also enhances security and usability. In this section, we will guide you through the processes of keeping your software up-to-date and uninstalling unused programs.
Keeping Your Software Up-to-Date
- Windows Updates
- Accessing Updates: Navigate to “Settings” > “Update & Security” to find Windows Update.
- Installing Updates: Regularly check for updates and install them to ensure your system is equipped with the latest features and security patches.
- Application Updates
- Automatic Updates: Many applications offer automatic updates. Ensure this feature is enabled in the settings of your frequently used apps.
- Manual Updates: For apps without automatic updates, periodically check the official website or app store for the latest versions.
Uninstalling Unused Programs to Free Up Space
- Identifying Unused Programs
- Review: Periodically review the list of installed programs and identify those you no longer use.
- System Impact: Consider the impact of each program on the system’s performance and storage space.
- Uninstalling Programs
- Control Panel: Go to “Control Panel” > “Programs” > “Programs and Features” to find the list of installed programs.
- Uninstallation: Right-click on the program you wish to uninstall and select “Uninstall”. Follow the on-screen instructions to complete the process.
Creating a Software Inventory
Listing Essential Software
Documentation: Create a document listing all the essential software installed on your system, including the version number and setup files if possible.
Backup
Setup Files: Keep a backup of the setup files for critical software to facilitate easy reinstallation in the future.
Settings: Backup the settings and configurations of your essential software to restore them quickly in case of a system reset.
Hardware Upgrades
To fully optimize your Windows experience, considering hardware upgrades can be a pivotal step. Upgrading your hardware not only enhances the performance of your system but also extends its lifespan. In this section, we will guide you through when to consider hardware upgrades and how to choose the right hardware for your system.
When to Consider Hardware Upgrades
- System Slowdown
- Symptoms: Frequent system crashes, slow boot times, and lagging applications are signs that your hardware might be due for an upgrade.
- Software Requirements
- New Applications: If you are planning to use new applications with higher system requirements, upgrading your hardware becomes necessary.
- Operating System: Upgrading to a newer Windows version might necessitate hardware upgrades to meet the minimum system requirements.
Choosing the Right Hardware for Your System
- Processor (CPU)
- Compatibility: Ensure the new CPU is compatible with your motherboard.
- Performance: Consider the performance gains you will achieve with the new CPU, keeping in mind your computing needs.
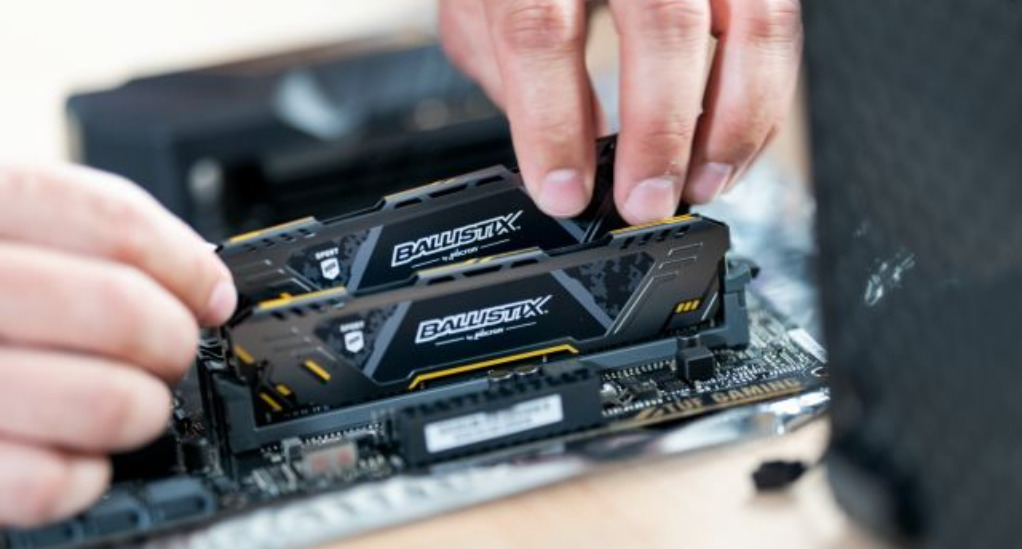
- Memory (RAM)
- Capacity: Increasing the RAM capacity can significantly improve system performance, especially when running multiple applications simultaneously.
- Speed: Consider the speed of the RAM, which can affect the system’s overall speed.
- Storage
- SSD vs HDD: Upgrading from an HDD to an SSD can drastically improve boot times and application load times.
- Capacity: Ensure the new storage device has sufficient capacity to store all your files and applications.
Hardware Compatibility and Installation
Compatibility Check
Motherboard: Ensure the new hardware components are compatible with your motherboard.
Power Supply: Verify that your power supply can handle the new components.
Installation
Professional Help: If you are not comfortable installing the hardware yourself, seek professional assistance.
Guides and Tutorials: If you decide to install the hardware yourself, refer to guides and tutorials to ensure a correct installation process.
Comparison Table: SSD vs HDD
To aid in choosing the right storage solution, here is a comparison between SSD and HDD:
| Aspect | SSD (Solid State Drive) | HDD (Hard Disk Drive) |
|---|---|---|
| Speed | Significantly faster read/write speeds | Slower read/write speeds |
| Durability | More durable due to no moving parts | Less durable due to moving parts |
| Capacity | Generally lower capacity | Higher capacity options available |
| Cost | Higher cost per GB | Lower cost per GB |
Troubleshooting Common Issues
In the journey to optimize your Windows experience, encountering issues is inevitable. However, being equipped with the knowledge to troubleshoot common problems can save you time and frustration. In this section, we will guide you through identifying and fixing common Windows issues and creating a recovery drive for emergencies.
How to Identify and Fix Common Windows Issues
Slow Performance
- Cause: Overloaded startup programs, fragmented hard drive, or malware infection.
- Solution: Clean up disk space, defragment the hard drive, and run a malware scan.
Blue Screen of Death (BSOD)
- Cause: Hardware issues, driver conflicts, or system file corruption.
- Solution: Update drivers, check for hardware issues, and use Windows’ built-in troubleshooting tools.
Network Connectivity Issues
- Cause: Incorrect network settings or issues with the router.
- Solution: Restart the router, run the network troubleshooter, and check the network settings.
Creating a Recovery Drive for Emergencies
Preparation
- USB Drive: Have a USB drive with at least 16 GB of space ready.
- Backup: Ensure you back up all important data before creating a recovery drive as the process will erase all data on the USB drive.
Creating the Recovery Drive
- Access: Type “Create a recovery drive” in the Windows search bar and select the application.
- Process: Follow the on-screen instructions, selecting the appropriate options for your system.
Using the Recovery Drive
- Boot: In case of system failure, boot your PC from the recovery drive.
- Recovery Options: You will be presented with various recovery options to restore your system.
Utilizing Windows Tools and Features
To fully optimize your Windows experience, it is essential to familiarize yourself with the various tools and features that the operating system offers. These built-in utilities can enhance your productivity and streamline your computing experience. In this section, we will explore some of these tools and how to make the most of them.
Exploring Built-in Tools
Task Manager
- Access: Press
Ctrl+Shift+Escor right-click on the taskbar and select “Task Manager.” - Features:
- Performance Tab: Monitor system performance in real-time.
- Startup Tab: Manage startup programs to improve boot time.
Resource Monitor
- Access: Type “Resource Monitor” in the Windows search bar and select the application.
- Features:
- Overview Tab: Get a comprehensive view of CPU, memory, disk, and network usage.
- Disk Tab: Identify which programs are reading or writing to the disk the most.
Making the Most of Windows Accessories
Snipping Tool
- Access: Find it by typing “Snipping Tool” in the Windows search bar.
- Usage:
- New: Capture screenshots with various snip shapes.
- Delay: Set a delay time to capture screenshots after a specified time.
Sticky Notes
- Access: Type “Sticky Notes” in the Windows search bar and select the application.
- Usage:
- Create Notes: Quickly jot down notes and pin them to your desktop.
- Sync: Sync your notes across devices using a Microsoft account.
Windows PowerToys
Windows PowerToys is a suite of utilities designed to enhance Windows usability. Here are some utilities included in PowerToys:
- FancyZones
- Usage: Create custom layouts for window management, enhancing multitasking efficiency.
- PowerRename
- Usage: Batch rename files with advanced options, saving time and effort.
Conclusion
Through this detailed guide, we have ventured through the essential steps to optimize your Windows experience, touching upon personalization, system performance, security, and more. We have equipped you with the knowledge to not only enhance the efficiency and security of your system but also to troubleshoot common issues adeptly.
As we wrap up, remember that optimizing your Windows environment is a continuous journey. With the insights and tools now at your disposal, you are well on your way to creating a Windows experience that is more secure, efficient, and tailored to your needs.