How to Choose the Right Video Editing Software
In today’s digital age, video content reigns supreme. From vloggers sharing their daily lives to businesses promoting their products, everyone is turning to video as a primary mode of communication. However, the quality of the video isn’t just about the camera you use; it’s also about the software you choose to edit it. This article will guide you step by step on how to select the right video editing software for your needs.
Why is Choosing the Right Software Important?
Selecting the right video editing software can make or break your video project. Here’s why:
- Quality of Output: The right software can enhance your video’s quality, making it look professional, even if shot on a basic camera.
- Efficiency: Time is of the essence. Efficient software can streamline your editing process, saving you time and effort.
- Features: Different software offers various features. Depending on your project, you might need advanced effects, sound editing capabilities, or color correction tools.
The Challenge of Choice
With a plethora of video editing software available in the market, making a choice can be overwhelming. Here’s a breakdown of the types of software available:
| Type of Software | Best For | Examples |
|---|---|---|
| Beginner | Novices, those new to video editing | iMovie, Windows Movie Maker |
| Intermediate | Those with some experience, needing more features | Adobe Premiere Elements, Corel VideoStudio |
| Professional | Advanced users working on commercial projects | Adobe Premiere Pro, Final Cut Pro, DaVinci Resolve |
Factors to Consider
Before diving into the specifics of each software, it’s essential to understand your needs. Here are some questions to guide your decision:
- Purpose: Are you editing a simple vlog, a corporate video, or a feature-length film?
- Platform: Are you using a Mac, Windows, or Linux? Not all software is available on every platform.
- Budget: Are you willing to invest in software, or are you looking for free options?
- Learning Curve: Do you have the time and patience to learn a new software, or do you need something user-friendly?
Understanding Video Editing Basics
Before diving deep into the world of video editing software, it’s essential to grasp some foundational concepts. These basics will not only enhance your understanding but also guide you in making the most of whichever software you choose.
Important Video Editing Terms to Know
- Aspect Ratio: This refers to the width-to-height ratio of your video frame. Common aspect ratios include 16:9 (widescreen) and 4:3 (standard). Your choice of aspect ratio can influence the viewer’s experience, especially on different devices.
- A-Roll: This is your primary footage, the main content that drives your video’s narrative. For instance, in an interview, the A-Roll would be the actual responses of the interviewee.
- B-Roll: Supplementary footage that adds depth and context to your A-Roll. Using the interview example, B-Roll could be shots of the interviewee’s environment, close-ups of their hands, or any visuals that complement the primary footage.
- Cut: A transition where one shot changes to another. It’s the most basic and commonly used transition in video editing.
The Difference Between A-Roll and B-Roll Footage
Understanding the distinction between A-Roll and B-Roll is crucial for storytelling. While A-Roll carries the main narrative, B-Roll provides the visual context, making your content more engaging. For instance:
Understanding Aspect Ratios and Their Significance
Different platforms and devices often favor specific aspect ratios. For instance:
- 16:9: Ideal for YouTube, widescreen TVs, and most modern devices.
- 1:1: Square videos, popular on platforms like Instagram.
- 9:16: Vertical videos, optimized for mobile viewing on platforms like TikTok and Instagram Stories.
Choosing the right aspect ratio ensures your video looks its best on the intended platform. It’s also worth noting that some video editing software offers preset project settings for various aspect ratios, making it easier for users.
Choosing Software Based on Experience
The world of video editing is vast, with tools ranging from simple drag-and-drop interfaces to intricate platforms with a myriad of features. Your experience level plays a pivotal role in determining which software will best serve your needs.
Beginner: Starting Your Video Editing Journey
If you’re new to video editing, diving into a professional-grade software can be overwhelming. Here’s what beginners should consider:
- User-Friendly Interface: Look for software with intuitive designs, clear icons, and easy-to-navigate menus.
- Tutorials and Support: Opt for platforms that offer comprehensive tutorials, guides, and customer support.
- Basic Features: At this stage, you might not need advanced effects. Focus on basic cutting, trimming, and text overlay features.
Recommendations: iMovie (for Mac users), Windows Movie Maker, and Shotcut.
Intermediate: Elevating Your Editing Skills
Once you’ve got the basics down, you might crave more advanced functionalities:
- Enhanced Transitions and Effects: Intermediate software often offers a wider range of transitions and visual effects.
- Color Correction: This allows you to adjust the color and lighting of your footage for a more polished look.
- Audio Editing: Enhanced audio editing tools can elevate your video’s overall quality.
Recommendations: Adobe Premiere Elements, Corel VideoStudio, and Filmora.
Professional: For the Seasoned Editors
For those working on commercial projects or aspiring to produce cinematic content, professional software is the way to go:
- Multi-Track Editing: This allows for intricate layering of video and audio tracks.
- Advanced Color Grading: Dive deep into color adjustments for a cinematic feel.
- Special Effects: From green screen capabilities to 3D effects, the possibilities are endless.
Recommendations: Adobe Premiere Pro, Final Cut Pro, and DaVinci Resolve.
Making the Right Choice: Questions to Ask Yourself
- What’s my end goal? Are you editing a family vacation video, a YouTube vlog, or a documentary?
- How much time am I willing to invest? Learning a new software can be time-consuming. Ensure you choose a platform that aligns with the time you can dedicate.
- What’s my budget? While some professional software can be pricey, there are often student discounts or monthly subscription options available.
The Value of Free Trials

In the realm of video editing software, free trials serve as a golden opportunity to test the waters before diving in. They offer a glimpse into the software’s capabilities, interface, and overall user experience. But how can you make the most of these trials, and why are they so crucial?
Understanding the Essence of Free Trials
Free trials, typically ranging from 7 to 30 days, are a marketing strategy employed by software companies to attract potential users. For users, it’s a risk-free way to:
- Experience the Interface: Get a feel for the software’s layout, design, and user-friendliness.
- Test Features and Tools: Explore the range of tools available, from basic trimming to advanced color grading.
- Assess Performance: Understand how the software performs on your device, especially in terms of speed and responsiveness.
Maximizing Your Free Trial Experience
To truly benefit from a free trial, consider the following steps:
- Set Clear Objectives: Before starting, list down what you want to achieve with the trial. Whether it’s testing the software’s rendering speed or its library of transitions, having clear goals will ensure you make the most of the limited trial period.
- Dedicate Time: Allocate specific blocks of time to explore the software during the trial period. This ensures you delve deep, rather than just skimming the surface.
- Seek Tutorials: Most companies offer tutorials for their software. These can be invaluable in quickly understanding the software’s capabilities.
- Compare and Contrast: If you’re trialing multiple software options, maintain a comparison chart. Note down features, ease of use, performance, and any other criteria important to you.
Post-Trial: Making the Decision
Once the trial period concludes, reflect on your experience:
- Did the software meet your objectives?
- Was the learning curve manageable?
- How does the software’s price align with its offerings?
Remember, the goal is to find software that not only meets your current needs but also aligns with your future aspirations in video editing.
Prioritizing Intuitive Workflow
In the intricate dance of video editing, where precision meets creativity, an intuitive workflow can be the difference between a seamless editing experience and a frustrating one. But what exactly is an “intuitive workflow,” and why is it so pivotal in the realm of video editing software?
Decoding the Concept of Intuitive Workflow
At its core, an intuitive workflow in video editing software refers to:
- User-Friendly Interface: A layout that’s easy to navigate, with clearly labeled tools and a logical arrangement.
- Streamlined Processes: Efficient pathways to execute common tasks, minimizing the number of steps required.
- Consistent Design: Uniformity in icons, buttons, and tool placements, ensuring you don’t have to relearn navigation with every update.
The Impact of Intuitive Workflow on Editing
- Boosted Efficiency: With tools and features at your fingertips, you can execute tasks faster, reducing the time spent searching for the right tool or option.
- Reduced Learning Curve: A logical, intuitive design means even those new to the software can quickly grasp its functionalities.
- Enhanced Creativity: When you’re not bogged down by a complicated interface, your mind is free to focus on the creative aspects of editing.
Features That Enhance Workflow
- Customizable Workspaces: The ability to rearrange panels and tools to suit your editing style.
- Shortcut Keys: Keyboard shortcuts for common tasks, speeding up the editing process.
- Preview Options: Real-time previews that allow you to view edits without rendering the entire video.
- Drag-and-Drop Functionality: Simplifying tasks like importing media or adding transitions.
Choosing Software with an Intuitive Workflow
When evaluating video editing software, consider:
- Personal Comfort: Sometimes, what’s intuitive for one person might not be for another. Trust your instincts and personal comfort with the software.
- Community Feedback: Online forums and reviews can provide insights into the software’s user-friendliness.
- Trial and Error: As discussed in the previous section, free trials are invaluable. Use them to gauge the software’s workflow.
Budget Considerations: Finding the Perfect Balance
In the vast landscape of video editing software, prices can range from entirely free to several hundreds of dollars. While it’s tempting to equate price with quality, the truth is more nuanced. Let’s delve into the financial aspect of choosing video editing software, ensuring you get the best bang for your buck.
The Myth of “More Expensive is Better”
A higher price tag doesn’t always equate to a better product. Some expensive software comes packed with features that, while impressive, might be overkill for a hobbyist or beginner. Conversely, some affordable or even free software can offer a robust set of tools perfect for everyday editing.
Factors Influencing Software Pricing
- Features and Capabilities: Advanced tools, special effects, and professional-grade color grading often come at a premium.
- Brand Reputation: Established brands with a long-standing reputation in the industry might price their products higher.
- Target Audience: Software aimed at professionals in the film and TV industry will typically be more expensive than those targeting casual users or beginners.
- Updates and Support: Regular updates, customer support, and access to online resources can influence the price.
Strategies to Maximize Your Investment
- Define Your Needs: List down the essential features you need. This will prevent you from paying for bells and whistles you’ll never use.
- Explore Free Versions: Many premium software options offer free or lite versions with limited features. These can be a great starting point.
- Look for Discounts: Students, educators, and non-profits often qualify for discounts. Seasonal sales and promotions can also offer significant savings.
- Consider Subscription Models: Some software is available on a monthly or yearly subscription basis, which can be more affordable than a one-time purchase.
Recommended Software Across Price Ranges
| Price Range | Software | Best For |
|---|---|---|
| Free | DaVinci Resolve, Shotcut, Lightworks | Beginners, hobbyists |
| Under $100 | Adobe Premiere Elements, Filmora, Corel VideoStudio | Intermediate users, content creators |
| $100 and above | Adobe Premiere Pro, Final Cut Pro, Avid Media Composer | Professionals, commercial projects |
Audio Editing Capabilities: The Unsung Hero of Video Production
While visuals often take center stage in video editing, sound plays an equally pivotal role in shaping the viewer’s experience. From subtle background music to impactful sound effects, audio can evoke emotions, set the mood, and enhance storytelling. Let’s delve into the significance of integrated audio editing tools and what to look for in your video editing software.
The Importance of Sound in Video Editing
- Setting the Mood: Background music can create an ambiance, whether it’s a suspenseful thriller or a heartwarming romance.
- Enhancing Storytelling: Sound effects can accentuate key moments, making them more memorable.
- Guiding the Viewer: Audio cues can direct the viewer’s attention, ensuring they focus on crucial elements.
Integrated vs. Standalone Audio Editing
When it comes to the realm of audio editing in video projects, there’s a distinction between integrated and standalone audio editing. Some video editing software provides robust audio editing capabilities, allowing users to seamlessly edit both video and audio within the same platform. This “Integrated Audio Editing” approach is particularly convenient and is ideal for projects that may not demand intricate audio work. On the other hand, there are instances where the provided audio tools might be basic, leading users to seek standalone audio editing software. This “Standalone Audio Editing” offers a suite of advanced tools and features, making it the go-to choice for projects where audio is paramount, such as podcasts or music videos.
Features to Look for in Integrated Audio Editing
- Audio Effects: Reverb, echo, and distortion can add depth and character to your sound.
- Equalization: Adjusting the balance between frequency components can enhance audio clarity.
- Noise Reduction: Essential for removing unwanted background noises or hisses.
- Audio Transitions: Smooth out abrupt changes in audio tracks, ensuring a seamless listening experience.
- Volume Control: Adjust the loudness of different audio elements, ensuring a balanced sound.
Popular Video Editing Software with Strong Audio Capabilities
- Adobe Premiere Pro: Offers a comprehensive suite of audio tools, and seamless integration with Adobe Audition, a professional audio workstation.
- DaVinci Resolve: Apart from its color grading tools, it boasts the Fairlight audio post-production suite, offering advanced audio editing capabilities.
- Final Cut Pro: With its integrated Logic Pro plugins, it provides a range of audio effects and advanced editing tools.
Timeline Functionalities: The Backbone of Video Editing
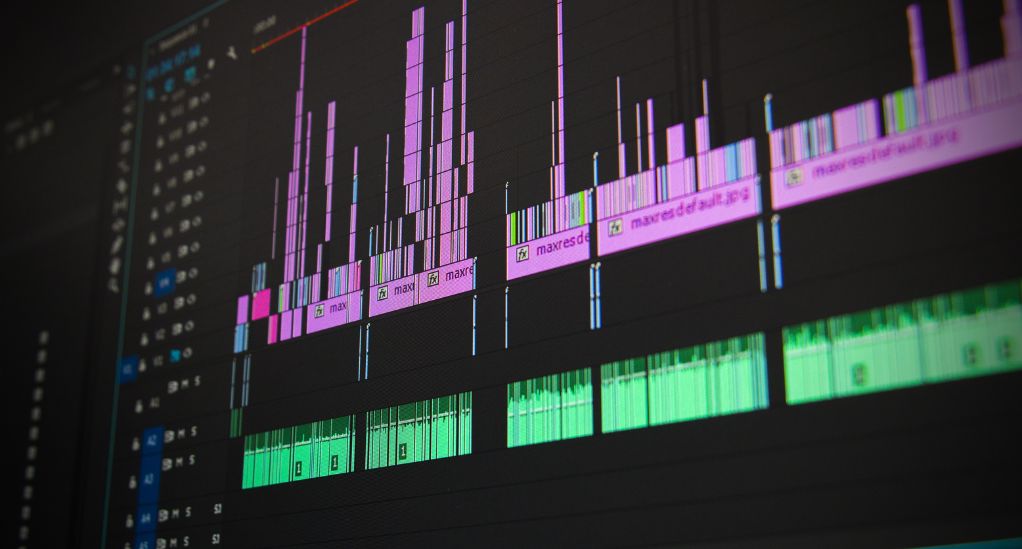
The timeline is where the magic of video editing truly comes to life. It’s the canvas upon which editors arrange, trim, and layer video and audio clips to craft a cohesive narrative. Understanding the functionalities and versatility of the timeline is crucial for both novice and seasoned editors. Let’s dive into the significance of the timeline and how it can shape your editing experience.
What is the Timeline?
At its core, the timeline is a sequential representation of your video project. It displays video and audio tracks, allowing editors to visually arrange and synchronize media clips. Each track can hold different elements, such as video footage, audio clips, text overlays, and effects.
Key Features of an Effective Timeline
- Multi-Track Editing: The ability to layer multiple video and audio tracks offers flexibility, especially for complex projects with various elements.
- Zoom In/Out: This feature allows for precise editing, ensuring accurate cuts and transitions.
- Magnetic Timeline: Found in software like Final Cut Pro, this feature ensures that clips automatically close gaps, reducing the risk of black frames.
- Clip Linking: When video and audio clips are linked, editing one automatically adjusts the other, ensuring synchronization.
- Markers and Annotations: These tools help editors mark specific points on the timeline for reference or collaboration.
Benefits of a Versatile Timeline
- Efficiency: A well-organized timeline speeds up the editing process, reducing the time spent searching for specific clips or sections.
- Precision: Advanced timeline features allow for frame-by-frame editing, ensuring accurate cuts and transitions.
- Creativity: Multiple tracks provide the freedom to layer effects, experiment with transitions, and craft a unique narrative.
Tips for Navigating the Timeline
- Stay Organized: Regularly label and color-code clips. This not only keeps the timeline tidy but also streamlines the editing process.
- Use Shortcuts: Familiarize yourself with keyboard shortcuts specific to the timeline. These can significantly speed up tasks like cutting, copying, and moving clips.
- Regularly Save: Ensure you save your progress frequently. This prevents any loss of work due to software crashes or unexpected shutdowns.
Envisioning Your End Product: Crafting with the Finish Line in Mind
Every video editing project starts with a vision—a final product that you aim to achieve. Whether it’s a cinematic masterpiece, a snappy social media clip, or an informative tutorial, having a clear picture of your end goal is paramount. This section will guide you through the importance of envisioning your end product and ensuring your video editing software aligns with that vision.
The Significance of the End Product Vision
- Guided Editing Process: Knowing your end goal helps streamline the editing process, ensuring every cut, transition, and effect serves a purpose.
- Resource Management: It helps in determining the kind of resources (footage, music, graphics) you’ll need and how to allocate them effectively.
- Audience Engagement: Crafting with the audience in mind ensures the final product resonates with them, be it evoking emotions or conveying information.
Determining Output Formats and Resolutions
The platform where your video will be showcased plays a significant role in determining the appropriate output format and resolution:
- For YouTube: MP4 format with a 16:9 aspect ratio is standard. Resolutions can range from 1080p for standard HD to 4K for ultra HD content.
- For Instagram: Square (1:1) or vertical (4:5) videos are popular, with a recommended resolution of 1080×1080 pixels for square videos.
- For Professional Screenings: Formats like ProRes or DNxHD/HR are preferred, with resolutions going up to 4K or even 8K.
Software Support for Your Vision
Ensure the video editing software you choose:
- Supports Desired Resolutions: Not all software supports 4K or 8K editing. If ultra-high-definition is your goal, ensure your software can handle it.
- Offers Multiple Export Options: The software should provide a range of output formats, catering to various platforms and devices.
- Maintains Quality: The software should export videos without significant quality loss, retaining the sharpness, color accuracy, and audio clarity of the edited project.
Future-Proofing Your Content
With rapid technological advancements, it’s wise to consider future trends:
- Higher Resolutions: Even if you don’t need 4K or 8K now, it might become standard in the future. Choosing software that supports higher resolutions ensures you’re prepared.
- VR and 360° Videos: As virtual reality and 360° content gain popularity, software that can edit such footage might be beneficial.
Learning and Upgrading: The Continuous Journey of Video Editing
The realm of video editing is dynamic, with new techniques, tools, and trends emerging regularly. As with any craft, continuous learning and adaptation are key to staying relevant and producing top-notch content. In this section, we’ll explore the importance of ongoing education in video editing and the value of progressing from basic software versions to more advanced ones.
The Ever-Evolving Landscape of Video Editing
Video editing isn’t static. From the transition to digital from analog to the rise of 4K and now 8K footage, the field is in constant flux. Factors driving these changes include:
- Technological Advancements: Faster processors, better graphics cards, and advanced storage solutions enable more intricate editing.
- Consumer Demands: As audiences become more tech-savvy, they seek higher quality, more immersive content.
- Innovations in Filmmaking: Techniques like drone footage, 360° videos, and virtual reality are reshaping the editing landscape.
Starting with Basic Versions
For those new to video editing, it’s wise to start with basic or beginner versions of software. Benefits include:
- Simplified Interface: Fewer features mean less overwhelm, allowing you to grasp the fundamentals.
- Lower Costs: Basic versions are often more affordable, making them ideal for those testing the waters.
- Foundational Skills: Mastering the basics ensures a solid foundation, upon which more advanced skills can be built.
Transitioning to Advanced Software
As you become more adept with the foundational aspects of video editing, transitioning to advanced software becomes a logical next step. Upgrading to professional versions brings with it a host of benefits. Firstly, users gain access to “Advanced Tools” that range from intricate color grading techniques to complex special effects, broadening the scope of what can be achieved. Additionally, these advanced software versions often come with “Efficiency Enhancements” such as batch processing, multi-camera editing, and sophisticated rendering options, all designed to make the editing process more streamlined and time-efficient. Furthermore, for those working on larger projects or within teams, the “Collaboration Capabilities” of professional software become invaluable. These tools facilitate team collaboration, ensuring smooth coordination and a unified vision for the final product.
The Value of Continuous Learning
- Stay Updated: Regularly updating your software ensures you have the latest tools and features at your disposal.
- Expand Skill Set: Explore online courses, workshops, and tutorials to learn new techniques and stay ahead of industry trends.
- Join Communities: Engaging with other editors, be it online forums or local groups, can provide insights, feedback, and collaboration opportunities.
Conclusion
Choosing the right video editing software is crucial, acting as the bridge between your vision and the final product. From beginners to professionals, the right tool can vary based on needs, budget, and expertise. It’s not just about features; it’s about finding a platform that complements your storytelling style. As technology and trends evolve, continuous learning and adaptation are key. With a clear understanding of your goals and the available tools, you’re well-equipped to craft compelling narratives in the dynamic world of video editing.