How to Enhance Productivity with Windows Hidden Features
Windows, the dominant operating system for personal computers, has evolved significantly over the years. With each iteration, Microsoft introduces a plethora of features, some of which become instantly popular, while others remain hidden gems, waiting to be discovered by curious users. These lesser-known features, often overlooked in the vast expanse of the operating system, can significantly boost productivity, streamline tasks, and enhance the overall user experience.
In this article, we will delve deep into the world of Windows to uncover some of these hidden treasures. Whether you’re a seasoned Windows veteran or a newcomer, there’s always something new to learn. By the end of this guide, you’ll be equipped with knowledge that can transform your everyday computing tasks, making them quicker, more efficient, and enjoyable.
| Did You Know? |
|---|
| Windows has been around for over three decades, and with each version, hundreds of new features are added. This means that even if you think you know Windows inside out, there’s always a hidden feature or shortcut waiting to be discovered! |
Mouse Hover Window Activation
One of the first features that often surprises many Windows users is the “Mouse Hover Window Activation.” This feature, while subtle, can make a significant difference in how you interact with multiple open windows.
What is it?
At its core, the Mouse Hover Window Activation allows users to activate a window by merely hovering the mouse cursor over it. This eliminates the need for an additional click to bring a background window to the forefront. Especially for those who multitask with several applications open simultaneously, this feature can be a game-changer.
Why is it useful?
Imagine working on a report while referencing data from a spreadsheet and an internet browser. Instead of constantly clicking between windows, you can seamlessly hover over the desired window to bring it into focus. This not only saves time but also reduces the repetitive strain on your fingers from excessive clicking.
How to enable it?
Activating this feature is straightforward:
- Navigate to the Control Panel.
- Click on the Ease of Access Center.
- Choose the option that says “Make the mouse easier to use.”
- Under the section “Make it easier to manage windows,” you’ll find an option labeled “Activate a window by hovering over it with the mouse.” Simply check this box.
- Click “OK” to enable the setting.
| Quick Tip |
|---|
| If you find the hover activation too swift, you can adjust the hover duration. This means you can set a slight delay, ensuring that windows don’t activate too quickly as you move your cursor across the screen. |
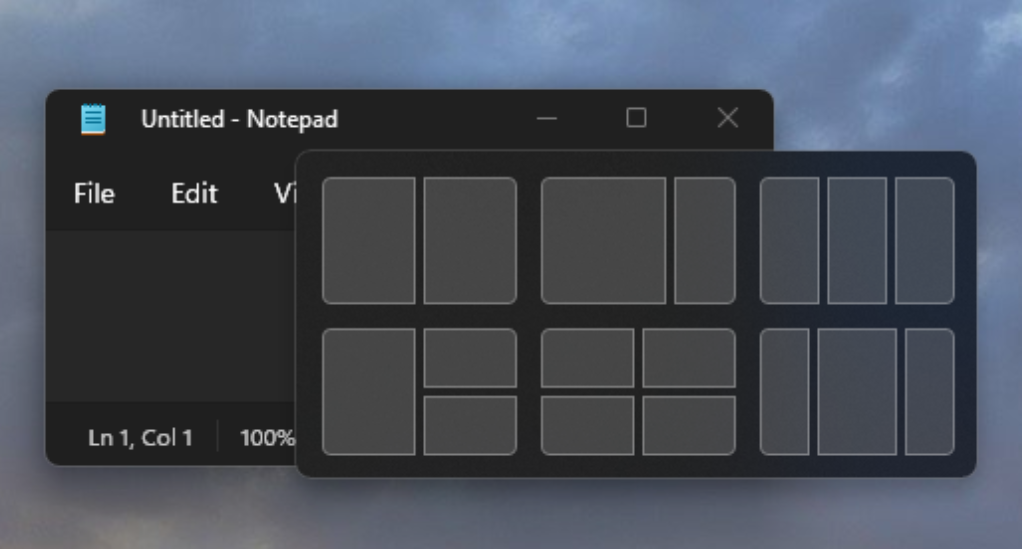
Easy Window Arrangement
In today’s digital age, screen real estate is invaluable. Whether you’re juggling multiple tasks, comparing documents side by side, or simply multitasking, the ability to efficiently arrange your windows can drastically improve your workflow. Windows offers a nifty feature for this exact purpose: Easy Window Arrangement.
What is it?
Easy Window Arrangement allows users to swiftly position open windows in specific sections of the screen using simple keyboard shortcuts. This feature is particularly handy for those without the luxury of multiple monitors, as it maximizes the use of available screen space.
Why is it useful?
Consider a scenario where you’re drafting an email while referencing a PDF document. Instead of constantly switching between the two or awkwardly resizing windows, you can have both windows perfectly positioned side by side, making referencing a breeze.
How to use it?
The magic lies in the combination of the Windows key and the arrow keys:
- Windows key + Left arrow: Moves the active window to the left half of the screen.
- Windows key + Right arrow: Moves it to the right half.
- Windows key + Up arrow: Maximizes the window.
- Windows key + Down arrow: Minimizes the window or, if already minimized, restores it to its previous size.
For those with multiple monitors, these shortcuts also work across screens, allowing for a seamless transition of windows between displays.
| Did You Know? |
|---|
| If you press the Windows key + Shift followed by the left or right arrow, you can move the active window to another monitor entirely. A handy trick for multi-monitor setups! |
Quick Taskbar Launching
The taskbar, located at the bottom of your Windows screen, is more than just a place to pin your favorite apps—it’s a gateway to efficient multitasking. One of the hidden treasures of the taskbar is the ability to launch applications swiftly using keyboard shortcuts.
What is it?
Quick Taskbar Launching allows users to instantly open or switch to applications pinned to the taskbar using a combination of the Windows key and number keys.
Why is it useful?
In the midst of a busy workday, every second counts. Instead of navigating to the desired application with your mouse, a simple keystroke can get the job done faster. This feature is particularly beneficial for those who rely on a set of core applications throughout their day, such as web browsers, email clients, or specific software tools.
How to use it?
The process is straightforward:
- Look at the sequence of your pinned applications on the taskbar from left to right.
- To launch or switch to an application, press the Windows key followed by the number corresponding to its position. For instance, if Chrome is the first pinned application, Windows key + 1 will open or switch to Chrome. If Microsoft Word is the third application, Windows key + 3 will do the trick.
| Pro Tip |
|---|
| You can also use these shortcuts to access the right-click context menu of pinned applications. Simply press the Shift key in combination with the shortcut (e.g., Shift + Windows key + 1) to view more options for the respective application. |
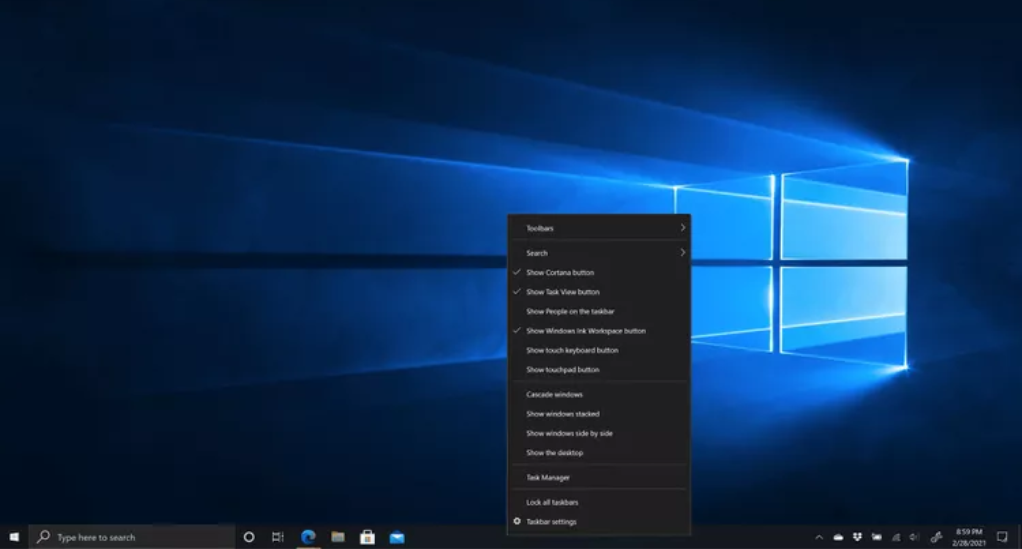
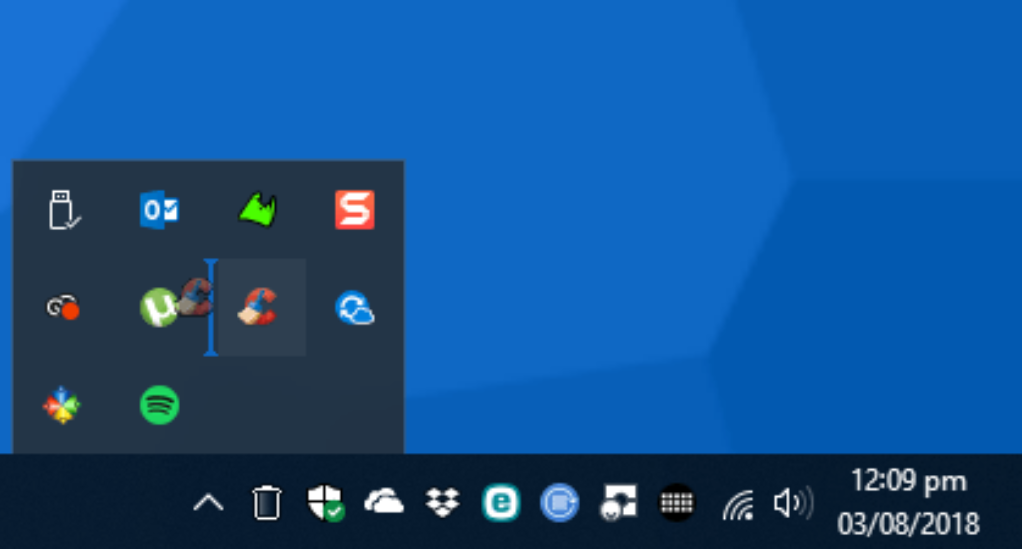
Rearranging the System Tray
The system tray, often found on the bottom right corner of your Windows screen, is a hub for quick access to various system functions and applications running in the background. Over time, with the installation of new software and tools, this area can become cluttered. However, Windows offers a simple solution to keep this area organized and tailored to your preferences.
What is it?
The ability to rearrange and manage icons in the system tray ensures that you have quick access to the tools and functions you use most frequently, while less frequently used items can be tucked away.
Why is it useful?
A well-organized system tray allows for faster access to essential functions, reduces visual clutter, and enhances the overall user experience. Instead of sifting through numerous icons to find the one you need, you can position your most-used items for immediate access.
How to use it?
Managing the system tray is a breeze:
- Rearrange Icons: Simply click and drag any icon in the system tray to change its position. This allows you to prioritize icons based on your usage.
- Hide/Show Icons: Click on the upward-facing arrow in the system tray to reveal hidden icons. From here, you can drag icons in or out of this hidden area. Icons dragged into this area will only be visible when you click the arrow, helping reduce clutter.
- Customize Icon Behavior: Right-click on an empty space in the taskbar, select “Taskbar settings”, and then click on “Select which icons appear on the taskbar.” Here, you can choose which icons are always visible, and which ones are automatically hidden.
| Did You Know? |
|---|
| Some applications offer additional settings for their system tray icons. Right-clicking on these icons may reveal options to change their behavior, appearance, or notifications. |
Night Light for Healthier Computing
In the digital age, many of us spend countless hours staring at screens, often extending our work or leisure activities well into the night. While technology has undoubtedly brought convenience to our lives, it’s essential to consider its impact on our health, particularly our eyes. Enter the “Night Light” feature, a hidden gem in Windows designed to reduce eye strain and promote better sleep.
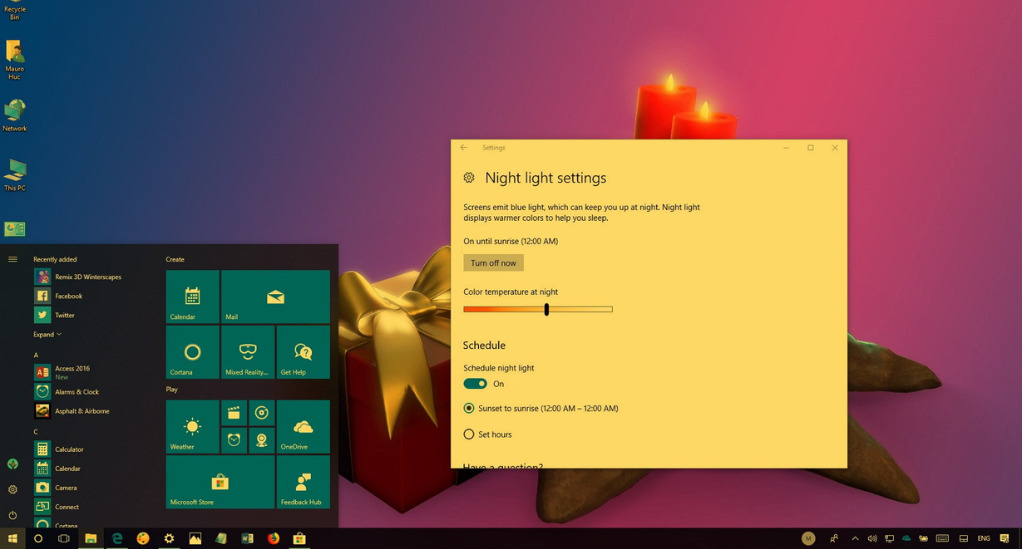
What is it?
Night Light is a built-in Windows feature that adjusts the color temperature of your screen, reducing the blue light emitted. This shift to warmer colors is gentler on the eyes and can help improve sleep quality if you use your computer before bedtime.
Why is it useful?
Exposure to blue light, especially during the evening, can interfere with the production of melatonin, a hormone responsible for regulating sleep. By reducing blue light exposure, Night Light can help users maintain a natural sleep cycle, ensuring they wake up feeling refreshed.
How to enable it?
Activating Night Light is simple:
- Go to Settings.
- Select System and then Display.
- Under the “Color” section, you’ll find the Night Light option. Toggle it on.
- For more customization, click on Night Light settings. Here, you can adjust the color temperature and set a schedule for automatic activation and deactivation based on your preferences.
| Quick Tip |
|---|
| For those who follow a strict routine, setting Night Light to turn on automatically at sunset and off at sunrise can be a convenient way to ensure reduced blue light exposure during the evening. |
Instant Access to Task Manager
The Task Manager is an indispensable tool for Windows users, offering a comprehensive overview of system performance, running applications, and background processes. While many are familiar with its basic functionalities, few realize the power and convenience of accessing it instantly, especially during system hiccups or unresponsive applications.
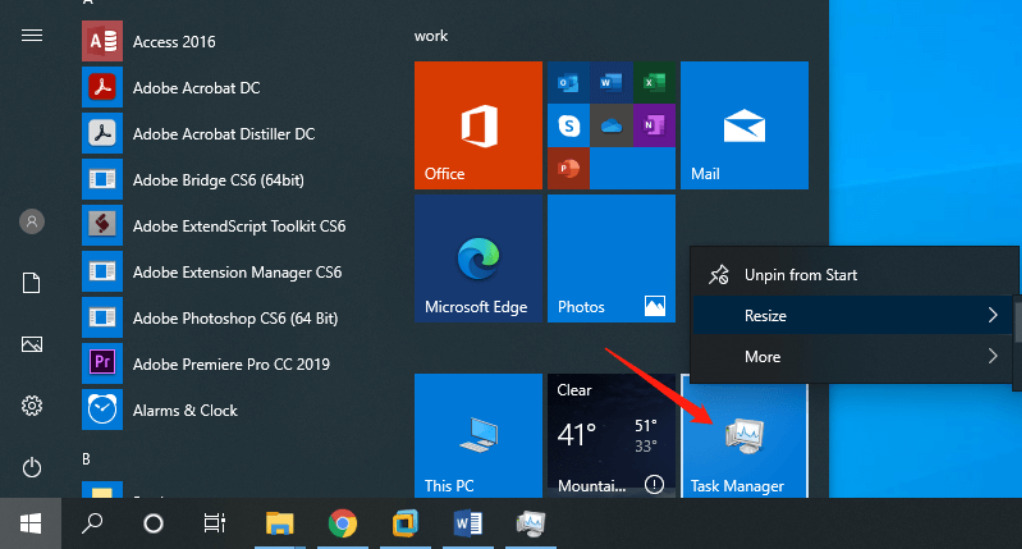
What is it?
The Task Manager provides real-time data on CPU, memory, and disk usage. It allows users to monitor and manage running applications, end unresponsive tasks, and even delve into advanced system performance metrics.
Why is it useful?
There are moments when an application might freeze or become unresponsive. Instead of waiting or restarting the computer, the Task Manager provides a quick solution to end the task and free up system resources. Additionally, it’s a valuable tool for those looking to optimize their system’s performance, offering insights into resource-heavy applications and background processes.
How to access it instantly?
While there are several ways to open the Task Manager, here’s the quickest:
- Press Ctrl + Shift + Escape simultaneously. This shortcut instantly brings up the Task Manager, allowing for immediate access.
For those more accustomed to the traditional method:
- Press Ctrl + Alt + Delete and select Task Manager from the menu.
| Did You Know? |
|---|
| The Task Manager has an advanced mode, revealing detailed performance graphs, startup impact of applications, and even user account details. To access this, simply click on “More details” at the bottom of the Task Manager window. |
Screenshot Tricks with Windows Snipping Tool
Screenshots are an integral part of our digital lives, allowing us to capture and share moments, document issues, or simply save information for later reference. While the basic screenshot functionality has been around for ages, Windows has introduced advanced tools that offer more flexibility and precision in capturing screen content.
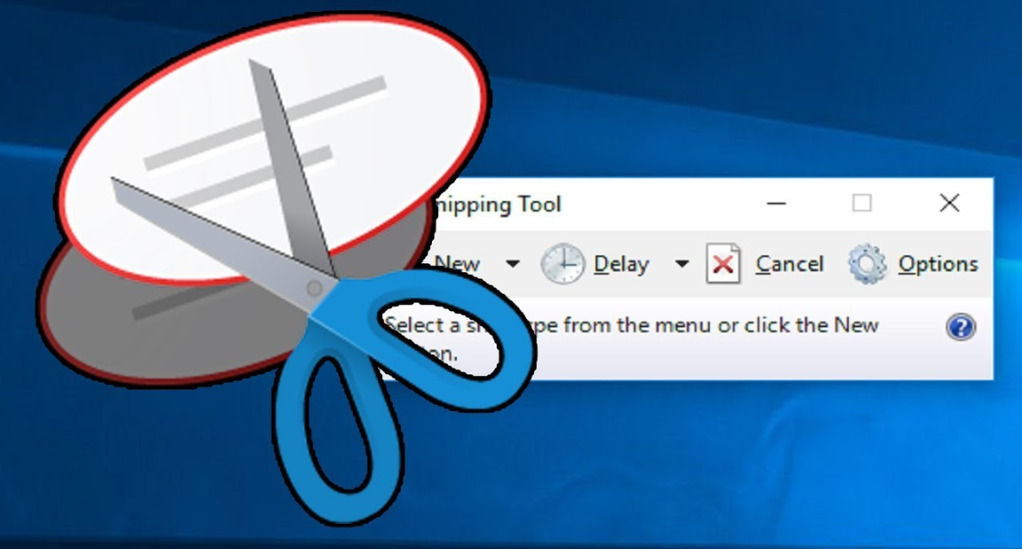
What is it?
The Windows Snipping Tool, and its successor “Snip & Sketch,” are built-in applications designed to provide enhanced screenshot capabilities. Beyond just capturing the entire screen, these tools offer various modes, allowing users to snip specific areas, freeform regions, or individual windows.
Why is it useful?
Whether you’re creating a tutorial, documenting an error, or simply sharing a snippet of your screen, the ability to capture specific areas without the need for additional editing saves time and effort. The Snipping Tool’s versatility makes it a go-to for many users seeking more control over their screenshots.
How to use it?
Accessing and utilizing the Snipping Tool is straightforward:
- Press Win + Shift + S simultaneously. This will dim your screen and present you with a small toolbar at the top.
- Choose from the available options: Rectangular Snip, Freeform Snip, Window Snip, or Fullscreen Snip.
- Once selected, click and drag to capture the desired area or select the specific window.
- The captured screenshot is automatically copied to your clipboard, ready to be pasted wherever needed.
For those who prefer using the dedicated application:
- Search for “Snipping Tool” or “Snip & Sketch” in the Start menu and launch the application. From there, you can choose the desired mode and capture your screenshot.
| Pro Tip |
|---|
| If you’re looking for a quick way to capture the entire screen, simply press Win + Print Screen. This will save a screenshot directly to your “Screenshots” folder within the “Pictures” library. |
Searching by Most Recently Installed Programs
As we continue to use our computers, the number of installed programs and applications tends to grow. Whether it’s a new productivity tool, a game, or specialized software, keeping track of recent installations can sometimes be a challenge. Windows, understanding the user’s need for efficient organization, offers a simple yet powerful feature to quickly access the most recently installed programs.
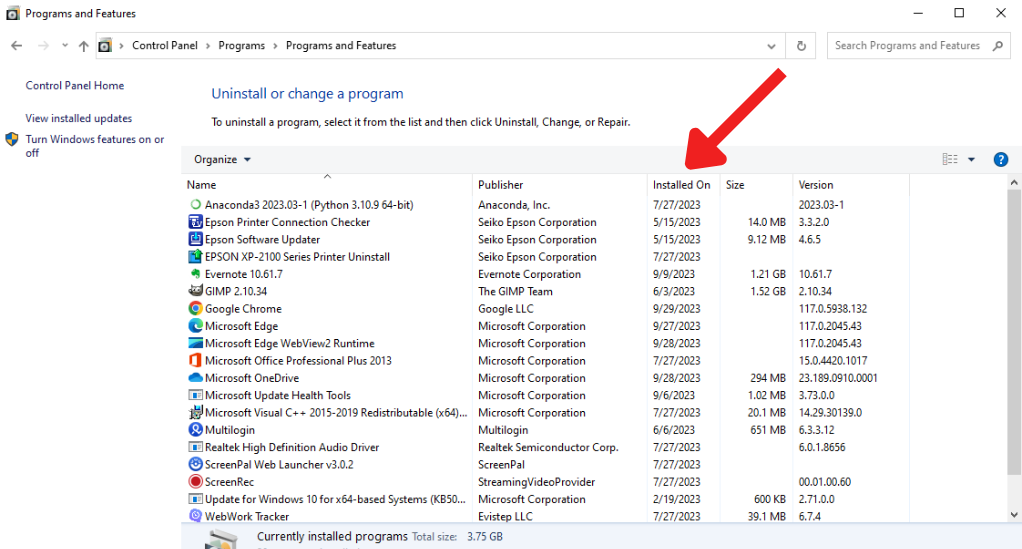
What is it?
This feature allows users to view and access the list of programs installed on their computer, sorted by the installation date. This is particularly useful when you’ve just installed a new application and want to access it quickly without sifting through the entire list of programs.
Why is it useful?
There are instances when you might install a program and then get distracted by another task, forgetting the name of the recently installed application. Instead of trying to recall the program’s name or searching through various folders, this feature provides a quick and efficient way to access it.
How to use it?
Accessing the list of recently installed programs is a straightforward process:
- Click on the Start button or press the Windows key.
- Type “Control Panel” and open it.
- Navigate to Programs and then click on Programs and Features.
- Here, you’ll see a list of all installed programs. By default, they might be sorted by name. To view them by their installation date, click on the “Installed On” column header.
| Quick Tip |
|---|
| For even faster access, right-click on the Start button and select “Apps and Features.” This will directly open the list of installed applications, where you can sort by installation date. |
Quickly Connecting to New Screens
In today’s dynamic work environment, flexibility is key. Whether you’re presenting at a meeting, collaborating with colleagues, or simply working from a different location, the ability to quickly connect your Windows computer to various screens can significantly enhance your productivity and presentation capabilities.
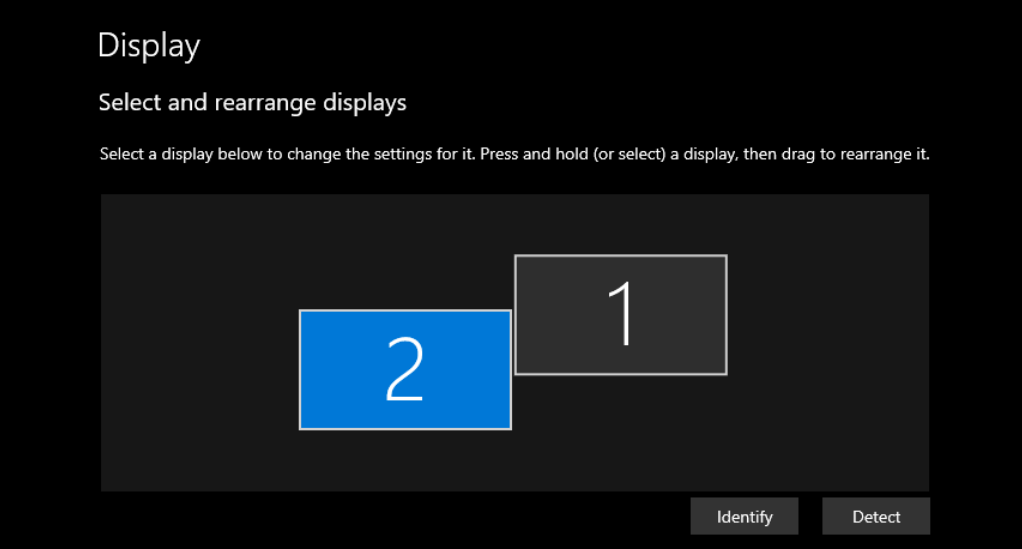
What is it?
Windows offers a streamlined approach to detect and connect to external displays, be it projectors, monitors, or even televisions. With a few clicks, users can extend their display, duplicate their screen, or use an external screen as their primary display.
Why is it useful?
Having the flexibility to quickly switch between screens or extend your display can be invaluable in various scenarios:
- Presentations: Easily duplicate your screen on a projector for audiences.
- Multitasking: Extend your display to use multiple applications side by side without switching windows.
- Entertainment: Connect to a larger screen or television for a better viewing experience.
How to use it?
Connecting to a new screen is intuitive:
- Ensure your external screen is connected to your computer, either via HDMI, VGA, DisplayPort, or any other compatible connection.
- Press Win + P on your keyboard. This will bring up the “Project” sidebar.
- Choose from the available options:
- Duplicate: Show the same screen on both your primary display and the external screen.
- Extend: Use the external screen as an extension of your primary display.
- Second screen only: Use the external screen as your primary display, turning off your original screen.
| Did You Know? |
|---|
| Windows remembers your settings for specific screens. So, if you frequently connect to a particular projector or monitor, Windows will automatically apply your preferred settings the next time you connect. |
Conclusion
Windows has consistently evolved, transforming from a rudimentary operating system into a dynamic platform teeming with features aimed at enhancing user productivity and experience. As we’ve navigated through its lesser-known yet invaluable functionalities, it’s clear that Windows is meticulously crafted with the user’s needs at its heart. Each feature, whether it’s the convenience of mouse hover activation or the adaptability of connecting to diverse screens, serves to streamline tasks and elevate the overall computing journey.
Yet, our exploration only touches the tip of the iceberg. The true essence of Windows lies in its depth, waiting to be discovered by curious users. By delving deeper and embracing the myriad of tools and features, one can truly harness the power of this robust platform. As technology continues to evolve, Windows stands as a testament to innovation, adaptability, and user-centric design. Here’s to a future of continued exploration and boundless productivity with Windows!