Struggling with Canva Backgrounds? Learn How to Make Them Transparent!
Welcome to the world of Canva, an amazing tool that has revolutionized the way we create graphics! In this guide, we’re going to focus on a very special feature – making backgrounds transparent. This might seem like a small thing, but it’s a game changer in design. Whether you’re creating a logo, a social media post, or any other kind of graphic, having the skill to make backgrounds transparent can set your work apart.
Transparent backgrounds are not just about aesthetics; they bring flexibility and a professional touch to your designs. They allow your main subject to stand out, making your graphics look cleaner and more polished. This is especially useful in marketing materials, product shots, and even personal projects.
Understanding Transparent Backgrounds in Canva

When we talk about transparent backgrounds in Canva, we’re referring to backgrounds that let you see what’s behind them. Imagine a glass window – you can see through it. That’s what a transparent background does; it lets the other parts of your design or the background of your website or document show through.
Why Use Transparent Backgrounds?
- Flexibility: They let you place your design on different backgrounds without a clash.
- Professional Look: Your design blends smoothly, giving it a polished and clean appearance.
- Focus on Main Subject: It helps to highlight the main elements of your design by removing any distracting background.
White Background vs Transparent Background
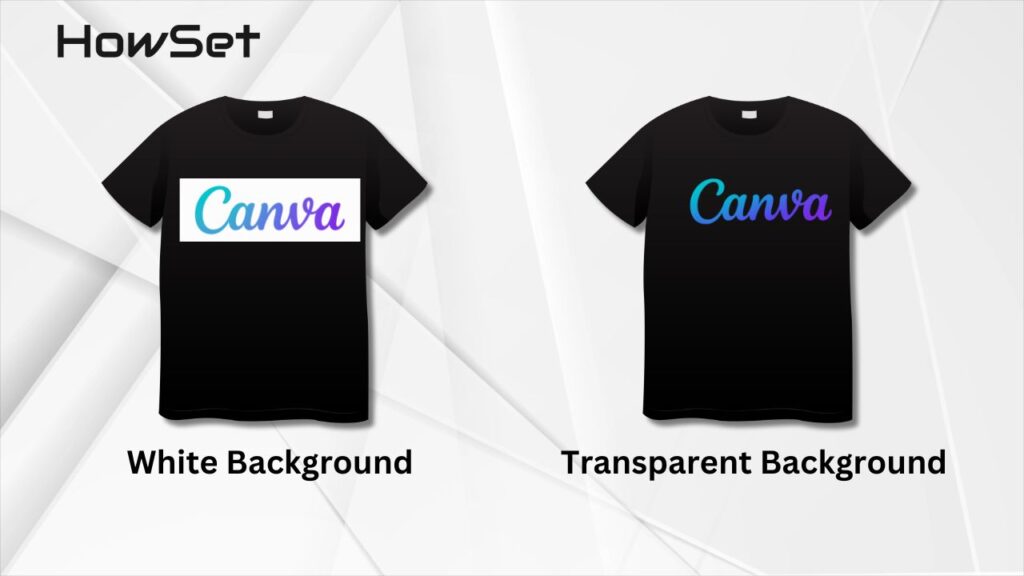
- White Background:
- Looks solid and clear.
- Best for designs where you need a bold, defined boundary.
- Can stand out harshly if placed on colored backgrounds.
- Transparent Background:
- Offers flexibility; the design can blend with any background.
- Gives a more seamless and integrated look.
- Ideal for logos, watermarks, and overlay graphics.
Using Transparent Backgrounds in Canva
Creating a transparent background in Canva is a straightforward process. Whether you’re working on a new design or want to change an existing one, Canva makes it easy. Here’s a basic idea of how it works:
- Choose Your Image: Start with the image you want to edit.
- Background Remover: Use Canva’s background remover tool to eliminate the original background.
- Save Your Design: Once the background is removed, save your image in a format that supports transparency, like PNG.
Remember, to access some of these features, especially the background remover tool, you might need a Canva Pro account. But don’t worry, even with the free version, there are ways to play around with transparency.
When to Use Transparent Backgrounds?
- Logos and Watermarks: To make sure they look good on any surface they are placed on.
- Overlaying Images: For creating complex designs with multiple layers.
- Product Images for E-Commerce: To place products against different backgrounds without editing each photo.
Getting Started with Canva
Are you new to Canva? No worries! Canva is a user-friendly graphic design tool that’s perfect for both beginners and professionals. It offers a wide range of features, including the ability to create transparent backgrounds. Here’s how you can get started:
Setting Up Your Canva Account
- Sign Up: Go to the Canva website and sign up for an account. You can use your email, Google, or Facebook account to register.
- Choose Your Version: Canva offers a free version and a Pro version. The free version is great for basic designs, but if you want advanced features like the background remover, you might consider the Pro version.
- Explore Templates: Canva provides a variety of templates for different design needs – from social media posts to business presentations.
Understanding Canva’s Interface
- Design Dashboard: This is where all your designs will be stored.
- Tool Bar: Here, you find tools like text, background, upload, and more.
- Search Bar: Use this to find specific templates or design elements.
Creating Your First Design
- Select a Template or Start from Scratch: You can choose a pre-made template or start with a blank canvas.
- Customize Your Design: Add text, images, and other elements. You can drag and drop these elements into your design.
- Experiment with Backgrounds: For transparent backgrounds, go to the ‘background’ section and either choose a transparent option or remove the background from an image.
Tips for Canva Beginners
- Take Advantage of Canva’s Tutorials: They are great for understanding the basics.
- Experiment: Try different features and tools to see what they do.
- Use Keyboard Shortcuts: They can speed up your design process.
Canva Pro: Is It Worth It?
For those who are serious about design, Canva Pro offers additional features:
- Background Remover: Easily remove the background from any image.
- More Templates and Elements: Access a wider range of design options.
- Brand Kit: Store your brand colors, fonts, and logos for easy access.
Whether you’re making a quick design for social media or a professional presentation, getting started with Canva is easy and fun. With a bit of practice, you’ll be creating stunning designs in no time! In the next section, we’ll guide you through the process of creating transparent backgrounds in more detail. Stay tuned!
Creating Transparent Backgrounds: Step-by-Step Guide
Now that you’re familiar with Canva and its interface, let’s dive into the main event: creating transparent backgrounds. This skill is incredibly useful for a variety of designs. Follow these simple steps, and you’ll be a pro in no time!
Step 1: Select Your Image
- Open Canva: Log in to your Canva account and start a new project or open an existing design.
- Choose an Image: Either upload your own image or select one from Canva’s extensive library.
Step 2: Remove the Background
- Use the Background Remover Tool: If you have Canva Pro, you can use the ‘Background Remover’ tool found in the effects panel. Simply click on the tool, and Canva will automatically remove the background from your image.
- Manual Removal: For those using the free version, you can manually remove the background by selecting elements of the background and deleting them.
Step 3: Adjust Transparency
- Select the Element: Click on the element (like text or an image) whose transparency you want to adjust.
- Use the Transparency Slider: Find the transparency option in the toolbar and adjust the slider to get the desired level of transparency.
Step 4: Save Your Design
- Choose the Right Format: When you’re done, make sure to save your design as a PNG. This format retains the transparency.
- Download: Click on the ‘Download’ button at the top of the page, select PNG, and make sure the ‘Transparent background’ option is checked.
Tips for Perfect Transparent Backgrounds
- Good Quality Images: Start with high-resolution images for cleaner removals.
- Fine-Tuning: Zoom in and use the eraser tool for any small corrections.
- Testing: Preview your design on different backgrounds to see how it looks.
Common Mistakes to Avoid
- Ignoring Edges: Make sure no small bits of the original background are left around the edges of your image.
- Wrong Format: Always save as PNG for transparency. Other formats like JPEG don’t support it.
- Over-Adjusting Transparency: Don’t make elements so transparent that they become hard to see.
Creating transparent backgrounds in Canva is easy once you get the hang of it. With a little practice, you’ll be able to add a professional touch to your designs that will make them stand out. Remember, the key is to experiment and have fun with your designs! In the next section, we’ll explore some practical applications of transparent backgrounds.
Practical Applications of Transparent Backgrounds
Transparent backgrounds aren’t just a fancy feature; they have practical applications in various design projects. Understanding where and how to use them can significantly enhance the quality and effectiveness of your work. Let’s explore some of these practical applications:
Enhancing Branding Materials
- Logos and Watermarks: Logos with transparent backgrounds are versatile. They can be placed over various backgrounds without looking out of place. Similarly, watermarks are less intrusive when transparent.
- Business Cards and Letterheads: Transparent elements on business cards or letterheads give a modern and professional look.
Improving Web and Social Media Graphics
- Website Elements: Transparent backgrounds are perfect for web design elements like banners, buttons, or overlays that need to blend seamlessly with the site’s layout.
- Social Media Posts: For social media, transparent backgrounds can make your posts stand out. They allow for more creativity, such as layering text over images without hiding the image’s details.
Product Presentation and E-Commerce
- Product Images: Online stores often use product images with transparent backgrounds to integrate them seamlessly into the store’s design.
- Promotional Materials: Whether it’s for a brochure or an online ad, transparent backgrounds can make your promotional materials look more appealing and focused.
Creative Art and Personal Projects
- Photomontages: For creative projects like photomontages, transparent backgrounds allow you to layer multiple images without harsh borders.
- Personalized Gifts: Whether it’s a custom mug or a t-shirt, designs with transparent backgrounds can be applied more easily and look better.
Event Planning and Decorations
- Invitations and Decor: Transparent backgrounds are great for event invitations, allowing for elegant designs that incorporate the theme’s colors and patterns seamlessly.
- Signage: Signs and banners for events benefit from transparent backgrounds as they can be placed over various backdrops without clashing.
Educational and Instructional Materials
- Presentations: Transparent backgrounds in presentations can make slides look cleaner and more professional.
- Instructional Design: For educational materials, transparent backgrounds help in creating clear, focused, and engaging content.
Photography and Videography
- Photo Editing: Photographers often use transparent backgrounds to manipulate images or create composite photographs.
- Video Graphics: In video production, transparent backgrounds are essential for overlays, lower thirds, and other graphic elements.
Advanced Techniques
Once you’ve mastered the basics of creating transparent backgrounds in Canva, you can explore some advanced techniques to elevate your designs further. These techniques will help you add more depth, sophistication, and creativity to your projects.
Layering and Blending
- Multi-Layered Designs: Experiment with layering multiple images or text boxes with varying degrees of transparency. This creates a sense of depth and complexity in your design.
- Blending Modes: Utilize Canva’s blending modes to blend images with the background creatively. You can achieve effects like lightening, darkening, or adding texture.
Text Effects with Transparency
- Text Overlays: Apply transparent backgrounds to text boxes and overlay them on images. This can make the text stand out while still showcasing the image.
- Creative Typography: Use transparency to create unique typographic designs, allowing the background to peek through the text for an artistic effect.
Custom Shapes and Patterns
- Creating Custom Shapes: Use the elements and shapes in Canva to create custom designs. Adjust their transparency for subtle or bold effects.
- Pattern Overlays: Overlay transparent patterns on images or backgrounds to add texture and visual interest without overwhelming the main content.
Background Removal for Complex Images
- Detailed Edits: For images with intricate details or mixed backgrounds, use the eraser tool in Canva to manually refine the edges after using the background remover.
- Selective Transparency: Apply transparency to specific parts of an image to highlight or hide elements, creating a focal point.
Animated Elements
- Transparent Animations: Incorporate animated elements with transparent backgrounds into your designs for a dynamic and engaging effect.
- Subtle Motion: Use subtle animations on transparent elements to add a touch of sophistication and keep your design lively.
Integrating with Other Software
- Export and Edit: Export your Canva designs with transparent backgrounds and further edit them in other software like Photoshop for more advanced effects.
- Combining Tools: Use Canva’s simplicity for initial designs and other tools for specialized edits, combining the strengths of different software.
Expert Tips for Transparency
- Consistency in Branding: For brand materials, maintain a consistent level of transparency across all designs to ensure a cohesive look.
- Balance: Ensure a balance between transparency and visibility. Too much transparency can make elements hard to see, especially in different contexts.
- Testing: Always preview your design in different environments (like on a website or printed material) to ensure it looks good in real-world applications.
Conclusion
In conclusion, mastering the art of creating transparent backgrounds in Canva opens up a realm of creative possibilities, allowing your designs to stand out with a professional and polished look. Whether you’re enhancing branding materials, creating captivating social media graphics, or designing personalized gifts, the versatility of transparent backgrounds can significantly elevate the aesthetic appeal of your projects. By embracing both the basic and advanced techniques outlined in this guide, you can transform ordinary designs into extraordinary creations.
Remember, the key to success in design lies in experimentation and continuous learning. Don’t be afraid to try new things and push the boundaries of your creativity. With Canva’s user-friendly platform and the tips provided, you’re well-equipped to explore the exciting world of transparent backgrounds and make your mark in the realm of digital design.