Struggling with Animated Emotes on Twitch? Here’s Your How-To Solution!
Are you a Twitch streamer looking to spice up your channel? Animated emotes might be just what you need! These fun, lively icons are not just eye-catching; they’re a fantastic way to connect with your audience and add a personal touch to your streams. Whether you’re greeting new followers, celebrating victories, or just sharing a laugh, animated emotes can bring your community together in unique ways.
But where do you start? If you’re new to this or even if you’ve tried before, creating custom animated emotes can seem a bit tricky. Don’t worry! In this guide, we’ll walk you through the process step-by-step. From understanding Twitch’s requirements to designing and uploading your emotes, we’ve got you covered. So, let’s dive in and learn how to make your Twitch channel more lively and engaging with your very own animated emotes.
Let’s go over the simplest (Free) solution first.
Step 1: Create Images Using Bing Image Creator
- Go to Bing Image Creator: Open your web browser and go to Bing Image Creator.
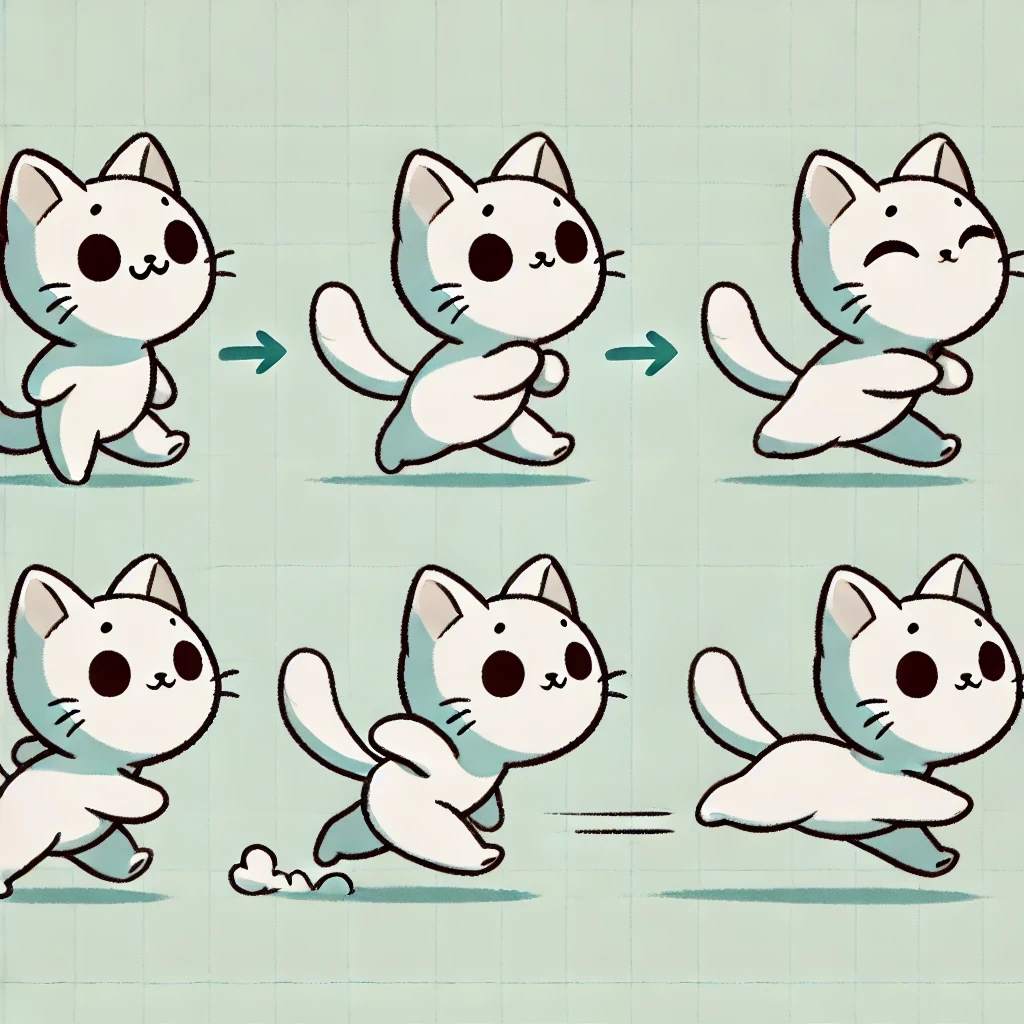
- Describe Your Image: In the text box, describe the sequence of images you want. For example, “A sequence of 5 images of a cute cartoon cat running. Each image shows a different phase of the running motion, with the cat’s legs and body in different positions. The cat should have a playful expression, a small body, large eyes, and a bushy tail. The background should be simple and light to highlight the cat’s movements.“.
- Generate Images: Click on the “Create” button to generate the images. The AI will create the images based on your description.
- Download Images: Once the images are generated, download each image to your computer. Save them in a sequence (e.g., cat_run_1.png, cat_run_2.png, etc.).
Step 2: Prepare Images for Animation
- Crop and Resize: Open each downloaded image in an image editor (e.g., GIMP, Photoshop, or an online editor like Pixlr). Crop and resize each image to ensure they are all the same dimensions and that the cat is consistently placed in each frame.
- Arrange Images: Make sure the images are in the correct running sequence. Rename the files if necessary to keep them in order (e.g., cat_run_1.png, cat_run_2.png, etc.).
- Save Prepared Images: Save the edited images to your computer. Ensure they are still in the correct order and that no additional edits are needed.
Step 3: Create an Animated GIF Using ezGIF
- Go to ezGIF Maker: Open your web browser and go to ezGIF Maker.
- Upload Images: Click on the “Choose Files” button and select the prepared sequence of images. Then click “Upload and make a GIF!”.
- Arrange and Edit: After uploading, ensure the images are in the correct order. Adjust the delay time between frames to control the speed of the animation. You can also apply other settings such as resizing or adding effects.
- Create GIF: Click on “Make a GIF” to create your animated GIF.
- Download GIF: Once the GIF is created, you can download it to your computer by clicking on the “Save” button.
Step 4: Create an Animated GIF Using Giphy
- Go to Giphy GIF Maker: Open your web browser and go to Giphy GIF Maker.
- Upload Images: Click on the “Choose Photo or GIF” button and select the prepared sequence of images.
- Arrange and Edit: Arrange the images in the correct order. Adjust the animation settings, such as speed and looping options, to your preference.
- Create GIF: Click on “Create GIF” to generate your animated GIF.
- Download or Share: Once the GIF is created, you can download it to your computer or share it directly from Giphy.
Tips for Best Results:
- Ensure that the images are in the correct sequence to create a smooth animation.
- Adjust the frame delay to control the speed of the animation according to your preference.
- Use simple backgrounds to highlight the main action of the animated emote.
By following these steps, you’ll be able to create, prepare, and animate your sequence of images to make a running cat GIF.
Preparing for Emote Creation
Before you start creating your animated emotes, it’s important to get ready. Think of this like gathering your tools and materials before building something amazing. Here are some key things to keep in mind:
- Know Twitch’s Rules: Twitch has specific requirements for emotes. Make sure your emotes are the right size and format. Twitch usually asks for square images and sets a limit on file size.
- Creative Ideas: Think about what represents you and your channel. Your emotes should reflect your personality and appeal to your audience.
- Tools for Creation: You’ll need software to design and animate your emotes. This could be something simple like Canva or more advanced like Adobe Photoshop.
Now, let’s break these down a bit more:
Knowing Twitch’s Rules
- Image Size: For auto-resize mode, images can be between 112x112px and 4096x4096px. In manual mode, you need three sizes: 28x28px, 56x56px, and 112x112px.
- File Size: Keep it under 1MB for auto-resize mode. For manual mode, each size should not exceed 512KB.
- Format: Your images should be in GIF format for animation.
Brainstorming Creative Ideas
- Reflect Your Brand: Choose themes and colors that match your channel’s vibe.
- Engage Your Audience: Think about what your viewers like, maybe in-jokes or common phrases from your stream.
- Be Unique: Try to create something new that stands out.
Choosing the Right Tools
- For Beginners: Canva is user-friendly and great for starters.
- For Pros: Adobe Photoshop offers more advanced features for those who have experience.
- Other Options: There are many online tools and apps available. Find one that suits your skill level and needs.
Using Twitch’s Emotes Creator Tool
Now that you’re all set with your ideas and know the rules, it’s time to start creating! Twitch has a handy tool called the Emotes Creator that simplifies this process. Let’s explore how to use it effectively:
Getting Started with the Emotes Creator Tool
- Access the Tool: Log in to your Twitch account and navigate to the Creator Dashboard. Here, you’ll find the Emotes section where the Emotes Creator Tool is located.
- Upload Your Design: You can either upload a ready-made design or use the tool to create one. If you’re uploading, ensure it meets Twitch’s size and format requirements.
- Animate Your Emote: If your design is static, Twitch offers simple animation options like shaking or spinning. Choose one that suits your emote.
Tips for Using the Emotes Creator Tool
- Preview Your Emote: Twitch lets you see how your emote will look in chat. Make sure it’s clear and visible at a small size.
- Be Creative with Animation: Even simple animations can add a lot of personality. Experiment with different options.
- Stay Within Guidelines: Remember Twitch’s content guidelines. Avoid anything that might be considered offensive or against the rules.
Finalizing and Uploading Your Emote
- Review Your Work: Double-check your emote for any last-minute adjustments.
- Upload and Wait for Approval: Once you upload, Twitch will review your emote to make sure it fits their guidelines. This process usually doesn’t take long.
- Go Live: Once approved, your emote is ready to be used by you and your subscribers!
Using the Twitch Emotes Creator Tool is a straightforward way to bring your animated emotes to life. It’s user-friendly and does not require advanced graphic design skills, making it a great starting point for streamers new to emote creation.
Creating Animated Emotes with Canva
If you’re looking for a simple yet powerful tool to create animated emotes, Canva is a great choice. It’s user-friendly and perfect for those who might not have extensive graphic design experience. Let’s dive into how you can use Canva to bring your animated emotes to life.
Getting Started with Canva
- Sign Up or Log In: First, you need to create an account on Canva or log in if you already have one.
- Choose Your Design: Canva offers a variety of templates, including ones specifically for Twitch emotes.
- Customize Your Template: Pick a template and start customizing it. You can change colors, add text, or upload your own images.
Customizing and Animating Your Emote in Canva
- Be Creative: Use Canva’s various tools to make your emote unique. Play around with different fonts, stickers, or even your own drawings.
- Animating Your Emote: Once you’re happy with your design, click on the ‘Animate’ button. Canva offers several animation styles – pick one that best suits your emote.
- Preview and Adjust: Check how your animated emote looks and make any necessary adjustments to ensure it looks great.
Exporting and Uploading Your Emote
- Download Your Emote: Once you’re satisfied with your animation, download the emote. Make sure it’s in GIF format, as that’s what Twitch requires for animated emotes.
- Check Twitch’s Requirements: Before uploading, ensure your emote meets Twitch’s size and file format specifications.
- Upload to Twitch: Log into your Twitch account, go to the Creator Dashboard, and upload your new animated emote for approval.
Creating animated emotes in Canva is an easy and fun process. With a little creativity and experimentation, you can design emotes that resonate with your audience and add a personal touch to your Twitch channel.
Advanced Custom Animated Emote Design
For those who want to take their emote design to the next level, advanced custom design is the way to go. This section is for streamers looking to create truly unique and professional-looking animated emotes.
Exploring Professional Design Options
- Hiring a Professional Designer: If you’re not a designer yourself, consider hiring a professional. Platforms like Fiverr and Upwork have many talented artists who specialize in Twitch emotes.
- Using Advanced Software: Tools like Adobe Photoshop or Illustrator offer more advanced features for detailed and complex designs.
- Learning from Tutorials: Plenty of online tutorials can help you improve your design skills. YouTube is a great resource for this.
Tips for Working with Professional Designers
- Communicate Clearly: Explain your vision and brand to the designer. The more they understand your style, the better they can create something that fits your channel.
- Review Portfolios: Look at the designer’s previous work to ensure their style aligns with what you want.
- Discuss Deadlines and Budgets: Make sure you agree on how long the project will take and how much it will cost.
Benefits of Advanced Custom Designs
- Uniqueness: Custom designs can make your channel stand out and be more memorable.
- Brand Consistency: Professional designs can align with your overall branding, helping to build a cohesive look for your channel.
- Viewer Engagement: Unique and appealing emotes can increase viewer interaction and loyalty.
Advanced custom animated emote design might require more time, effort, and possibly investment, but the payoff can be significant. Not only do they enhance the visual appeal of your channel, but they also help in creating a strong brand identity that viewers can easily recognize and connect with.
Uploading and Managing Your Animated Emotes on Twitch
Once you have your animated emotes ready, the next step is to upload and manage them on your Twitch channel. This process is straightforward, but it’s important to follow Twitch’s guidelines to ensure your emotes are approved and available for your community to use.
Uploading Your Animated Emotes to Twitch
- Access the Creator Dashboard: Log into your Twitch account and go to the Creator Dashboard.
- Navigate to the Emotes Section: Here, you’ll find options for uploading your emotes.
- Upload Your Emotes: Click on the upload button and select your animated emote files. Remember, they should be in GIF format and adhere to Twitch’s size specifications.
- Submit for Approval: Once uploaded, Twitch will review your emotes to ensure they meet community guidelines.
Tips for a Smooth Approval Process
- Adhere to Guidelines: Make sure your emotes follow Twitch’s content guidelines to avoid rejection.
- Quality Check: Ensure your emotes are clear and discernible even at smaller sizes.
- Patience is Key: The approval process can take some time, so be patient. Twitch will notify you once your emotes are approved.
Managing Your Emotes on Twitch
- Organizing Your Emotes: Twitch allows you to organize your emotes in a way that makes sense for your channel. You can categorize them based on different themes or uses.
- Updating Emotes: You can replace or update your emotes at any time. This is useful if you want to keep your channel fresh and engaging.
- Engaging Your Community: Encourage your viewers to use your new emotes. This not only adds to the fun of your stream but also promotes your channel.
Tracking Emote Usage
- Viewer Feedback: Pay attention to which emotes your viewers use the most. This can give you insights into what types of designs are more popular.
- Adjust Based on Trends: Don’t be afraid to change things up based on trends or feedback from your community.
Uploading and managing your animated emotes on Twitch is an ongoing process. It’s about finding what works best for your channel and your community. With the right approach, your custom animated emotes can become a signature part of your Twitch presence, enhancing your stream’s interactivity and fun.
Alternative Methods for Emote Creation
If you’re looking for different ways to create animated emotes, there are several alternatives to explore. These methods can offer unique styles and functionalities that might suit your specific needs better.
Using Online Emote Makers
- StreamLadder Emote Maker: This tool is designed specifically for Twitch streamers. It’s user-friendly and allows you to create emotes directly from Twitch clips or images.
- EmoteMaker.net: A straightforward tool that offers basic design options for creating emotes.
- Kapwing: Although not exclusively for emotes, Kapwing provides robust editing tools that can be used for emote creation.
Tips for Using Online Emote Makers
- Ease of Use: These tools are generally easy to use, even for beginners.
- Customization: While they offer less customization than professional software, they are great for quick and simple designs.
- Format and Size: Ensure that the final output matches Twitch’s requirements for animated emotes.
Exploring Mobile App Options
- Emote Maker Apps: There are several mobile apps available that allow you to create emotes right from your phone.
- Adobe Spark Post: Offers a range of design tools and is available on mobile devices, making it convenient for on-the-go creation.
Advantages of Mobile Apps
- Convenience: Create emotes anywhere, anytime.
- User-Friendly Interfaces: Mobile apps are designed for ease of use, making them accessible to everyone.
- Integration: Some apps offer direct integration with Twitch, simplifying the upload process.
Community-Driven Resources
- Twitch Creative Communities: Joining communities on platforms like Reddit or Discord can provide valuable tips and resources.
- Collaborations: Sometimes, other streamers or designers in the community are willing to collaborate or offer advice.
Leveraging Community Knowledge
- Learning from Others: Benefit from the experience and knowledge of other streamers and designers.
- Networking: Building relationships in the community can lead to collaborative opportunities and support.
Alternative methods for emote creation offer a range of options to suit different preferences and skill levels. Whether you prefer the convenience of a mobile app, the simplicity of an online tool, or the collaborative environment of a community, there’s an option available to help you create engaging animated emotes for your Twitch channel.
Best Practices for Animated Emotes on Twitch
Creating great animated emotes is more than just about design skills. It’s about understanding what resonates with your audience and using emotes effectively on your Twitch channel. Here are some best practices to help you make the most out of your animated emotes.
Understanding Your Audience
- Know Your Viewers: Tailor your emotes to match the interests and humor of your audience. If your channel is gaming-focused, game-related emotes might be a hit.
- Feedback is Key: Listen to what your viewers say about your emotes. Their feedback can guide you in creating emotes they’ll love to use.
Designing for Clarity and Appeal
- Keep It Simple: Overly complex designs can be hard to distinguish, especially when scaled down. Simple, bold designs work best.
- Consistency in Style: Your emotes should have a consistent style that reflects your channel’s branding.
- Visibility on Different Backgrounds: Ensure your emotes are visible on both light and dark Twitch chat backgrounds.
Encouraging Emote Usage
- Introduce New Emotes: When you add new emotes, make a big deal about it on your stream. Excitement is contagious!
- Use Emotes Yourself: Lead by example. Use your emotes during streams to encourage viewers to do the same.
Staying Within Twitch Guidelines
- Adhere to Rules: Regularly check Twitch’s guidelines to ensure your emotes comply. Twitch may update their policies, and you want to stay in the clear.
- Avoid Sensitive Content: Steer clear of controversial or sensitive topics to avoid offending viewers or violating Twitch policies.
Updating and Refreshing Your Emotes
- Regular Updates: Keep your emotes fresh and relevant. Update them to reflect current trends, seasons, or special events.
- Retire Old Emotes: Don’t be afraid to remove emotes that aren’t popular. It’s all part of keeping your channel dynamic and engaging.
Following these best practices will help you create animated emotes that not only look great but also enhance the overall experience on your Twitch channel. Remember, the goal is to foster a fun and interactive community, and well-crafted emotes are a big part of that.
Troubleshooting
Creating and managing animated emotes on Twitch can sometimes come with challenges. Here, we’ll address some common issues and provide answers to frequently asked questions to help you navigate any obstacles you might encounter.
Common Issues and Solutions
- Emote Rejection: If Twitch rejects your emote, review their feedback and guidelines carefully. Usually, it’s an issue with content guidelines or image specifications.
- Poor Visibility: If your emotes aren’t clear in chat, try simplifying the design. Remember, they need to be recognizable at a small scale.
- Animation Issues: If the animation isn’t displaying correctly, check the file format and size. Twitch requires GIF format with specific size limitations.
FAQs
It can vary, but typically Twitch reviews and approves emotes within a few days.
Yes, you can update or replace an emote at any time through the Twitch dashboard.
Animated emotes are currently available to Twitch Affiliates and Partners.
For beginners, Canva is a great choice. More experienced users may prefer Adobe Photoshop or Illustrator.
Conclusion
In conclusion, animated emotes are a dynamic and engaging way to enhance your Twitch streaming experience. From understanding the basics and guidelines of Twitch to exploring various creation tools like Canva and professional design services, the journey to creating custom animated emotes is filled with creativity and learning opportunities. Whether you’re a beginner or an experienced streamer, the key is to keep your emotes simple, relatable, and reflective of your unique brand and community.
Remember to stay updated with Twitch’s evolving guidelines, embrace feedback from your viewers, and continuously refine your emote library to keep your channel fresh and exciting. Animated emotes are more than just fun graphics; they are a means to connect with your audience, express shared emotions, and build a vibrant streaming community. By following the best practices and troubleshooting tips outlined, you’ll be well on your way to creating memorable and enjoyable experiences for both you and your viewers on Twitch.