How to Get Started with Linux: A Beginner’s Guide
In the realms of computing, Linux holds a special place as a beacon of open-source innovation and community collaboration. The journey of Linux began in the early 1990s when a young Finnish student named Linus Torvalds decided to create a new operating system kernel as a part of his personal project. This kernel, combined with the GNU system, gave birth to what we know today as Linux. Over the years, Linux has grown exponentially, fostering a vibrant community of enthusiasts, developers, and professionals who contribute to its development and expansion.
The Modern Tech Landscape and Linux
In the contemporary tech landscape, Linux stands as a robust and reliable alternative to mainstream operating systems like Windows and macOS. Its open-source nature means that it is continually evolving, with contributions from people worldwide. Moreover, Linux powers a significant portion of the world’s servers, supercomputers, and even forms the base for the Android operating system used in smartphones.
Understanding Linux is not just a hobbyist’s pursuit but a valuable skill in the IT sector. Professionals with Linux proficiency are in high demand in various fields, including system administration, software development, and cybersecurity.
Why Choose Linux?
Before we delve into the technicalities of starting with Linux, let’s explore why one might choose Linux over other operating systems. Here are a few compelling reasons:
- Open-Source Nature: Linux’s source code is freely available, allowing users to modify and distribute it as they see fit. This fosters innovation and community collaboration.
- Security: Linux is renowned for its robust security features. Its user permission levels and segregation of system files make it less prone to viruses and malware.
- Customizability: Linux offers an unparalleled level of customization. Users can tweak almost every aspect of the system to suit their preferences.
- Community Support: Being a community-driven project, Linux has a vast network of forums, communities, and resources where users can seek help and guidance.
| Feature | Linux | Windows | macOS |
|---|---|---|---|
| Source Code Accessibility | Open-source | Closed-source | Closed-source |
| Security | High | Moderate | High |
| Customizability | High | Low | Moderate |
| Community Support | Extensive | Limited | Limited |
| Cost | Free | Paid | Paid |
Getting Started with Linux: A Step-by-Step Journey
Embarking on your Linux journey is an exciting venture. In this guide, we will walk you through the essential steps to get started with Linux. From choosing the right distribution to setting up your environment and navigating the Linux desktop, we have got it all covered. Stay tuned as we unfold the world of Linux, one step at a time.
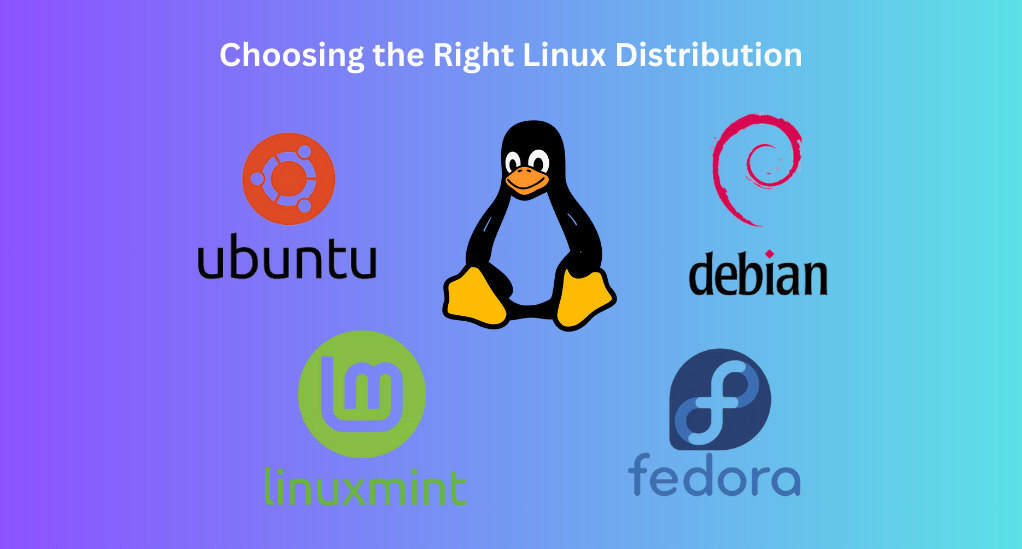
Choosing the Right Linux Distribution
The first step in your Linux journey is to choose a distribution that suits your needs and preferences. A Linux distribution, often referred to as a “distro,” is a package consisting of the Linux kernel, a collection of software, and a desktop environment. Here, we will explore some popular distributions and what they have to offer:
- Ubuntu: Perhaps the most popular Linux distribution, Ubuntu is known for its user-friendliness and a vast community of users. It is an excellent choice for beginners and professionals alike.
- Fedora: This distribution is known for its cutting-edge technology and innovation. It is often used by developers and tech enthusiasts who want to stay abreast of the latest developments in the open-source world.
- Debian: A stable and reliable choice, Debian is known for its robustness and a rich repository of software packages. It forms the base for many other distributions, including Ubuntu.
- Mint: Linux Mint is based on Ubuntu and is known for its simplicity and elegance. It comes with a variety of tools and software pre-installed, making it a great choice for those new to Linux.
Factors to Consider When Choosing a Distribution
When choosing a Linux distribution, consider the following factors:
- User-Friendliness: If you are new to Linux, you might prefer a distribution with an intuitive interface and easy-to-use tools.
- Community Support: A vibrant community can be a great resource for finding help and guidance as you navigate your Linux journey.
- Software Repositories: Consider the availability of software packages and how easy it is to install and manage software in the distribution.
- Hardware Compatibility: Ensure that the distribution you choose supports your hardware components for a smooth computing experience.
Making Your Choice
After considering the factors mentioned above, take the time to explore different distributions. You can visit their official websites, read user reviews, and even try them out through live USB or virtual machines before making a decision. Remember, the best distribution is the one that meets your specific needs and preferences.
Setting Up Your Linux Environment
Hardware Requirements
Before you embark on the installation journey, it’s essential to ensure that your hardware meets the minimum requirements of the Linux distribution you’ve chosen. Generally, Linux is known for its ability to run on a wide variety of hardware, including older machines. Here are some general hardware requirements for a smooth Linux experience:
- Processor: A minimum of 1 GHz processor, although a 2 GHz dual-core processor is recommended for a smooth experience.
- RAM: At least 512 MB of RAM, but 2 GB or more is recommended for better performance.
- Hard Drive: A minimum of 10 GB of free space, with 20 GB recommended for installing additional software and storing files.
- Graphics Card: Most distributions work well with integrated graphics, but a dedicated graphics card can enhance the visual experience.
- Internet Connection: While not a requirement, an internet connection will allow you to download updates and new software packages easily.
Installing Linux: A Step-by-Step Guide
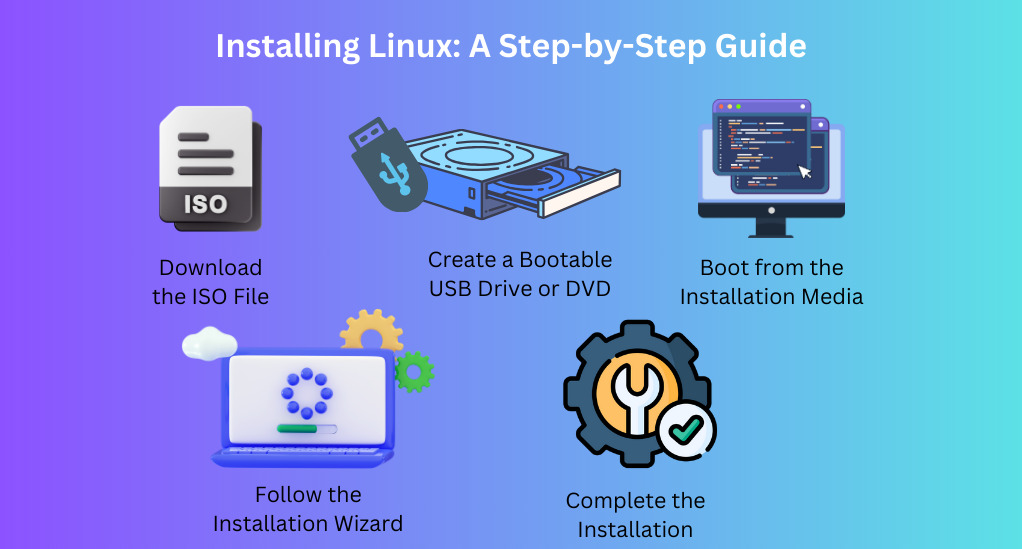
Step 1: Download the ISO File
Start by downloading the ISO file of your chosen distribution from its official website. This file contains all the necessary files to install Linux on your system.
Step 2: Create a Bootable USB Drive or DVD
Once the ISO file is downloaded, create a bootable USB drive or DVD using software like Rufus or UNetbootin. This will serve as the installation media.
Step 3: Boot from the Installation Media
Restart your computer and boot from the installation media. You might need to change the boot order in the BIOS settings to do this.
Step 4: Follow the Installation Wizard
Most Linux distributions come with an installation wizard that guides you through the installation process. Follow the on-screen instructions, which will include setting up a user account and partitioning your hard drive.
Step 5: Complete the Installation
Once the installation process is complete, remove the installation media and restart your computer. You should now boot into your new Linux environment.
Dual Booting with Other Operating Systems
If you’re not ready to fully commit to Linux, you can set up a dual boot system, allowing you to choose between Linux and another operating system at startup. Here’s a brief guide on setting up a dual boot system:
- Partition Your Hard Drive: Create a separate partition on your hard drive for Linux.
- Install Linux: Install Linux on the new partition, as described in the steps above.
- Install a Boot Loader: During the installation process, you’ll be prompted to install a boot loader, which will allow you to choose between operating systems at startup.
- Choose Your OS at Startup: Every time you start your computer, you’ll be able to choose which operating system to boot into.
Navigating the Linux Desktop
Understanding the Linux Desktop Environment
Once you have successfully installed Linux, the next step is to familiarize yourself with the desktop environment. Linux offers a variety of desktop environments, each with its unique style and functionality. Here are some popular ones:
- GNOME: A modern and intuitive desktop environment that focuses on simplicity and ease of use. It features a streamlined interface with a centralized activities overview.
- KDE Plasma: Known for its visual appeal and customization options, KDE Plasma offers a rich set of features and a vibrant community of users and developers.
- XFCE: A lightweight desktop environment that is ideal for older hardware or systems with limited resources. It offers a simple and traditional desktop experience.
- LXQt: Another lightweight option, LXQt, provides a fast and user-friendly desktop experience with a modern look and feel.
Exploring Basic Functionalities and Applications
As you start exploring the Linux desktop, you will come across various functionalities and applications that enhance your computing experience. Here are some areas to explore:
- File Manager: Learn how to navigate through files and directories using the file manager. Understand the Linux file hierarchy and how to organize your files efficiently.
- Terminal: The terminal is a powerful tool in Linux, allowing you to perform tasks using command-line instructions. Get acquainted with basic terminal commands and how to use them effectively.
- Software Center: Most distributions come with a software center where you can find and install a wide variety of applications. Learn how to use the software center to add new programs to your system.
- System Settings: Explore the system settings to customize your Linux experience. Here, you can change the appearance, manage users, configure network settings, and more.
Getting Acquainted with Linux Commands
The Linux terminal, also known as the command line or console, is a powerful tool that allows users to interact with the system using text-based commands. While it might seem daunting at first, getting acquainted with the terminal can significantly enhance your Linux experience. Here, we will introduce you to some essential commands and tips for using the terminal efficiently.
Essential Commands for Beginners
As you begin your journey with the Linux terminal, here are some fundamental commands that you should know:
ls: Lists all files and directories in the current directory.cd: Changes the current directory.mkdir: Creates a new directory.cp: Copies files or directories.mv: Moves or renames files or directories.rm: Removes files or directories.nano: Opens the nano text editor, which is useful for editing files directly in the terminal.sudo: Allows users to run commands with administrative privileges.apt-get(oryumin some distributions): Used for installing, updating, and removing software packages.
A Closer Look at Commands
Let’s take a closer look at how to use some of these commands:
- Listing Files and Directories (
ls -l) - Changing Directories (cd /path/to/directory)
- Creating a New Directory (mkdir new_directory)
Tips for Efficient Command Line Usage
As you become more comfortable with the command line, here are some tips to use it more efficiently:
- Using Tab Completion: Press the Tab key to auto-complete file and directory names.
- Using History: Press the Up and Down arrow keys to navigate through previously used commands.
- Using Man Pages: Use the
mancommand followed by another command to view its manual page, which provides detailed information about how to use the command.
File Management in Linux
Understanding the Linux File System
The Linux file system is a hierarchical structure that organizes files and directories in a tree-like pattern. At the root of this hierarchy is the root directory, denoted by a forward slash (/). Understanding the Linux file system is crucial for effective file management. Here’s a brief overview of some important directories:
/bin: Contains essential command binaries that are needed for the basic functioning of the system./etc: Stores system-wide configuration files and shell scripts used to boot and initialize system settings./home: Home directories for all users to store personal files./var: Contains variable data files such as logs and databases./usr: Stores read-only user data containing a majority of multi-user utilities and applications./tmp: A temporary directory where programs can store temporary files.
Basic File Management Commands
As you navigate through the Linux file system, you’ll frequently use various commands to manage files effectively. Here are some basic file management commands and their functions:
touch: Creates a new, empty file.cat: Displays the content of a file.headandtail: Display the beginning and the end of a file, respectively.find: Searches for files and directories in the file system.grep: Searches for specific patterns within files.chmod: Changes the file permissions.chown: Changes the owner of a file or directory.
File Permissions and Ownership
In Linux, file permissions and ownership are crucial concepts that govern access to files and directories. Here’s a brief explanation of these concepts:
- Permissions: Each file and directory has three types of permissions: read (
r), write (w), and execute (x). These permissions are defined for three types of users: owner, group, and others. - Ownership: Every file and directory in Linux has an owner and a group associated with it. The owner has the authority to set permissions for the file or directory.
- Changing Permissions and Ownership: You can use the
chmodandchowncommands to change permissions and ownership, respectively.
For example:
chmod 755 filename
chown user:group filename
Tips for Effective File Management
- Organizing Files: Develop a habit of organizing files in a structured manner within your home directory to avoid clutter and find files easily.
- Backup Regularly: Ensure to back up important files regularly to prevent data loss.
- Using Wildcards: Learn to use wildcards (
*and?) to work with groups of files more efficiently.
Software Management
Installing and Updating Software
One of the essential tasks you’ll be performing on your Linux system is installing and managing software. Linux distributions come with package management systems that streamline the process of installing, updating, and removing software. Here’s a step-by-step guide to managing software on your Linux system:
Step 1: Update the Package List
Before installing new software, it’s a good practice to update the package list to ensure you are getting the latest version. Use the following command:
| sudo apt update (For Debian-based distributions) sudo yum update (For RedHat-based distributions) |
Step 2: Installing Software
To install a new software package, use the following command:
| sudo apt install package_name (For Debian-based distributions) sudo yum install package_name (For RedHat-based distributions) |
Step 3: Removing Software
If you wish to remove a software package, use the following command:
| sudo apt remove package_name (For Debian-based distributions) sudo yum remove package_name (For RedHat-based distributions) |
Step 4: Upgrading Software
To upgrade all the installed packages to their latest versions, use the following command:
| sudo apt upgrade (For Debian-based distributions) sudo yum upgrade (For RedHat-based distributions) |
Package Management Systems: apt, yum, and others
Linux supports various package management systems. Here, we will briefly discuss two popular ones:
- apt: The Advanced Package Tool (apt) is used in Debian-based distributions like Ubuntu. It provides a high-level interface for handling software packages.
- yum: The Yellowdog Updater, Modified (yum) is used in RedHat-based distributions. It is a powerful tool that manages software installation, updates, and removal.
Using Software Repositories
Software repositories are servers that store and distribute software packages. These repositories contain a vast array of software applications, libraries, and updates. Here’s how to manage repositories in Linux:
- Adding Repositories: To add a new repository, use the following command:
| sudo add-apt-repository repository_name (For Debian-based distributions) sudo yum-config-manager –add-repo repository_url (For RedHat-based distributions) |
- Updating Repositories: After adding new repositories, update the package list using the
sudo apt updateorsudo yum updatecommand. - Searching for Software: To search for software in the repositories, use the following command:
| apt search keyword (For Debian-based distributions) yum search keyword (For RedHat-based distributions) |
Customizing Your Linux Experience
Personalizing the Desktop Environment
Linux offers a plethora of customization options that allow you to personalize your desktop environment to suit your preferences. Here are some ways to personalize your Linux desktop:
- Changing Themes: Linux allows you to change the theme of your desktop environment, which includes window colors, icons, and fonts. You can find new themes in the system settings or download from websites like GNOME-Look.org.
- Wallpapers and Backgrounds: Customize your desktop with wallpapers and backgrounds that reflect your style. You can set static wallpapers or dynamic backgrounds that change throughout the day.
- Widgets and Panels: Add widgets and panels to your desktop to display information like time, weather, and system status. You can customize these widgets to match your desktop theme.
Installing Themes and Icons
To further enhance your desktop’s appearance, you can install new themes and icons. Here’s a guide to installing themes and icons on Linux:
- Downloading Themes and Icons: Download your preferred themes and icons from reliable sources. Websites like GNOME-Look.org offer a wide variety of themes and icons to choose from.
- Installing Themes: To install a new theme, extract the downloaded file and move it to the
.themesdirectory in your home folder. If the directory does not exist, create it. - Installing Icons: Similarly, to install new icons, move the extracted files to the
.iconsdirectory in your home folder. - Applying Themes and Icons: Once installed, you can apply the new themes and icons from the system settings or using a tool like GNOME Tweak Tool.
Setting Up a Productive Workspace
A well-organized workspace can enhance your productivity and make your computing experience more enjoyable. Here are some tips to set up a productive workspace:
- Virtual Desktops: Utilize virtual desktops to organize your open applications and switch between different tasks seamlessly.
- Keyboard Shortcuts: Create custom keyboard shortcuts to quickly access frequently used applications and perform common tasks.
- File Organization: Develop a file organization system that allows you to find and access files quickly. Use folders and subfolders to categorize your files logically.
- Backup and Sync: Set up a backup system to protect your data and use synchronization services to access your files across different devices.
Community and Support
Joining Linux Forums and Communities
As you embark on your Linux journey, becoming a part of the vibrant Linux community can be a rewarding experience. Here are some platforms where you can connect with other Linux enthusiasts:
- Forums: Linux forums are a great place to seek help, share your experiences, and learn from others. Popular forums include Ubuntu Forums, Linux Questions, and the Arch Linux Forums.
- Reddit: Subreddits like r/linux, r/ubuntu, and r/archlinux are bustling communities where you can find news, discussions, and support related to Linux.
- Stack Exchange: The Unix & Linux Stack Exchange is a question and answer site where you can find solutions to your Linux-related problems.
- Blogs and Websites: Follow blogs and websites that focus on Linux to stay updated with the latest news, tutorials, and tips.
Finding Help and Documentation
Linux distributions come with extensive documentation that can help you understand and use the system effectively. Here are some resources where you can find help and documentation:
- Man Pages: The manual pages, commonly known as man pages, provide detailed documentation for commands and programs. You can access them using the
mancommand in the terminal. - Wiki and Official Documentation: Many distributions maintain a wiki or official documentation where you can find comprehensive information about the system. For instance, the Arch Wiki is a well-regarded resource in the Linux community.
- Tutorials and Guides: The internet is replete with tutorials and guides that can help you learn various aspects of Linux. Websites like Linux.com and Tecmint offer a wealth of information for Linux users.
Contributing to the Open-Source Community
As a Linux user, you have the opportunity to contribute to the open-source community and help improve the system. Here are some ways to contribute:
- Reporting Bugs: If you encounter bugs or issues, report them to the respective project’s bug tracking system to help developers fix them.
- Developing Software: If you have programming skills, you can contribute by developing software and creating new features for the community.
- Translating and Documenting: Help translate software and documentation into different languages to make Linux accessible to a broader audience.
- Community Support: Assist other users by providing support and guidance in forums and communities.
Conclusion
As we reach the end of this comprehensive guide, it’s evident that stepping into the world of Linux opens up a plethora of opportunities to learn, explore, and contribute. Linux, with its robust architecture, customizable environment, and vibrant community, stands as a beacon of innovation and collaboration in the tech world.
Whether you are a budding enthusiast eager to explore the nuances of Linux or a professional aiming to hone your skills further, the Linux ecosystem welcomes you with open arms. The journey might seem overwhelming at first, but remember, every expert was once a beginner. With time, patience, and practice, you will find yourself becoming proficient and comfortable in navigating the Linux landscape.
As you embark on this exciting journey, do not hesitate to immerse yourself in the community, where learning is a collaborative and ongoing process. From customizing your desktop to mastering the command line, every step you take will be a rewarding experience, fostering growth and knowledge.
Moreover, the open-source nature of Linux means that you are not just a user but a potential contributor to a movement that values freedom, transparency, and community collaboration. Your contributions, no matter how small, can help shape the future of Linux, making it even better for generations to come.
So, gear up and step into the world of Linux, where learning is an adventure, and the possibilities are limitless. Happy Linuxing!