Want to Spice Up Your Twitch Channel? Learn How to Add Emotes Now:
Welcome to the world of Twitch streaming, a platform where creativity and community come together. Twitch Emotes stand out as a key feature, allowing for lively and interactive communication between streamers and viewers. These small, dynamic images go beyond mere symbols; they are the essence of Twitch’s unique language. For streamers, custom emotes are more than just fun graphics; they’re a way to engage with your audience, making your channel more inviting and personable. Whether you’re just starting out or looking to enhance your Twitch presence, this guide will walk you through adding your own custom emotes to your channel. Let’s begin our journey into the colorful and expressive realm of Twitch emotes, and see how they can add a new dimension to your streaming experience.
Understanding Twitch Emotes
Twitch Emotes are an integral part of the streaming platform, serving as a bridge between streamers and their audience. They are small graphics or images that viewers use in chat to express emotions, reactions, or just to have fun. These emotes range from simple smiley faces to more complex and customized images unique to each streamer’s channel. Understanding them is key to engaging effectively with your audience.
The Role of Emotes in Twitch Streaming
Emotes on Twitch are more than just fun graphics; they are a form of communication in the Twitch community. They allow viewers to express a range of emotions quickly and easily. For streamers, recognizing and responding to these emotes can greatly enhance interaction during a live stream. Emotes can signify everything from laughter and agreement to surprise and support.
- Bullet List Example:
- Kappa: Used for sarcasm or irony.
- PogChamp: Expresses excitement or hype.
- BibleThump: Shows sadness or empathy.
Types of Twitch Emotes: Global vs. Channel Specific
There are two main types of emotes on Twitch: Global and Channel Specific.
- Global Emotes: These are available to all Twitch users. They are standard across the platform and include emotes like ‘Kappa’, ‘LOL’, and ‘PJSalt’.
- Channel Specific Emotes: These are unique to each streamer’s channel. Streamers create or commission their own emotes, which become available to subscribers of their channel.
| Emote Type | Available To | Examples |
|---|---|---|
| Global Emotes | All Twitch users | Kappa, LOL |
| Channel Specific | Channel subscribers | Custom emotes by streamer |
Incorporating emotes into your channel not only enhances your stream’s interactivity but also strengthens your community. Your emotes can become a part of your brand, recognizable across the Twitch universe.
Understanding Twitch emotes is essential for both streamers and viewers to fully enjoy and participate in the Twitch experience. Whether it’s through global emotes or channel-specific ones, these small images play a big role in the culture of Twitch.
How to Become Eligible for Adding Twitch Emotes
Gaining the ability to add custom emotes to your Twitch channel is a milestone for any streamer. However, this feature isn’t available to everyone immediately. To unlock this capability, you need to become a Twitch Affiliate or Partner. This status is a badge of recognition from Twitch, showcasing your growing presence and commitment to your channel.
Becoming a Twitch Affiliate
The first step towards adding custom emotes is to become a Twitch Affiliate. The Affiliate Program is designed for streamers who are just starting to grow their audience. To qualify for this program, you need to meet specific criteria:
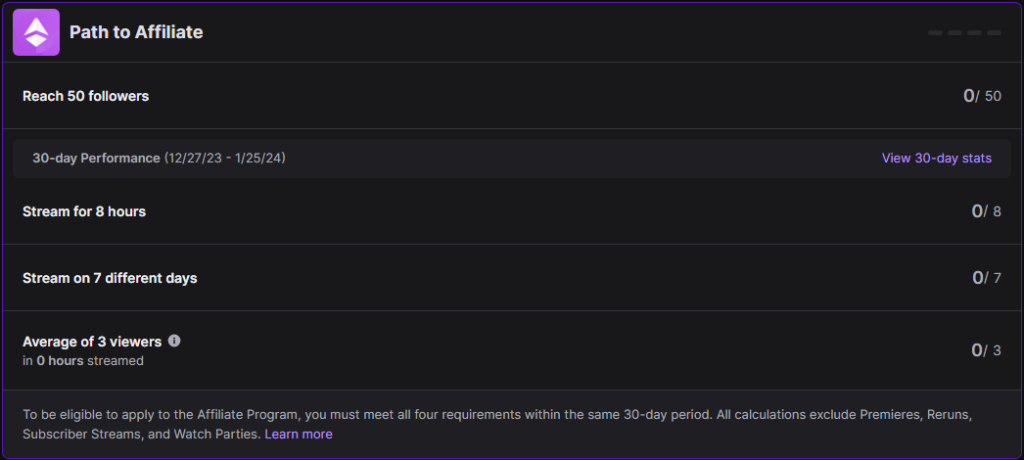
- Bullet List of Affiliate Requirements:
- Stream for 8 hours: This should be done over the last 30 days.
- Stream on 7 different days: Also within the last 30 days.
- Reach an average of 3 viewers per stream: This is calculated over the last 30 days.
- Grow your audience to 50 followers.
Once you meet these criteria, Twitch will typically extend an invitation to join the Affiliate Program. Accepting this invitation is your key to unlocking custom emote slots for your channel.
Advancing to Twitch Partner
The Twitch Partner Program is for streamers who have a larger, more established audience. The requirements are more stringent than the Affiliate Program, reflecting the higher level of commitment and audience engagement:
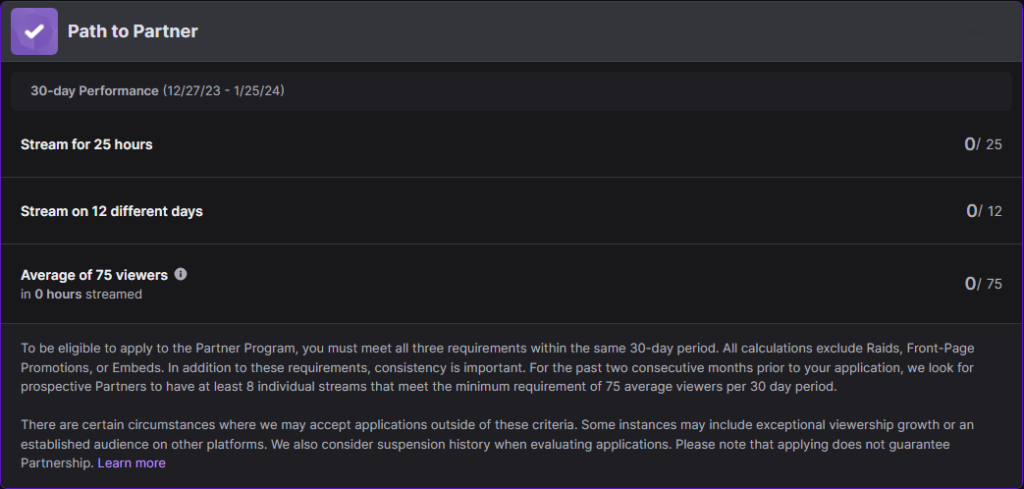
- Bullet List of Partner Requirements:
- Stream for 25 hours in the last 30 days.
- Stream on 12 different days in the last 30 days.
- Maintain an average of 75 viewers per stream.
Achieving Partner status not only allows you to add more custom emotes but also unlocks additional benefits and recognition on the platform.
The journey to becoming a Twitch Affiliate or Partner is an exciting one, filled with streaming, community building, and content creation. As you grow your channel and meet these milestones, the ability to add custom emotes becomes a rewarding way to further engage with and appreciate your audience.
Creating Your Custom Twitch Emotes
Once you’ve achieved Twitch Affiliate or Partner status, the next exciting step is creating your custom emotes. This is where you can showcase your personality and brand through unique, fun graphics that your viewers can use. Your emotes can range from funny and quirky to cool and trendy, depending on your channel’s vibe and your audience’s preferences.
Designing Your Emotes
Designing your emotes is a creative process where you can express the essence of your channel. Here are some tips to get you started:
- Reflect Your Brand: Your emotes should align with your channel’s theme and your personal brand.
- Simplicity is Key: Remember, emotes are small. Simple, clean designs work best.
- Be Unique: Try to come up with designs that stand out and are easily associated with your channel.
- Stay Appropriate: Ensure your emotes adhere to Twitch’s Community Guidelines.
If you’re not confident in your graphic design skills, consider hiring a professional designer. There are many artists who specialize in Twitch emotes and can bring your ideas to life.
Size and Format Requirements
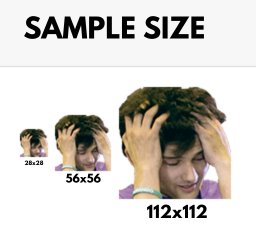
Twitch has specific requirements for the size and format of emotes:
- Size: Emotes should be uploaded in three sizes: 28×28, 56×56, and 112×112 pixels.
- Format: Emotes must be in PNG format with a transparent background.
- File Size: Each emote file size should not exceed 25KB.
While it might seem like a lot to consider, creating your emotes can be one of the most enjoyable parts of being a Twitch streamer. Your emotes are not just fun graphics; they are a way for your community to connect with you and each other. So let your creativity flow, and design emotes that both you and your viewers will love!
Uploading Custom Emotes to Your Twitch Channel
After creating your custom Twitch emotes, the next step is to upload them to your channel. This process allows your subscribers to start using these emotes in chat, further enhancing the interactive experience on your channel. Uploading emotes is a straightforward process but it’s important to do it correctly to ensure they are available for use without any issues.
Step-by-Step Guide to Uploading Emotes
Uploading your custom emotes to Twitch involves a few simple steps:
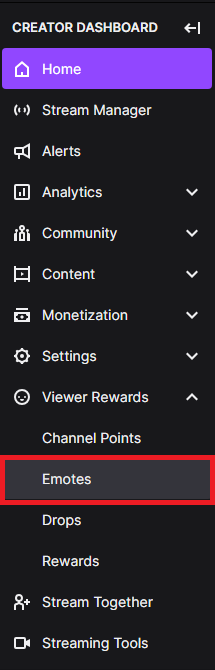
- Access Your Twitch Dashboard: Log into your Twitch account and navigate to the Creator Dashboard.
- Go to the Emote Section: Within the dashboard, find the section labeled ‘Viewer Rewards’, and then click on ‘Emotes’.
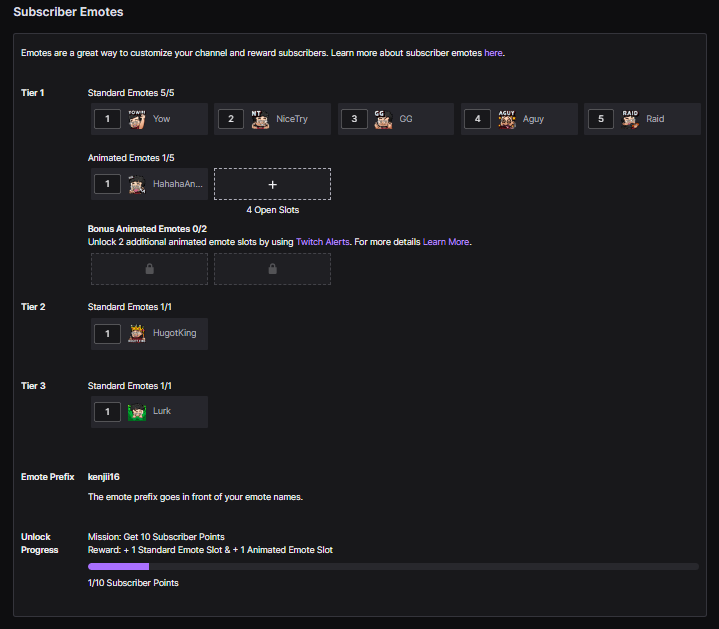
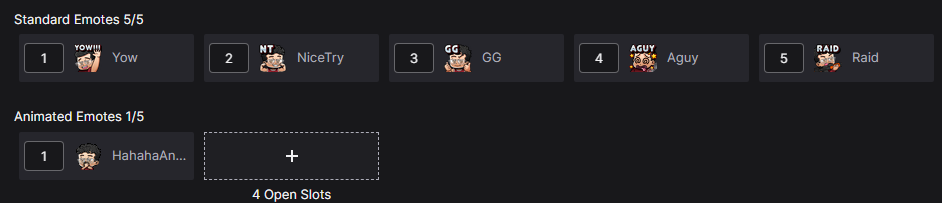
- Upload Your Emotes: You will see options to upload emotes for Tier 1, Tier 2, and Tier 3 subscribers. Select the tier you want to upload an emote for and click the upload button.
- Select and Upload Your Emote Images: Choose the appropriate image files (in PNG format) from your computer – remember you need to have three sizes for each emote (28×28, 56×56, and 112×112 pixels).
- Assign a Unique Code to Each Emote: This code is what users will type to use the emote in chat. It should be easy to remember and relevant to the emote image.
Once you have uploaded your emotes and assigned codes to them, they will be submitted for review by Twitch. This review process ensures that your emotes adhere to Twitch’s community standards and guidelines.
Approval and Usage of Emotes
After submitting your emotes, Twitch will review them. This process usually takes a few days, but it can vary:
- Approval Time: The review process typically takes up to 48 hours, but this can be longer during busy periods.
- Notification: You will receive a notification once your emotes have been approved.
- Emote Usage: After approval, your emotes will be available for your subscribers to use in any Twitch chat.
Remember, the emotes you create and upload represent your channel and help build your community. They are a fun way for viewers to interact with your stream and with each other, making your channel a more engaging and enjoyable place to be.
Managing Your Twitch Emotes
After successfully uploading your custom emotes to Twitch, managing them effectively is crucial. This involves keeping an eye on how they are being used, updating them, and even removing some if necessary. Proper management ensures that your emotes remain relevant, engaging, and aligned with your channel’s brand and community culture.
Updating and Removing Emotes
Your channel and community will evolve over time, and your emotes should reflect this growth. Here’s how you can keep your emotes fresh and relevant:
- Updating Emotes: If an emote isn’t popular or doesn’t fit your channel’s current theme, consider updating it. This could be as simple as tweaking the design or replacing it with a new emote that resonates more with your audience.
- Removing Emotes: Sometimes, an emote may no longer be appropriate or it might not be used often. In such cases, you can remove it to make room for new ones. To remove an emote, go to the ‘Emotes’ section in your Twitch Dashboard and simply delete the emote you no longer need.
Managing emotes is an ongoing process. Pay attention to how your viewers are using them. Are there emotes that are rarely used? Are there frequent requests for a particular type of emote? Keeping a pulse on these aspects can guide you in making effective updates.
Engaging Your Community with Emotes
Emotes are a powerful tool for community engagement. Here are some tips to maximize their impact:
- Encourage Emote Use: Regularly remind your viewers to use emotes. This can be done during your stream or through your channel’s chat.
- Get Feedback: Ask your community for feedback on emotes. This can be done through polls or direct questions during your stream.
- Special Occasions: Consider creating special emotes for events like holidays, channel anniversaries, or community milestones.
Effectively managing your Twitch emotes not only enhances viewer interaction but also contributes to a more vibrant and engaging streaming experience. Remember, your emotes are a reflection of your channel’s identity and a fun way for your community to express themselves.
Alternatives to Custom Twitch Emotes
While custom Twitch emotes are a fantastic way to personalize your channel, not every streamer has the ability to create them immediately. Fortunately, there are several alternatives that can be used to enhance the chat experience on your channel. These options are great for those still working towards Affiliate or Partner status, or for adding variety alongside your custom emotes.
Using Third-Party Emote Services
Several third-party services offer a wide range of emotes that can be integrated into your Twitch channel. These platforms provide a diverse selection of emotes, often created by talented artists, and can be a great addition to any stream:
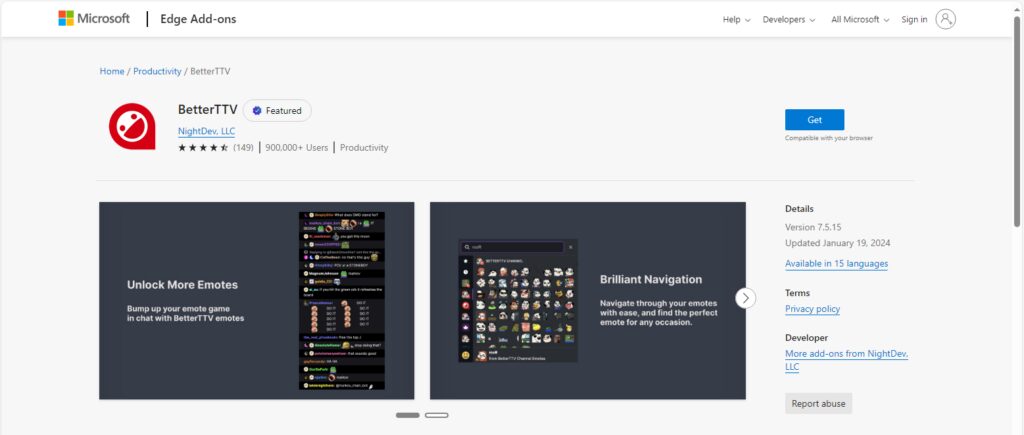
- BetterTTV (BTTV): A popular browser extension that provides additional emotes for Twitch chat. It’s widely used in the Twitch community and easy to set up.
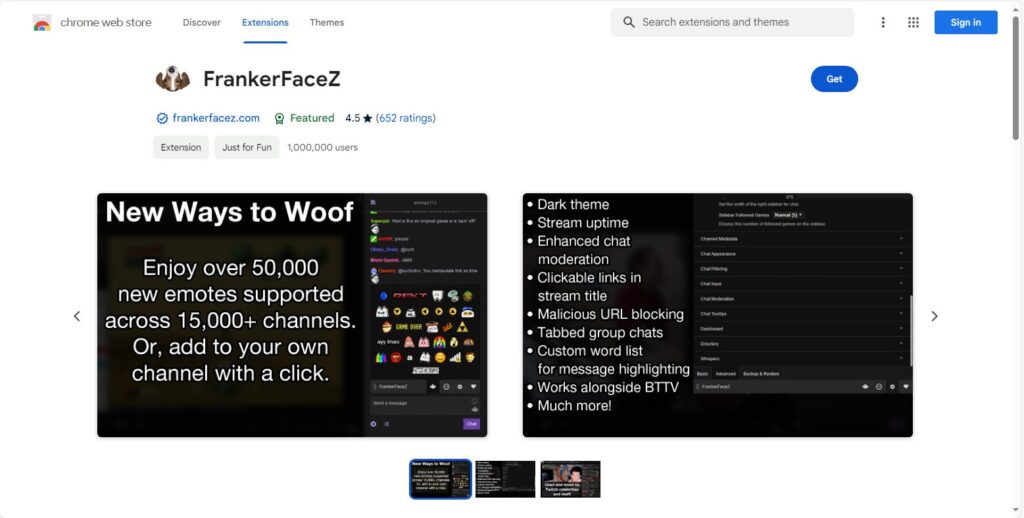
- FrankerFaceZ (FFZ): Another browser extension that offers custom emote options. It also includes chat enhancement features.
Using these services allows you to offer a broader range of emotes to your viewers, which can enhance engagement and enjoyment during your streams. It’s a simple way to add more personality to your channel without needing the status of Affiliate or Partner.
Global Twitch Emotes
In addition to third-party services, Twitch offers a variety of global emotes that any user on the platform can use. These include:
- Emotes like
Kappa,PogChamp, andBibleThump.
- Twitch Turbo emotes, available to Twitch Turbo subscribers.
These global emotes are recognized across the Twitch platform and can be used to express a wide range of emotions and reactions during streams.
Exploring alternatives to custom Twitch emotes can be a great way to enhance your channel’s chat experience. Whether it’s through third-party services or utilizing global emotes, these options provide a fun and interactive way to keep your audience engaged.
Conclusion
In the dynamic world of Twitch streaming, emotes play a crucial role in enriching the viewer experience and strengthening the streamer-community bond. From custom emotes that reflect a streamer’s unique personality to global and third-party emotes that add variety, these expressive icons are key in fostering engagement and a sense of belonging. Whether you’re starting fresh or looking to spice up your channel, emotes are an invaluable tool in your streaming journey. They not only enhance communication but also add a fun, visual element to interactions, making your Twitch channel a more vibrant and inviting place. As you continue to grow and evolve as a streamer, keep exploring the creative possibilities of emotes to connect with your audience and enhance your streaming experience. 🎮🌟
FAQs
In the world of Twitch streaming, many questions arise, especially when it comes to emotes. Here are some frequently asked questions to help you navigate your way through the exciting feature of Twitch emotes.
Twitch Affiliate: Initially, Affiliates can have up to 5 emotes across all subscriber tiers.
Twitch Partner: Partners start with up to 6 emotes for Tier 1 and can unlock more as their subscriber count increases.
Yes, you can update or change your emotes. Go to the Dashboard, select ‘Viewer Rewards’, then ‘Emotes’, and upload your new emotes.
Typically, it takes about 48 hours for Twitch to approve new emotes. However, it can sometimes take longer if there’s a high volume of submissions.
Yes, viewers need to install the BetterTTV or FrankerFaceZ browser extensions to see these emotes in your Twitch chat.
No, you cannot use copyrighted material in your emotes unless you have the legal right or permission to use it.
Understanding these aspects of Twitch emotes can enhance your streaming experience and help you create a more engaging channel for your viewers. Remember, emotes are a fun way to interact with your audience, so enjoy the process of creating and managing them! 🌟🎮