How to Optimize Your Mobile Experience with Advanced iOS Settings
In the ever-evolving world of technology, smartphones have become an extension of ourselves. Among the leaders in this domain, iOS devices stand out for their sleek design and advanced features. However, to truly harness the power of an iOS device, one needs to venture beyond the basic settings and explore the plethora of advanced options available. In this guide, we will walk you through “how to” optimize your mobile experience with advanced iOS settings, enhancing not only the functionality but also the security and efficiency of your device.
The Importance of Optimizing Your iOS Device
Before we delve into the specifics, let’s understand why optimizing your iOS device is essential. Firstly, it allows for a smoother, faster, and more responsive user experience. Secondly, it helps in preserving the battery life, thereby ensuring that your device can last throughout the day without needing a recharge. Lastly, with the increasing concerns about digital privacy, optimizing settings can provide an added layer of security, safeguarding your personal information from potential threats.
Benefits of Optimization:
- Enhanced Performance: Enjoy a faster and more responsive device.
- Increased Battery Life: Utilize settings that help in conserving battery life.
- Improved Security: Protect your personal information with enhanced privacy settings.
What are Advanced iOS Settings?
Advanced iOS settings refer to the customizable options that are slightly more complex than the basic settings but offer a greater degree of control over your device. These settings allow you to tweak various aspects of your device, including battery usage, privacy settings, Siri functionalities, and more. By understanding and utilizing these settings, you can tailor your iOS device to suit your preferences and needs perfectly.
Exploring Advanced Settings:
- Settings App: The hub for all customization, the settings app houses options for tweaking everything from display brightness to privacy settings.
- Control Center: A quick access panel that can be customized to include shortcuts to various settings and features.
- Siri & Search: This section allows you to customize Siri’s behavior and settings, making the virtual assistant more personalized and efficient.
Getting Started:
To begin optimizing your iOS device, head to the ‘Settings’ app, represented by a gear icon on your home screen. Here, you will find a plethora of options categorized under different headings. In the subsequent sections of this article, we will delve deep into each category, providing a step-by-step guide on “how to” optimize various settings for an enhanced mobile experience.
Maximizing Battery Life
Understanding Battery Usage on iOS
Before we delve into the tips, it’s crucial to understand how to monitor battery usage on your iOS device. The battery settings provide detailed information on the apps and services that are consuming the most power. Here’s how you can access this information:
Step 1: Open the ‘Settings’ app on your iOS device.
Step 2: Scroll down and tap on ‘Battery’.
Step 3: Here, you will find a breakdown of battery usage by app, along with other details such as battery health and last charge level.
Battery Usage Insights
| Feature | Description |
|---|---|
| Battery Health | Indicates the current health of your battery, helping you decide when it’s time for a replacement. |
| Last Charge Level | Shows the battery level during the last charging cycle, helping you monitor your charging habits. |
| Battery Usage by App | Provides a detailed breakdown of battery consumption by each app, allowing you to identify and manage power-hungry apps effectively. |
Tips to Extend Battery Life
Now that you have a grasp of battery usage insights, let’s move on to the tips that can help you extend your device’s battery life:
- Adjust Screen Brightness: Lowering the screen brightness can significantly save battery life. Learn “how to” adjust it manually or set it to auto-brightness in ‘Settings’ > ‘Display & Brightness’.
- Enable Low Power Mode: This mode temporarily reduces background activity and automatic downloads to save battery. You can activate it in ‘Settings’ > ‘Battery’ > ‘Low Power Mode’.
- Manage Background App Refresh: This feature allows apps to refresh their content when on Wi-Fi or cellular in the background. Managing this effectively can save battery life. Navigate to ‘Settings’ > ‘General’ > ‘Background App Refresh’ to customize.
- Reduce Motion and Animations: Reducing motion effects and animations can also save battery life. Find this option in ‘Settings’ > ‘Accessibility’ > ‘Motion’ > ‘Reduce Motion’.
How to Use Low Power Mode Effectively
Low Power Mode is a handy feature that helps conserve battery life when your device is running low on power. Here’s a step-by-step guide on how to use it effectively:
Step 1: Go to ‘Settings’ > ‘Battery’.
Step 2: Toggle on ‘Low Power Mode’. You will notice that the battery icon turns yellow, indicating that the mode is activated.
Step 3: While in this mode, consider reducing the use of power-intensive apps and features to conserve even more battery life.
Enhancing Privacy Settings
The Importance of Privacy in the Digital Age
Before we delve into the specifics, it’s essential to understand why privacy is a cornerstone of a secure digital experience. With the rise in cyber-attacks and data breaches, having control over your personal information can prevent potential misuse and protect your digital identity. Moreover, it fosters trust in the technology we use daily, knowing that our data is handled responsibly and securely.
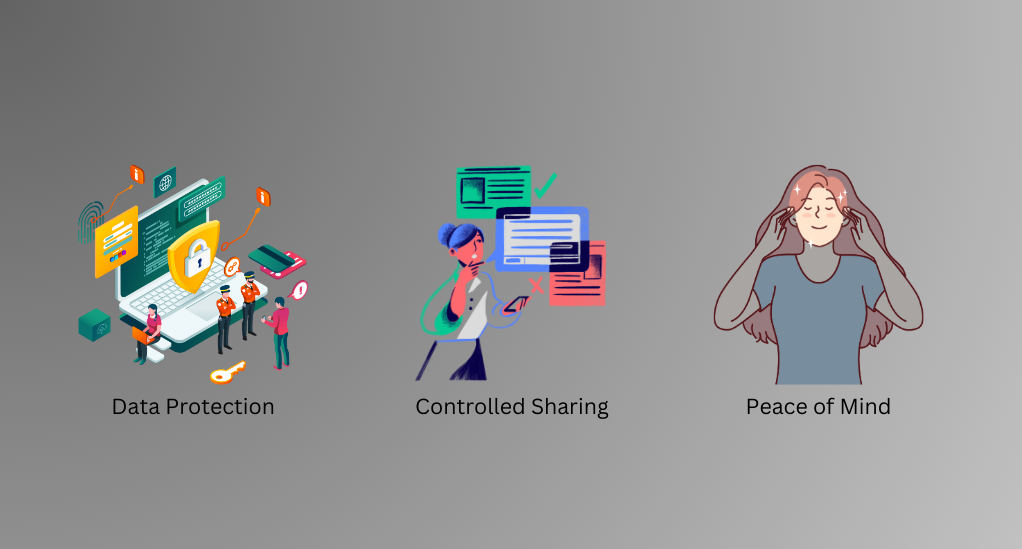
Key Benefits of Enhanced Privacy:

- Data Protection: Safeguard your personal information from unauthorized access and potential misuse.
- Controlled Sharing: Decide what information you want to share and with whom, giving you control over your digital footprint.
- Peace of Mind: Enjoy a secure mobile experience, knowing that your data is protected with advanced privacy settings.
How to Manage App Permissions
One of the critical aspects of enhancing privacy on iOS is managing app permissions effectively. Here’s a step-by-step guide to help you control the access apps have to your personal information:
Step 1: Open the ‘Settings’ app on your iOS device.
Step 2: Scroll down and tap on ‘Privacy’.
Step 3: Here, you will find a list of permissions such as Location Services, Contacts, Photos, etc. Tap on each to see which apps have access and adjust accordingly.
Setting Up Content and Privacy Restrictions
To further enhance your privacy, iOS allows you to set up content and privacy restrictions. This feature is particularly useful if you want to restrict certain content or features for children. Here’s how to set it up:
Step 1: Go to ‘Settings’ > ‘Screen Time’.
Step 2: Tap on ‘Content & Privacy Restrictions’.
Step 3: Here, you can set up various restrictions such as content ratings, web content filters, and privacy settings.
Utilizing Siri to Its Fullest Potential
Siri, Apple’s virtual assistant, has revolutionized the way we interact with our devices. From setting reminders to answering queries, Siri can do it all. However, to truly make the most of this feature, one needs to understand and customize Siri’s settings fully.
Introduction to Siri
Siri is more than just a voice-activated assistant; it’s a powerful tool that integrates with almost all aspects of your iOS device. It can help you streamline tasks, stay organized, and even entertain you with a joke or two. Here’s a brief overview of what Siri can do:
- Voice Commands: Execute a wide range of commands using voice, making multitasking easier and more efficient.
- Personalized Suggestions: Siri learns from your habits and offers personalized suggestions to enhance your iOS experience.
- HomeKit Integration: Control your smart home devices seamlessly with Siri’s integration with HomeKit.
- Language Translation: Siri can translate phrases and sentences into various languages, aiding in communication across language barriers.
How to Customize Siri’s Settings
To make Siri more personalized and efficient, you can customize its settings according to your preferences. Here’s a step-by-step guide to help you do so:
Step 1: Open the ‘Settings’ app on your iOS device.
Step 2: Scroll down and tap on ‘Siri & Search’.
Step 3: Here, you can customize various settings such as Siri’s voice, language, and suggestions.
Key Siri Settings and Customizations
| Setting | Customization Options |
|---|---|
| Listen for “Hey Siri” | Enable or disable voice activation for Siri |
| Press Side Button for Siri | Activate Siri by pressing the side button |
| Language | Choose the language Siri uses to communicate |
| Siri Voice | Select the voice and accent for Siri |
| Siri Responses | Customize how Siri responds to your commands |
Useful Siri Commands and Shortcuts
To truly utilize Siri to its fullest potential, it’s essential to know the various commands and shortcuts that can make your life easier. Here are some useful Siri commands and how to create shortcuts for a more streamlined experience:
- Creating Reminders and Lists: “Hey Siri, remind me to call John at 5 PM” or “Hey Siri, add milk to my shopping list”.
- Setting Alarms and Timers: “Hey Siri, set an alarm for 6 AM” or “Hey Siri, set a timer for 15 minutes”.
- Sending Messages and Making Calls: “Hey Siri, text Mary ‘Happy Birthday'” or “Hey Siri, call Mom”.
- Getting Directions: “Hey Siri, give me directions to the nearest gas station” or “Hey Siri, what’s the traffic like to work?”.
Creating Siri Shortcuts
Siri Shortcuts allow you to create personalized commands for a series of actions. To create a shortcut:
Step 1: Open the ‘Shortcuts’ app on your iOS device.
Step 2: Tap on the ‘+’ icon to create a new shortcut.
Step 3: Add actions from the list and create a personalized command for Siri to execute those actions.
Optimizing Storage Space

As we use our iOS devices for a myriad of tasks, from capturing high-resolution photos to downloading numerous apps, managing storage space becomes a vital aspect.
Understanding Storage Management on iOS
Before we delve into the tips, it’s essential to understand how to monitor and manage storage on your iOS device. The storage settings provide a detailed breakdown of the space occupied by various apps and files. Here’s how you can access this information:
Step 1: Open the ‘Settings’ app on your iOS device.
Step 2: Scroll down and tap on ‘General’.
Step 3: Tap on ‘iPhone Storage’ or ‘iPad Storage’ to view a breakdown of the storage usage.
Tips for Freeing Up Space
Now that you have an understanding of storage management, let’s explore the various tips that can help you free up space on your device:
- Delete Unused Apps: Regularly review and delete apps that you no longer use. You can do this by tapping on the app in the storage settings and selecting ‘Delete App’.
- Offload Unused Apps: This feature automatically removes unused apps but keeps their documents and data. You can enable it in ‘Settings’ > ‘General’ > ‘iPhone Storage’ > ‘Enable Offload Unused Apps’.
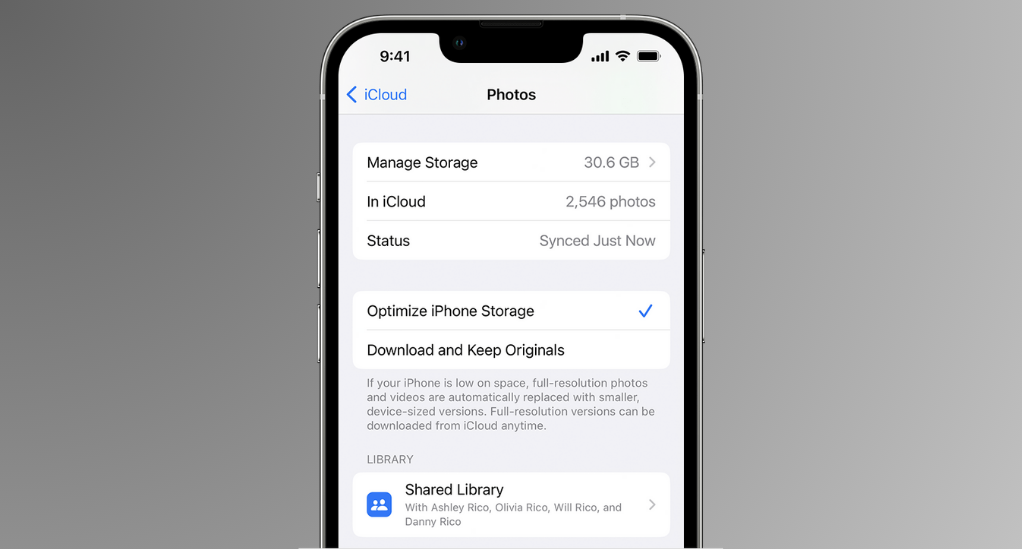
- Manage Media Files: Consider transferring old photos and videos to iCloud or an external storage device to free up space.
- Clear Browser Cache: Regularly clear the cache of your web browser to free up space. You can do this in ‘Settings’ > ‘Safari’ > ‘Clear History and Website Data’.
How to Use iCloud for Additional Storage
iCloud offers a seamless way to expand your storage space without cluttering your device. Here’s a guide on how to use iCloud effectively:
Step 1: Go to ‘Settings’ > [your name] > ‘iCloud’.
Step 2: Here, you can manage your iCloud storage, view the space used, and buy more storage if needed.
Step 3: Enable ‘iCloud Photos’ to store your photos and videos in iCloud, freeing up space on your device.
Personalizing Your Display and Sound Settings
How to Customize Display Settings
The display settings on your iOS device offer a range of options to customize the visual aspects according to your preference. Here’s a step-by-step guide to help you personalize your display settings:
Step 1: Open the ‘Settings’ app on your iOS device.
Step 2: Scroll down and tap on ‘Display & Brightness’.
Step 3: Here, you can adjust various settings such as brightness, text size, and view options.
Key Display Settings and Customizations
| Setting | Customization Options |
|---|---|
| Brightness | Adjust the screen brightness to suit your preference or enable auto-brightness. |
| Text Size | Customize the text size for better readability. |
| View Options | Choose between standard and zoomed view to alter the display scale. |
| Wallpaper | Set a personalized wallpaper for your home and lock screen. |
| Auto-Lock | Set the duration after which the screen automatically locks to conserve battery life. |
Adjusting Sound Settings for a Better Experience
Sound settings are equally important in enhancing your mobile experience. Here’s how you can adjust the sound settings to suit your preferences:
Step 1: Open the ‘Settings’ app on your iOS device.
Step 2: Scroll down and tap on ‘Sounds & Haptics’ (or ‘Sounds’ on older devices).
Step 3: Here, you can customize various sound settings such as ringtone, text tone, and volume levels.
Creating a Balanced User Experience
To create a balanced user experience, it’s essential to find the right combination of display and sound settings that suit your style. Here are some tips to achieve a harmonious balance:
- Theme Selection: Choose a theme that is visually appealing and aligns with your personal style. iOS offers both light and dark modes to choose from.
- Notification Management: Customize notification sounds and styles to avoid disturbances and maintain a pleasant user experience.
- Accessibility Features: Explore the accessibility settings to find options that can further enhance your user experience, such as larger text and increased contrast.
Advanced Connectivity Features
How to Manage Cellular Data and Wi-Fi Settings

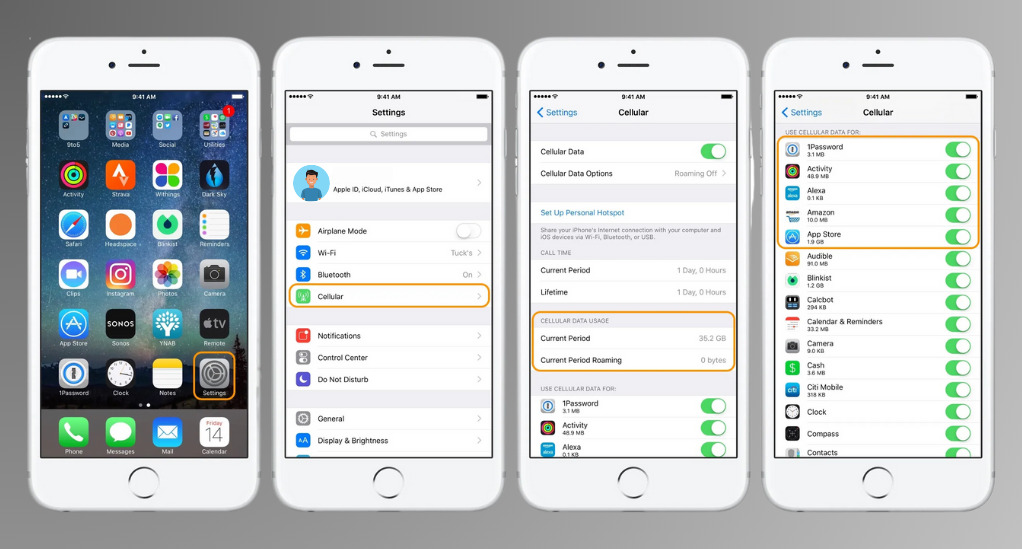
Managing your cellular data and Wi-Fi settings effectively can help you maintain a stable internet connection while also conserving data usage. Here’s a step-by-step guide to help you manage these settings:
Step 1: Open the ‘Settings’ app on your iOS device.
Step 2: Tap on ‘Cellular’ or ‘Mobile Data’ to manage your cellular data settings. Here, you can view data usage and toggle data access for individual apps.
Step 3: Go back and tap on ‘Wi-Fi’ to manage your Wi-Fi connections. Here, you can connect to networks and set up VPNs if necessary.
Setting Up VPNs for Secure Connections
Virtual Private Networks (VPNs) offer a secure way to connect to the internet, protecting your data from potential eavesdropping and unauthorized access. Here’s how to set up a VPN on your iOS device:
Step 1: Open the ‘Settings’ app on your iOS device.
Step 2: Tap on ‘General’ and then tap on ‘VPN’.
Step 3: Here, you can add a VPN configuration by providing the necessary details from your VPN provider.
Comparison Table: Regular Connection vs VPN Connection
| Feature | Regular Connection | VPN Connection |
|---|---|---|
| Security | Basic encryption | Enhanced encryption with secure tunnels |
| Privacy | Internet Service Provider (ISP) can track browsing history | ISP cannot track browsing history |
| Access | Restricted access to geographically blocked content | Unrestricted access to geographically blocked content |
Tips for a Seamless Connectivity Experience
To ensure a seamless connectivity experience, consider the following tips:
- Network Selection: Always choose secure and reliable networks to connect to, avoiding public Wi-Fi networks that are not secure.
- Data Management: Keep an eye on your data usage to avoid exceeding your data plan limits. Consider setting data warnings and limits in the cellular settings.
- Software Updates: Regularly update your device’s software to ensure compatibility with the latest network technologies and security protocols.
Conclusion
In this guide, we’ve explored advanced iOS settings to enhance your mobile experience. From extending battery life to optimizing privacy, utilizing Siri, managing storage, personalizing display and sound settings, and handling connectivity, you’ve gained valuable insights.
We encourage you to explore these settings to tailor your device to your needs. Continuously adapt to the ever-changing tech world, making the most of your iOS device for a seamless and enjoyable experience.


Leave a Reply